Have you been noticing a bad motor mount sound? Well, search no more. In this article, we’ll delve into the 12 symptoms, causes, and fixes for a bad motor mount sound to help you identify and resolve this common vehicle issue.
So, what can you expect from understanding a bad motor mount sound? A bad motor mount sound often manifests as clunking noises, excessive vibrations, and engine movement. Identifying these symptoms can help you address issues such as loose mounts, worn-out components, and deteriorated materials, ensuring your vehicle runs smoothly and safely.
Reading this article will equip you with the knowledge to diagnose and fix bad motor mount sounds, enhancing your vehicle’s performance and longevity.
Table of Contents
What Is A Motor Mount?
Essential Takeaway
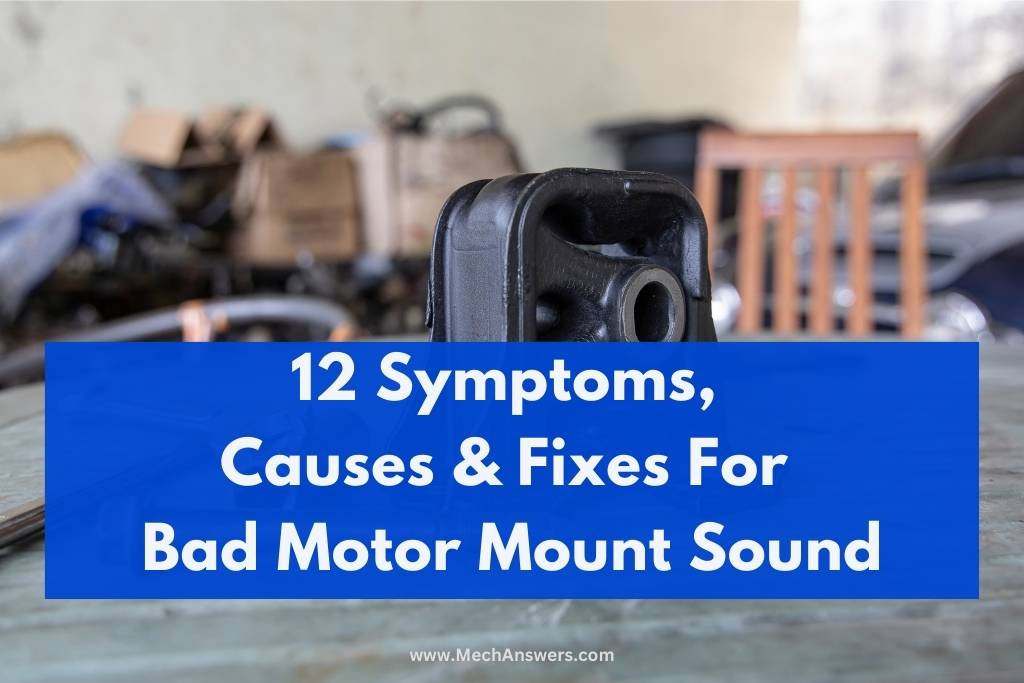
A motor mount secures the engine to the vehicle’s chassis and absorbs vibrations and shocks. Different types of motor mounts include rubber, hydraulic, and electronic mounts, each designed for specific performance needs.
Overview
In this section, we’ll explore the definition and function of a motor mount, followed by a detailed look at the different types of motor mounts. Understanding these basics will help you diagnose and address issues related to bad motor mount sounds. The following points will be covered:
- Definition and function of a motor mount
- Types of motor mounts
Definition And Function Of A Motor Mount
A motor mount, also known as an engine mount, is a crucial component in a vehicle that secures the engine to the chassis. The primary function of a motor mount is to hold the engine in place and absorb vibrations and shocks that occur during vehicle operation. This ensures that the engine remains stable and reduces the amount of vibration transmitted to the vehicle’s cabin, enhancing overall driving comfort.
Motor mounts are designed to:
- Secure the engine: Preventing it from moving or shifting during operation.
- Absorb vibrations: Minimizing the transfer of engine vibrations to the vehicle chassis and cabin.
- Dampen shocks: Reducing the impact of road bumps and engine torque.
Key Point: Motor mounts secure the engine and absorb vibrations and shocks, ensuring stability and comfort.
Types Of Motor Mounts
There are several types of motor mounts, each designed to meet specific performance and comfort needs. The most common types include rubber, hydraulic, and electronic motor mounts.
Rubber Motor Mounts
Rubber motor mounts are the most basic and commonly used type. They consist of a rubber block sandwiched between two metal plates. The rubber component provides flexibility and absorbs vibrations, while the metal plates secure the engine to the chassis.
- Advantages: Cost-effective, simple design, and effective at reducing basic vibrations.
- Disadvantages: Limited damping capabilities for more intense vibrations and shocks.
Key Point: Rubber motor mounts are cost-effective and absorb basic vibrations but have limited damping capabilities for intense shocks.
Hydraulic Motor Mounts
Hydraulic motor mounts contain a hollow rubber casing filled with hydraulic fluid. These mounts are designed to provide better vibration damping by utilizing the fluid’s properties to absorb and dissipate energy.
- Advantages: Superior vibration and shock absorption, better performance in reducing cabin noise.
- Disadvantages: More expensive than rubber mounts, can leak hydraulic fluid over time.
Key Point: Hydraulic motor mounts offer superior vibration damping but are more expensive and can leak over time.
Electronic Motor Mounts
Electronic motor mounts (also known as active motor mounts) use electronic controls to adjust the damping characteristics in real time. These mounts can change their stiffness and damping properties based on driving conditions, providing the best possible comfort and performance.
- Advantages: Adaptable to different driving conditions, excellent vibration control, and improved ride comfort.
- Disadvantages: High cost, complex design, and potential for electronic malfunctions.
Key Point: Electronic motor mounts provide adaptable damping and excellent vibration control but are expensive and complex.
Summary
Different types of motor mounts include rubber, hydraulic, and electronic mounts, each designed for specific performance needs.
A motor mount secures the engine to the vehicle’s chassis and absorbs vibrations and shocks.
Bad Motor Mount Sound Symptom 1: Clunking Noises
Clunking noises in your vehicle often indicate a loose or broken motor mount. Replacing the motor mount is the most effective solution to resolve this issue.
Overview
In this section, we will discuss clunking noises as a symptom of a bad motor mount sound, the causes behind this symptom, and how to fix it. Understanding these aspects will help you diagnose and address the problem effectively. The following points will be covered:
- Symptom: Clunking noises
- Cause: Loose or broken motor mount
- Fix: Replace the motor mount
Symptom: Clunking Noises
Clunking noises are often one of the first indicators of a bad motor mount sound. These noises can occur when starting the engine, accelerating, or driving over bumps. The sound resembles a heavy knock or thud, which can be quite alarming and should not be ignored.
Key Point: Clunking noises indicate a loose or broken motor mount.
Cause: Loose Or Broken Motor Mount
A loose or broken motor mount is the primary cause of clunking noises. Motor mounts are designed to secure the engine in place and absorb vibrations and shocks. When a motor mount becomes loose or breaks, the engine can move more freely, causing it to knock against other parts of the vehicle.
- Loose Mounts: Over time, the bolts and fasteners that secure the motor mount can become loose due to vibrations and engine movement.
- Broken Mounts: Wear and tear, corrosion, or manufacturing defects can cause the motor mount to crack or break, leading to clunking noises.
Key Point: A loose or broken motor mount allows the engine to move, causing it to knock against other vehicle parts.
Fix: Replace The Motor Mount
To fix clunking noises caused by a bad motor mount, follow these steps to replace the motor mount:
Safety First
Ensure the vehicle is on a flat, stable surface. Use wheel chocks to prevent the vehicle from moving. Wear appropriate safety gear, including gloves and eye protection.
Tools And Materials Needed
- New motor mount
- Jack and Jack stands
- Socket set and wrenches
- Pry bar
- Torque wrench
Step-by-Step Replacement Process
Lift the Vehicle: Use a jack to lift the front of the vehicle and secure it with jack stands. Ensure the vehicle is stable before working underneath it.
Locate the Motor Mount: Identify the motor mount that needs replacement. Refer to the vehicle’s manual for the exact location.
Support the Engine: Place a jack under the engine, using a wooden block to protect the oil pan. Gently lift the engine to relieve pressure on the motor mount.
Remove the Old Mount: Use a socket set and wrenches to remove the bolts securing the motor mount. Carefully take out the old motor mount.
Install the New Mount: Position the new motor mount in place and secure it with bolts. Tighten the bolts to the manufacturer’s specifications using a torque wrench.
Lower the Engine: Slowly lower the engine back into place, ensuring the new motor mount is properly aligned.
Test the Installation: Start the engine and check for any clunking noises. Test drive the vehicle to ensure the issue is resolved.
Key Point: Replacing the motor mount resolves clunking noises and ensures the engine is securely mounted.
Summary
Replacing the motor mount is the most effective solution to eliminate clunking noises and ensure engine stability.
Clunking noises in your vehicle often indicate a loose or broken motor mount.
The primary cause is a motor mount that has become loose or broken, allowing the engine to move freely.
Bad Motor Mount Sound Symptom 2: Excessive Vibrations
Excessive vibrations in your vehicle often indicate a deteriorated motor mount, which can be resolved by inspecting and replacing damaged mounts.
Overview
In this section, we will discuss excessive vibrations as a symptom of a bad motor mount sound, the causes behind this symptom, and how to fix it. Understanding these aspects will help you diagnose and address the problem effectively. The following points will be covered:
- Symptom: Excessive vibrations
- Cause: Deteriorated motor mount
- Fix: Inspect and replace damaged mounts
Symptom: Excessive Vibrations
Excessive vibrations can be a clear sign of a bad motor mount sound. These vibrations are usually felt throughout the vehicle, particularly in the steering wheel, seats, and floorboards. They can make driving uncomfortable and indicate underlying issues that need to be addressed promptly.
Key Point: Excessive vibrations suggest deteriorated motor mounts.
Cause: Deteriorated Motor Mount
A deteriorated motor mount is the primary cause of excessive vibrations. Motor mounts are designed to absorb and dampen engine vibrations, but over time, they can wear out and lose their effectiveness. This deterioration can be due to aging, exposure to engine heat, or damage from impacts.
- Aging: Rubber components in motor mounts can harden and crack over time, reducing their ability to absorb vibrations.
- Heat Exposure: Constant exposure to engine heat can cause the rubber to degrade faster.
- Damage: Physical impacts from rough driving conditions or accidents can break or weaken motor mounts.
Key Point: Deteriorated motor mounts lose their ability to absorb vibrations, causing excessive vibrations in the vehicle.
Fix: Inspect And Replace Damaged Mounts
To fix excessive vibrations caused by a bad motor mount, follow these steps to inspect and replace the damaged mounts:
Safety First
Ensure the vehicle is on a flat, stable surface. Use wheel chocks to prevent the vehicle from moving. Wear appropriate safety gear, including gloves and eye protection.
Tools And Materials Needed
- New motor mount
- Jack and jack stands
- Socket set and wrenches
- Pry bar
- Torque wrench
Step-by-Step Inspection And Replacement Process
Lift the Vehicle: Use a jack to lift the front of the vehicle and secure it with jack stands. Ensure the vehicle is stable before working underneath it.
Locate the Motor Mount: Identify the motor mount that needs inspection. Refer to the vehicle’s manual for the exact location.
Inspect the Motor Mount: Check for visible signs of wear, such as cracks, tears, or separation in the rubber components. Look for any signs of hydraulic fluid leaks if the mount is hydraulic.
Support the Engine: Place a jack under the engine, using a wooden block to protect the oil pan. Gently lift the engine to relieve pressure on the motor mount.
Remove the Old Mount: Use a socket set and wrenches to remove the bolts securing the motor mount. Carefully take out the old motor mount.
Install the New Mount: Position the new motor mount in place and secure it with bolts. Tighten the bolts to the manufacturer’s specifications using a torque wrench.
Lower the Engine: Slowly lower the engine back into place, ensuring the new motor mount is properly aligned.
Test the Installation: Start the engine and check for any excessive vibrations. Test drive the vehicle to ensure the issue is resolved.
Key Point: Inspecting and replacing deteriorated motor mounts can resolve excessive vibrations and improve driving comfort.
Summary
Inspecting and replacing the motor mount is the most effective solution to eliminate excessive vibrations and ensure driving comfort.
Excessive vibrations in your vehicle often indicate a deteriorated motor mount.
The primary cause is a motor mount that has worn out or damaged, losing its ability to absorb vibrations.
Bad Motor Mount Sound Symptom 3: Engine Movement
Engine movement is a clear sign of a bad motor mount sound, often caused by worn-out mounts. Replacing the motor mounts is crucial to stabilize the engine and eliminate the issue.
Overview
In this section, we will discuss engine movement as a symptom of a bad motor mount sound, the causes behind this symptom, and how to fix it. Understanding these aspects will help you diagnose and address the problem effectively. The following points will be covered:
- Symptom: Engine movement
- Cause: Worn-out motor mounts
- Fix: Replace the motor mounts
Symptom: Engine Movement
Engine movement refers to the noticeable shifting or swaying of the engine within the engine bay. This can be observed when the vehicle is idling, accelerating, or coming to a stop. It can cause significant performance issues and lead to further damage if not addressed.
Key Point: Engine movement is a sign of worn-out motor mounts that allow the engine to shift or sway.
Cause: Worn-Out Motor Mounts
Worn-out motor mounts are the primary cause of engine movement. Motor mounts are designed to secure the engine firmly in place and absorb vibrations. Over time, these mounts can degrade, leading to reduced effectiveness and allowing the engine to move excessively.
- Aging and Wear: Motor mounts can wear out due to prolonged use and exposure to engine vibrations.
- Material Fatigue: The rubber or hydraulic components can degrade, causing the mounts to lose their elasticity and strength.
- Physical Damage: Impacts from rough driving conditions or accidents can break or weaken the motor mounts.
Key Point: Worn-out motor mounts lose their ability to secure the engine, resulting in excessive engine movement.
Fix: Replace The Motor Mounts
To fix engine movement caused by worn-out motor mounts, follow these steps to replace the motor mounts:
Safety First
Ensure the vehicle is on a flat, stable surface. Use wheel chocks to prevent the vehicle from moving. Wear appropriate safety gear, including gloves and eye protection.
Tools And Materials Needed
- New motor mounts
- Jack and Jack stands
- Socket set and wrenches
- Pry bar
- Torque wrench
Step-by-Step Replacement Process
Lift the Vehicle: Use a jack to lift the front of the vehicle and secure it with jack stands. Ensure the vehicle is stable before working underneath it.
Locate the Motor Mounts: Identify the motor mounts that need replacement. Refer to the vehicle’s manual for the exact location.
Support the Engine: Place a jack under the engine, using a wooden block to protect the oil pan. Gently lift the engine to relieve pressure on the motor mounts.
Remove the Old Mounts: Use a socket set and wrenches to remove the bolts securing the motor mounts. Carefully take out the old motor mounts.
Install the New Mounts: Position the new motor mounts in place and secure them with bolts. Tighten the bolts to the manufacturer’s specifications using a torque wrench.
Lower the Engine: Slowly lower the engine back into place, ensuring the new motor mounts are properly aligned.
Test the Installation: Start the engine and check for any engine movement. Test drive the vehicle to ensure the issue is resolved.
Key Point: Replacing worn-out motor mounts stabilizes the engine and eliminates excessive movement.
Summary
Replacing the motor mounts is the most effective solution to eliminate engine movement and ensure engine stability.
Engine movement is a sign of worn-out motor mounts that allow the engine to shift or sway.
The primary cause is motor mounts that have degraded or been damaged, losing their ability to secure the engine.
Bad Motor Mount Sound Symptom 4: Misaligned Engine
Essential Takeaway
A misaligned engine often indicates a bad motor mount sound caused by a failed motor mount. Realigning the engine and replacing the mount are essential to resolve this issue.
Overview
In this section, we will discuss engine misalignment as a symptom of a bad motor mount sound, the causes behind this symptom, and how to fix it. Understanding these aspects will help you diagnose and address the problem effectively. The following points will be covered:
- Symptom: Misaligned engine
- Cause: Failed motor mount
- Fix: Realign and replace the motor mount
Symptom: Misaligned Engine
A misaligned engine refers to the engine not being properly positioned within the engine bay. This misalignment can cause various performance issues, including vibrations, noises, and uneven wear on engine components. It can also lead to increased strain on other motor mounts and parts of the vehicle.
Key Point: A misaligned engine can cause performance issues and increased wear on engine components.
Cause: Failed Motor Mount
A failed motor mount is the primary cause of engine misalignment. Motor mounts are designed to keep the engine in a fixed position and absorb vibrations. When a motor mount fails, it can no longer support the engine properly, leading to misalignment.
- Wear and Tear: Over time, motor mounts can wear out due to continuous exposure to engine vibrations and stresses.
- Physical Damage: Impacts from accidents or rough driving conditions can break or weaken motor mounts.
- Material Degradation: Rubber or hydraulic components can degrade over time, reducing the mount’s effectiveness.
Key Point: A failed motor mount loses its ability to support the engine, leading to misalignment.
Fix: Realign And Replace The Motor Mount
To fix a misaligned engine caused by a failed motor mount, follow these steps to realign the engine and replace the motor mount:
Safety First
Ensure the vehicle is on a flat, stable surface. Use wheel chocks to prevent the vehicle from moving. Wear appropriate safety gear, including gloves and eye protection.
Tools And Materials Needed
- New motor mount
- Jack and jack stands
- Socket set and wrenches
- Pry bar
- Torque wrench
Step-by-Step Realignment And Replacement Process
Lift the Vehicle: Use a jack to lift the front of the vehicle and secure it with jack stands. Ensure the vehicle is stable before working underneath it.
Locate the Motor Mount: Identify the motor mount that needs replacement. Refer to the vehicle’s manual for the exact location.
Support the Engine: Place a jack under the engine, using a wooden block to protect the oil pan. Gently lift the engine to relieve pressure on the motor mount.
Remove the Old Mount: Use a socket set and wrenches to remove the bolts securing the motor mount. Carefully take out the old motor mount.
Realign the Engine: Ensure the engine is properly aligned within the engine bay. Adjust the engine position as necessary while the mount is removed.
Install the New Mount: Position the new motor mount in place and secure it with bolts. Tighten the bolts to the manufacturer’s specifications using a torque wrench.
Lower the Engine: Slowly lower the engine back into place, ensuring the new motor mount is properly aligned.
Test the Installation: Start the engine and check for any misalignment issues. Test drive the vehicle to ensure the engine is properly aligned and the issue is resolved.
Key Point: Realigning the engine and replacing the motor mount ensures proper engine positioning and eliminates misalignment issues.
Summary
Realigning the engine and replacing the motor mount is the most effective solution to ensure proper engine positioning and eliminate misalignment issues.
A misaligned engine can cause performance issues and increased wear on engine components.
The primary cause is a failed motor mount that can no longer support the engine properly.
Bad Motor Mount Sound Symptom 6: Engine Jumps At Idle
Engine jumps at idle are often caused by a damaged motor mount, which can be resolved by replacing the motor mount.
Overview
In this section, we will discuss engine jumps at idle as a symptom of a bad motor mount sound, the causes behind this symptom, and how to fix it. Understanding these aspects will help you diagnose and address the problem effectively. The following points will be covered:
- Symptom: Engine jumps at idle
- Cause: Damaged motor mount
- Fix: Replace the motor mount
Symptom: Engine Jumps At Idle
Engine jumps at idle occur when the engine exhibits sudden, noticeable movements while the vehicle is idling. This can cause the entire vehicle to shake or lurch unexpectedly, making idling uncomfortable and potentially leading to further engine issues.
Key Point: Engine jumps at idle indicate a problem with motor mount stability.
Cause: Damaged Motor Mount
A damaged motor mount is the primary cause of engine jumps at idle. Motor mounts are designed to hold the engine securely in place and absorb vibrations. When a motor mount is damaged, it cannot effectively perform these functions, leading to sudden engine movements.
- Physical Damage: Impacts from accidents or rough driving conditions can break or weaken motor mounts.
- Wear and Tear: Continuous exposure to engine vibrations and stresses can cause motor mounts to degrade over time.
Key Point: A damaged motor mount fails to stabilize the engine, causing it to jump at idle.
Fix: Replace The Motor Mount
To fix engine jumps at idle caused by a damaged motor mount, follow these steps to replace the motor mount:
Safety First
Ensure the vehicle is on a flat, stable surface. Use wheel chocks to prevent the vehicle from moving. Wear appropriate safety gear, including gloves and eye protection.
Tools And Materials Needed
- New motor mount
- Jack and Jack stands
- Socket set and wrenches
- Pry bar
- Torque wrench
Step-by-Step Replacement Process
Lift the Vehicle: Use a jack to lift the front of the vehicle and secure it with jack stands. Ensure the vehicle is stable before working underneath it.
Locate the Motor Mount: Identify the motor mount that needs replacement. Refer to the vehicle’s manual for the exact location.
Support the Engine: Place a jack under the engine, using a wooden block to protect the oil pan. Gently lift the engine to relieve pressure on the motor mount.
Remove the Old Mount: Use a socket set and wrenches to remove the bolts securing the motor mount. Carefully take out the old motor mount.
Install the New Mount: Position the new motor mount in place and secure it with bolts. Tighten the bolts to the manufacturer’s specifications using a torque wrench.
Lower the Engine: Slowly lower the engine back into place, ensuring the new motor mount is properly aligned.
Test the Installation: Start the engine and check for any engine jumps at idle. Test drive the vehicle to ensure the issue is resolved.
Key Point: Replacing the motor mount resolves engine jumps at idle and ensures engine stability.
Summary
Replacing the motor mount is the most effective solution to eliminate engine jumps at idle and ensure engine stability.
Engine jumps at idle are a sign of a damaged motor mount.
The primary cause is a motor mount that has been physically damaged or degraded over time.
Bad Motor Mount Sound Symptom 7: Banging Noises On Acceleration
Banging noises on acceleration often indicate a loose motor mount, which can be resolved by tightening or replacing the mount.
Overview
In this section, we will discuss banging noises on acceleration as a symptom of a bad motor mount sound, the causes behind this symptom, and how to fix it. Understanding these aspects will help you diagnose and address the problem effectively. The following points will be covered:
- Symptom: Banging noises on acceleration
- Cause: Loose motor mount
- Fix: Tighten or replace the motor mount
Symptom: Banging Noises On Acceleration
Banging noises on acceleration can be alarming and are a common indicator of motor mount issues. These noises typically occur when the engine shifts suddenly during acceleration, causing it to hit against other components. The banging sound is a clear sign that the engine is not securely fastened.
Key Point: Banging noises on acceleration indicate that the engine is shifting excessively due to a loose motor mount.
Cause: Loose Motor Mount
A loose motor mount is the primary cause of banging noises on acceleration. Motor mounts are designed to secure the engine in place and absorb vibrations. When a motor mount becomes loose, it cannot hold the engine firmly, leading to excessive movement and noise.
- Vibration Loosening: Continuous engine vibrations can loosen bolts and fasteners over time.
- Improper Installation: Motor mounts not installed or tightened properly can become loose quickly.
- Wear and Tear: Over time, motor mounts can degrade, causing bolts to lose their grip.
Key Point: A loose motor mount allows the engine to shift excessively, causing banging noises on acceleration.
Fix: Tighten Or Replace The Motor Mount
To fix banging noises on acceleration caused by a loose motor mount, follow these steps to tighten or replace the motor mount:
Safety First
Ensure the vehicle is on a flat, stable surface. Use wheel chocks to prevent the vehicle from moving. Wear appropriate safety gear, including gloves and eye protection.
Tools And Materials Needed
- New motor mount (if replacement is needed)
- Jack and Jack stands
- Socket set and wrenches
- Pry bar
- Torque wrench
Step-by-Step Tightening And Replacement Process
Lift the Vehicle: Use a jack to lift the front of the vehicle and secure it with jack stands. Ensure the vehicle is stable before working underneath it.
Locate the Motor Mount: Identify the motor mount that needs tightening or replacement. Refer to the vehicle’s manual for the exact location.
Support the Engine: Place a jack under the engine, using a wooden block to protect the oil pan. Gently lift the engine to relieve pressure on the motor mount.
Tighten the Bolts: Use a socket set and wrenches to check the bolts securing the motor mount. Tighten any loose bolts to the manufacturer’s specifications using a torque wrench.
Inspect the Mount: If the motor mount is damaged or worn, it needs to be replaced. Remove the old mount by taking out the bolts and carefully extracting the mount.
Install the New Mount: Position the new motor mount in place and secure it with bolts. Tighten the bolts to the manufacturer’s specifications using a torque wrench.
Lower the Engine: Slowly lower the engine back into place, ensuring the motor mount is properly aligned and secure.
Test the Installation: Start the engine and check for any banging noises on acceleration. Test drive the vehicle to ensure the issue is resolved.
Key Point: Tightening or replacing the motor mount resolves banging noises on acceleration and ensures the engine is securely fastened.
Summary
Tightening or replacing the motor mount is the most effective solution to eliminate banging noises and ensure the engine is securely fastened.
Banging noises on acceleration indicate that the engine is shifting excessively due to a loose motor mount.
The primary cause is a motor mount that has become loose, worn, or improperly installed.
Bad Motor Mount Sound Symptom 9: Rough Idle
A rough idle often indicates a deteriorated motor mount, which can be resolved by replacing the motor mount.
Overview
In this section, we will discuss rough idle as a symptom of a bad motor mount sound, the causes behind this symptom, and how to fix it. Understanding these aspects will help you diagnose and address the problem effectively. The following points will be covered:
- Symptom: Rough idle
- Cause: Deteriorated motor mount
- Fix: Replace the motor mount
Symptom: Rough Idle
A rough idle is characterized by an engine that runs unevenly or shakes noticeably when the vehicle is idling. This can cause the entire vehicle to vibrate and make the idling experience uncomfortable.
Key Point: A rough idle indicates that the engine is not stable, often due to a bad motor mount.
Cause: Deteriorated Motor Mount
A deteriorated motor mount is the primary cause of a rough idle. Motor mounts are designed to stabilize the engine and absorb vibrations. When a motor mount deteriorates, it can no longer effectively perform these functions, leading to a rough idle.
- Aging and Wear: Motor mounts can wear out over time due to continuous exposure to engine vibrations and stresses.
- Material Degradation: The rubber or hydraulic components can degrade, causing the mount to lose its elasticity and damping properties.
- Heat Exposure: Constant exposure to engine heat can accelerate the degradation process of the mount materials.
Key Point: A deteriorated motor mount loses its ability to stabilize the engine, leading to a rough idle.
Fix: Replace The Motor Mount
To fix a rough idle caused by a deteriorated motor mount, follow these steps to replace the motor mount:
Safety First
Ensure the vehicle is on a flat, stable surface. Use wheel chocks to prevent the vehicle from moving. Wear appropriate safety gear, including gloves and eye protection.
Tools And Materials Needed
- New motor mount
- Jack and Jack stands
- Socket set and wrenches
- Pry bar
- Torque wrench
Step-by-Step Replacement Process
Lift the Vehicle: Use a jack to lift the front of the vehicle and secure it with jack stands. Ensure the vehicle is stable before working underneath it.
Locate the Motor Mount: Identify the motor mount that needs replacement. Refer to the vehicle’s manual for the exact location.
Support the Engine: Place a jack under the engine, using a wooden block to protect the oil pan. Gently lift the engine to relieve pressure on the motor mount.
Remove the Old Mount: Use a socket set and wrenches to remove the bolts securing the motor mount. Carefully take out the old motor mount.
Install the New Mount: Position the new motor mount in place and secure it with bolts. Tighten the bolts to the manufacturer’s specifications using a torque wrench.
Lower the Engine: Slowly lower the engine back into place, ensuring the new motor mount is properly aligned.
Test the Installation: Start the engine and check for any rough idling. Test drive the vehicle to ensure the issue is resolved.
Key Point: Replacing the motor mount resolves rough idle and ensures engine stability.
Summary
Replacing the motor mount is the most effective solution to eliminate rough idle and ensure engine stability.
A rough idle is a sign of a deteriorated motor mount.
The primary cause is a motor mount that has worn out or degraded over time.
Bad Motor Mount Sound Symptom 10: Increased Engine Noise
Essential Takeaway
Increased engine noise often indicates a failed motor mount, which can be resolved by replacing the motor mount.
Overview
In this section, we will discuss increased engine noise as a symptom of a bad motor mount sound, the causes behind this symptom, and how to fix it. Understanding these aspects will help you diagnose and address the problem effectively. The following points will be covered:
- Symptom: Increased engine noise
- Cause: Failed motor mount
- Fix: Replace the motor mount
Symptom: Increased Engine Noise
Increased engine noise can be a clear indication of a motor mount problem. This noise can manifest as louder engine operation, more pronounced vibrations, and rattling sounds coming from the engine bay.
Key Point: Increased engine noise indicates that the motor mount is no longer absorbing vibrations effectively.
Cause: Failed Motor Mount
A failed motor mount is the primary cause of increased engine noise. Motor mounts are designed to dampen engine vibrations and noise. When a motor mount fails, it can no longer perform this function, leading to increased noise levels.
- Material Fatigue: Continuous exposure to engine vibrations and stresses can cause the motor mount materials to fail.
- Physical Damage: Impacts from rough driving conditions or accidents can break or weaken motor mounts.
- Aging and Wear: Over time, motor mounts can deteriorate, losing their ability to dampen vibrations and noise.
Key Point: A failed motor mount loses its ability to dampen engine vibrations, leading to increased noise.
Fix: Replace The Motor Mount
To fix increased engine noise caused by a failed motor mount, follow these steps to replace the motor mount:
Safety First
Ensure the vehicle is on a flat, stable surface. Use wheel chocks to prevent the vehicle from moving. Wear appropriate safety gear, including gloves and eye protection.
Tools And Materials Needed
- New motor mount
- Jack and jack stands
- Socket set and wrenches
- Pry bar
- Torque wrench
Step-by-Step Replacement Process
Lift the Vehicle: Use a jack to lift the front of the vehicle and secure it with jack stands. Ensure the vehicle is stable before working underneath it.
Locate the Motor Mount: Identify the motor mount that needs replacement. Refer to the vehicle’s manual for the exact location.
Support the Engine: Place a jack under the engine, using a wooden block to protect the oil pan. Gently lift the engine to relieve pressure on the motor mount.
Remove the Old Mount: Use a socket set and wrenches to remove the bolts securing the motor mount. Carefully take out the old motor mount.
Install the New Mount: Position the new motor mount in place and secure it with bolts. Tighten the bolts to the manufacturer’s specifications using a torque wrench.
Lower the Engine: Slowly lower the engine back into place, ensuring the new motor mount is properly aligned.
Test the Installation: Start the engine and check for any increased noise. Test drive the vehicle to ensure the issue is resolved.
Key Point: Replacing the motor mount resolves increased engine noise and ensures engine stability.
Summary
Replacing the motor mount is the most effective solution to eliminate increased engine noise and ensure engine stability.
Increased engine noise is a sign of a failed motor mount.
The primary cause is a motor mount that has failed due to material fatigue, physical damage, or aging.
Bad Motor Mount Sound Symptom 11: Vibration In The Cabin
Essential Takeaway
Vibration in the cabin often indicates a damaged motor mount, which can be resolved by replacing the motor mount.
Overview
In this section, we will discuss vibration in the cabin as a symptom of a bad motor mount sound, the causes behind this symptom, and how to fix it. Understanding these aspects will help you diagnose and address the problem effectively. The following points will be covered:
- Symptom: Vibration in the cabin
- Cause: Damaged motor mount
- Fix: Replace the motor mount
Symptom: Vibration In The Cabin
Vibration in the cabin can make driving uncomfortable and is often a sign of motor mount issues. These vibrations can be felt through the steering wheel, seats, and floorboards, indicating that the motor mounts are not effectively dampening engine vibrations.
Key Point: Vibration in the cabin indicates that the motor mounts are not absorbing engine vibrations effectively.
Cause: Damaged Motor Mount
A damaged motor mount is the primary cause of vibration in the cabin. Motor mounts are designed to stabilize the engine and absorb vibrations. When a motor mount is damaged, it can no longer effectively perform these functions, leading to noticeable vibrations.
- Physical Damage: Impacts from accidents or rough driving conditions can break or weaken motor mounts.
- Wear and Tear: Continuous exposure to engine vibrations and stresses can cause motor mounts to degrade over time.
- Material Degradation: The rubber or hydraulic components can degrade, causing the mount to lose its elasticity and damping properties.
Key Point: A damaged motor mount fails to absorb engine vibrations, leading to noticeable vibrations in the cabin.
Fix: Replace The Motor Mount
To fix vibration in the cabin caused by a damaged motor mount, follow these steps to replace the motor mount:
Safety First
Ensure the vehicle is on a flat, stable surface. Use wheel chocks to prevent the vehicle from moving. Wear appropriate safety gear, including gloves and eye protection.
Tools And Materials Needed
- New motor mount
- Jack and jack stands
- Socket set and wrenches
- Pry bar
- Torque wrench
Step-by-Step Replacement Process
Lift the Vehicle: Use a jack to lift the front of the vehicle and secure it with jack stands. Ensure the vehicle is stable before working underneath it.
Locate the Motor Mount: Identify the motor mount that needs replacement. Refer to the vehicle’s manual for the exact location.
Support the Engine: Place a jack under the engine, using a wooden block to protect the oil pan. Gently lift the engine to relieve pressure on the motor mount.
Remove the Old Mount: Use a socket set and wrenches to remove the bolts securing the motor mount. Carefully take out the old motor mount.
Install the New Mount: Position the new motor mount in place and secure it with bolts. Tighten the bolts to the manufacturer’s specifications using a torque wrench.
Lower the Engine: Slowly lower the engine back into place, ensuring the new motor mount is properly aligned.
Test the Installation: Start the engine and check for any vibration in the cabin. Test drive the vehicle to ensure the issue is resolved.
Key Point: Replacing the motor mount resolves vibration in the cabin and ensures engine stability.
Summary
Replacing the motor mount is the most effective solution to eliminate vibration in the cabin and ensure engine stability.
Vibration in the cabin is a sign of a damaged motor mount.
The primary cause is a motor mount that has been physically damaged or degraded over time.
Bad Motor Mount Sound Symptom 12: Engine Jerks When Starting
Engine jerks when starting often indicate a loose or broken motor mount, which can be resolved by replacing the motor mount.
Overview
In this section, we will discuss engine jerks when starting as a symptom of a bad motor mount sound, the causes behind this symptom, and how to fix it. Understanding these aspects will help you diagnose and address the problem effectively. The following points will be covered:
- Symptom: Engine jerks when starting
- Cause: Loose or broken motor mount
- Fix: Replace the motor mount
Symptom: Engine Jerks When Starting
Engine jerks when starting refers to sudden, noticeable movements of the engine when the vehicle is started. This can cause the entire vehicle to shake momentarily and indicate underlying motor mount issues.
Key Point: Engine jerks when starting indicate a problem with motor mount stability.
Cause: Loose Or Broken Motor Mount
A loose or broken motor mount is the primary cause of engine jerks when starting. Motor mounts are designed to hold the engine securely in place and absorb vibrations. When a motor mount is loose or broken, it cannot effectively perform these functions, leading to sudden engine movements.
- Loose Mounts: Over time, the bolts and fasteners that secure the motor mount can become loose due to vibrations and engine movement.
- Broken Mounts: Wear and tear, corrosion, or manufacturing defects can cause the motor mount to crack or break, leading to engine jerks.
Key Point: A loose or broken motor mount fails to stabilize the engine, causing it to jerk when starting.
Fix: Replace The Motor Mount
To fix engine jerks when starting caused by a loose or broken motor mount, follow these steps to replace the motor mount:
Safety First
Ensure the vehicle is on a flat, stable surface. Use wheel chocks to prevent the vehicle from moving. Wear appropriate safety gear, including gloves and eye protection.
Tools And Materials Needed
- New motor mount
- Jack and Jack stands
- Socket set and wrenches
- Pry bar
- Torque wrench
Step-by-Step Replacement Process
Lift the Vehicle: Use a jack to lift the front of the vehicle and secure it with jack stands. Ensure the vehicle is stable before working underneath it.
Locate the Motor Mount: Identify the motor mount that needs replacement. Refer to the vehicle’s manual for the exact location.
Support the Engine: Place a jack under the engine, using a wooden block to protect the oil pan. Gently lift the engine to relieve pressure on the motor mount.
Remove the Old Mount: Use a socket set and wrenches to remove the bolts securing the motor mount. Carefully take out the old motor mount.
Install the New Mount: Position the new motor mount in place and secure it with bolts. Tighten the bolts to the manufacturer’s specifications using a torque wrench.
Lower the Engine: Slowly lower the engine back into place, ensuring the new motor mount is properly aligned.
Test the Installation: Start the engine and check for any jerking movements. Test drive the vehicle to ensure the issue is resolved.
Key Point: Replacing the motor mount resolves engine jerks when starting and ensures engine stability.
Summary
Replacing the motor mount is the most effective solution to eliminate engine jerks when starting and ensure engine stability.
Engine jerks when starting are a sign of a loose or broken motor mount.
The primary cause is a motor mount that has become loose or broken, failing to stabilize the engine.
Diagnosing Bad Motor Mount Sounds
Diagnosing bad motor mount sounds involves a combination of visual inspections, physical tests, and engine tests to identify any cracks, damage, or abnormal movements.
Overview
In this section, we will explore the methods for diagnosing bad motor mount sounds, focusing on three key steps: visual inspection, physical test, and engine test. Understanding these diagnostic steps will help you accurately identify and address motor mount issues. The following points will be covered:
- Visual inspection for cracks, damage, or fluid leaks
- Physical test for excessive movement
- Engine test for unusual sounds or abnormal movements
Visual Inspection
Inspect For Cracks And Damage
Begin by visually inspecting the motor mounts for any visible cracks or damage. Cracks in the rubber or metal parts of the motor mount can indicate significant wear and compromise the mount’s ability to function properly.
Look For Fluid Leaks
If your vehicle uses hydraulic motor mounts, look for any signs of fluid leaks. Hydraulic mounts contain fluid that can leak if the mount is damaged, leading to reduced effectiveness in absorbing vibrations.
Check For Rust And Corrosion
Inspect the motor mounts for rust or corrosion, especially if your vehicle is older or frequently exposed to harsh weather conditions. Rust and corrosion can weaken the motor mount structure, leading to failure.
Key Point: Visual inspection for cracks, damage, and fluid leaks is the first step in diagnosing bad motor mount sounds.
Physical Test
Use A Pry Bar
A physical test involves using a pry bar to check for excessive movement in the motor mounts. Gently lift the engine using the pry bar to see if the motor mounts shift or move excessively. This can help identify if the mounts are loose or broken.
Observe Engine Movement
While performing the physical test, observe the engine for any noticeable movement. If the engine shifts significantly, it indicates that the motor mounts are not securing the engine properly.
Check Mount Bolts
Ensure that the bolts securing the motor mounts are tight and not missing. Loose or missing bolts can cause the motor mounts to fail, leading to bad motor mount sounds.
Key Point: A physical test using a pry bar can help identify excessive movement and loose or broken motor mounts.
Engine Test
Start The Engine
Start the engine and listen for any unusual sounds. Bad motor mounts often produce knocking, clunking, or banging noises, especially during engine start-up or acceleration.
Observe For Abnormal Movements
With the engine running, observe it for any abnormal movements. An engine that shifts or rocks excessively indicates that the motor mounts are not functioning correctly.
Conduct A Test Drive
Take the vehicle for a test drive to further assess the engine’s behavior. Pay attention to any vibrations, noises, or unusual movements during acceleration, deceleration, and idling.
Key Point: An engine test can help identify unusual sounds and abnormal movements, indicating bad motor mounts.
Summary
Engine tests involve listening for unusual sounds and observing abnormal engine movements.
Diagnosing bad motor mount sounds involves visual inspections, physical tests, and engine tests.
Visual inspection helps identify cracks, damage, and fluid leaks.
Physical tests check for excessive movement using a pry bar.
Fixing Bad Motor Mount Sounds
Essential Takeaway
Fixing bad motor mount sounds involves replacing damaged mounts with new ones to ensure engine stability and reduce noise. This process requires specific tools, safety precautions, and a step-by-step approach.
Overview
In this section, we will discuss how to fix bad motor mount sounds by replacing damaged mounts. We will cover the necessary tools, safety precautions, and a detailed step-by-step guide to replacing a motor mount. The following points will be covered:
- Replacing damaged mounts
- Tools needed
- Safety precautions
- Step-by-step replacement guide
Replacing Damaged Mounts
Replacing damaged motor mounts is essential to maintain engine stability and reduce unwanted noise and vibrations. A bad motor mount sound can often be resolved by removing the faulty mount and installing a new one. This process involves several key steps to ensure the engine is properly supported and the new mount is securely installed.
Key Point: Replacing damaged motor mounts is crucial for engine stability and noise reduction.
Tools Needed
Before starting the replacement process, gather the necessary tools and equipment:
- Jack and Jack Stands: To lift and support the vehicle safely.
- Socket Set and Wrenches: For removing and tightening bolts.
- Pry Bar: To assist in lifting and positioning the engine.
- Torque Wrench: To ensure bolts are tightened to the manufacturer’s specifications.
- Wooden Block: To protect the oil pan when supporting the engine with a jack.
- New Motor Mount: The replacement part.
Key Point: Having the right tools is essential for a successful motor mount replacement.
Safety Precautions
Working on motor mounts involves lifting the vehicle and supporting the engine, which can be hazardous. Follow these safety precautions to ensure a safe working environment:
- Flat, Stable Surface: Ensure the vehicle is on a flat, stable surface to prevent it from moving or tipping.
- Wheel Chocks: Use wheel chocks to prevent the vehicle from rolling.
- Protective Gear: Wear gloves and eye protection to avoid injuries from debris or tools.
- Proper Jack Placement: Place the jack securely under the vehicle and use jack stands to support it.
- Engine Support: Use a wooden block on the jack to protect the oil pan when lifting the engine.
Key Point: Following safety precautions is crucial to prevent accidents and injuries while replacing motor mounts.
Step-by-Step Guide to Replacing a Motor Mount
Step 1: Lift the Vehicle
Use a jack to lift the front of the vehicle and secure it with jack stands. Ensure the vehicle is stable before working underneath it.
Step 2: Locate the Motor Mount
Identify the motor mount that needs replacement. Refer to the vehicle’s manual for the exact location.
Step 3: Support the Engine
Place a jack under the engine, using a wooden block to protect the oil pan. Gently lift the engine to relieve pressure on the motor mount.
Step 4: Remove the Old Mount
Use a socket set and wrenches to remove the bolts securing the motor mount. Carefully take out the old motor mount.
Step 5: Install the New Mount
Position the new motor mount in place and secure it with bolts. Tighten the bolts to the manufacturer’s specifications using a torque wrench.
Step 6: Lower the Engine
Slowly lower the engine back into place, ensuring the new motor mount is properly aligned.
Step 7: Test the Installation
Start the engine and check for any unusual sounds or vibrations. Test drive the vehicle to ensure the issue is resolved.
Key Point: Following a step-by-step guide ensures the motor mount replacement is done correctly and safely.
Summary
A step-by-step guide helps you replace the motor mount correctly and effectively.
Fixing bad motor mount sounds involves replacing damaged mounts to ensure engine stability and reduce noise.
Gather the necessary tools and follow safety precautions to ensure a safe and successful replacement.
FAQs
What Are The Signs Of A Bad Motor Mount?
Signs of a bad motor mount include clunking noises, excessive vibrations, and noticeable engine movement. Clunking noises often occur when the engine shifts excessively, typically during acceleration or deceleration. These sounds indicate that the engine is not being held securely in place, leading to it knocking against other components.
Excessive vibrations are felt throughout the vehicle, particularly in the steering wheel, seats, and floorboards. These vibrations suggest that the motor mount is no longer absorbing engine vibrations effectively. This can make the driving experience uncomfortable and may lead to additional wear on other vehicle parts.
Engine movement is another clear sign of a bad motor mount. If the engine appears to rock, tilt, or move abnormally within the engine bay, it suggests that the mount has failed to secure the engine properly. This can cause further damage to the engine and surrounding components if not addressed promptly.
- Key Point: Clunking noises, excessive vibrations, and engine movement are common signs of a bad motor mount.
Can I Drive With A Bad Motor Mount?
Driving with a bad motor mount is not recommended as it can cause further damage and affect vehicle safety. A faulty motor mount allows the engine to move excessively, leading to the misalignment of other components. This misalignment can result in increased wear and tear on engine parts, the transmission, and the drivetrain.
Additionally, the excessive movement of the engine can cause damage to hoses, wiring, and other critical components. This can lead to more severe and expensive repairs down the line. Furthermore, driving with a bad motor mount can make the vehicle’s handling unpredictable, posing a safety risk to the driver and passengers.
In summary, it’s best to address a bad motor mount as soon as possible to prevent further damage and ensure the vehicle operates safely. Ignoring the issue can lead to more significant mechanical problems and higher repair costs.
- Key Point: Driving with a bad motor mount can cause further damage and pose a safety risk, so it should be addressed promptly.
How Much Does It Cost To Replace A Motor Mount?
The cost to replace a motor mount can vary depending on the vehicle’s make and model, labor rates, and the type of mount being replaced. Typically, the cost ranges from $200 to $600 per mount. This includes both parts and labor, with labor often being the more significant portion of the cost.
Luxury or high-performance vehicles may have higher replacement costs due to the complexity of their engines and the need for specialized mounts. Conversely, smaller or more common vehicles might have lower replacement costs. It is always advisable to get a few quotes from different mechanics to ensure you receive a fair price.
Additionally, some vehicles may have multiple motor mounts that need to be replaced simultaneously. This can increase the overall repair cost, but replacing all necessary mounts at once can save on labor costs in the long run.
- Key Point: Replacing a motor mount typically costs between $200 and $600, but this can vary based on the vehicle and specific circumstances.
How Often Should Motor Mounts Be Replaced?
Motor mounts should be inspected regularly and replaced as needed, usually every 5-7 years. Regular inspections during routine maintenance can help identify wear and tear before it leads to significant problems. Some signs that a motor mount needs to be replaced include visible cracks, rubber deterioration, or noticeable engine movement.
Driving habits and conditions can affect the lifespan of motor mounts. Frequent driving on rough roads or aggressive driving can lead to earlier wear and the need for more frequent replacements. Conversely, more gentle driving on smooth roads may extend the life of the motor mounts.
It is essential to follow the manufacturer’s recommendations and consult with a trusted mechanic for specific advice on your vehicle. Regular maintenance and timely replacements can prevent more severe issues and ensure the vehicle’s longevity and performance.
- Key Point: Motor mounts typically need replacement every 5-7 years, but regular inspections can help determine the right timing.
What Happens If I Ignore Bad Motor Mount Sounds?
Ignoring bad motor mount sounds can lead to severe engine and transmission damage, increased repair costs, and safety hazards. A failing motor mount allows excessive engine movement, which can strain other engine components and lead to misalignment. This misalignment can cause additional wear on the transmission, drivetrain, and exhaust system.
The vibrations and movement can also damage hoses, wiring, and other critical engine parts. This can result in leaks, electrical issues, and further mechanical problems that require expensive repairs. Additionally, the increased engine movement can make the vehicle’s handling unpredictable, posing a safety risk.
In extreme cases, a completely failed motor mount can cause the engine to shift dramatically, leading to catastrophic damage. Addressing bad motor mount sounds promptly can prevent these severe outcomes and maintain vehicle safety and reliability.
Key Point: Ignoring bad motor mount sounds can lead to severe damage, increased repair costs, and safety risks.
Related Articles
Read more >> 12 Bad Engine Mount Symptoms: The Ultimate Guide
Read more >> 12 Bad Transmission Mount Symptoms: The Ultimate Guide
Read more >> 12 Most Common Signs Of A Bad Engine Mount
Read more >> 15 Signs Of A Bad Engine: Simply Explained!
Conclusion
Regular maintenance and timely repairs of motor mounts are crucial for vehicle performance and safety. Addressing bad motor mount sounds promptly prevents severe damage, reduces repair costs, and ensures a smooth and reliable driving experience. Inspect and replace motor mounts as needed to maintain engine stability and minimize vibrations.