
You may ask yourself, perhaps even searching for the “Cheapest Way to Fix A Catalytic Converter”, haven’t you? Well, search no more. As a car owner dealing with the notorious check engine light, it’s entirely reasonable to look for cost-effective solutions.
So, what can you expect when you’re seeking the cheapest way to fix a catalytic converter? Essentially, there are several ways to approach this problem, from using catalytic converter cleaners to opting for aftermarket parts, all of which can offer substantial savings.
If your vehicle has been suffering from catalytic converter issues and you’re on a budget, this article is a must-read. We’ll explore affordable methods to get your car running smoothly again, without breaking the bank.
Table of Contents
Symptoms of a Faulty Catalytic Converter
A faulty catalytic converter can manifest in various ways, making it essential to recognize the signs to address the issue promptly. Here are some common symptoms associated with a malfunctioning catalytic converter:
Poor engine performance:
A clogged or damaged catalytic converter can restrict exhaust flow, leading to reduced engine power, hesitation during acceleration, and sluggish response from the throttle.
Decreased fuel efficiency:
As the catalytic converter’s function is compromised, your engine will struggle to maintain optimal fuel combustion, resulting in a drop in fuel efficiency.
Foul smell:
A failing catalytic converter may emit a strong odor of rotten eggs or sulfur, caused by an excessive buildup of hydrogen sulfide in the exhaust system.
Illuminated check engine light:
A malfunctioning catalytic converter or related components may trigger the check engine light on your dashboard. This can be due to a faulty oxygen sensor, a clogged converter, or other issues that require attention.
Failed emissions test:
A faulty catalytic converter cannot effectively reduce harmful emissions, making it more likely for your vehicle to fail an emissions test.
Overview of the 8 Cheapest Ways to Fix a Catalytic Converter
Fixing a catalytic converter doesn’t always mean replacing it entirely. There are several budget-friendly ways to address common issues and restore its functionality. Below is a brief overview of the 10 cheapest ways to fix a catalytic converter:
Cleaning a clogged catalytic converter:
Use a catalytic converter cleaner or manually remove and clean the converter to restore proper exhaust flow.
Replacing the oxygen sensor:
A malfunctioning oxygen sensor can affect the catalytic converter’s performance; replacing it can help improve converter efficiency.
Inspecting and replacing exhaust gaskets:
Leaking exhaust gaskets can cause poor catalytic converter performance; replacing them can help maintain optimal converter function.
Repairing damaged heat shields:
Fixing or replacing damaged heat shields can protect the catalytic converter from excessive heat and potential damage.
Adjusting the air-fuel mixture:
Ensuring the proper air-fuel mixture in the engine can improve the efficiency of the catalytic converter and reduce emissions.
Fixing exhaust leaks:
Repairing exhaust leaks can improve exhaust flow and ensure the catalytic converter operates effectively.
Reflashing the engine control module (ECM):
Updating the ECM software can resolve issues related to the catalytic converter and improve overall vehicle performance.
Utilizing aftermarket catalytic converters:
Installing a more affordable aftermarket converter can be a cost-effective solution for a failed catalytic converter.
Seeking professional help:
Consulting a reputable mechanic and following cost-saving tips for professional catalytic converter repair services can save you money in the long run.
Regular maintenance:
Performing routine maintenance on your vehicle can help prevent catalytic converter issues and extend its lifespan.
1. Cleaning a Clogged Catalytic Converter
Identifying a Clogged Converter
A clogged catalytic converter can significantly affect your vehicle’s performance.
Common signs of a clogged converter include:
Poor engine performance:
The engine may lose power, experience hesitation during acceleration, or feel sluggish when you press the throttle.
Decreased fuel efficiency:
A clogged converter can lead to suboptimal fuel combustion and reduce your vehicle’s fuel efficiency.
Rattling noise:
A rattling noise from the exhaust system may indicate a broken substrate inside the catalytic converter, causing it to clog.
Overheating:
A clogged converter can cause the engine to overheat as exhaust gases cannot escape efficiently.
Using a Catalytic Converter Cleaner
Benefits and Drawbacks
Benefits:
Easy to use:
Catalytic converter cleaners are simple to use and do not require any mechanical expertise.
Affordable:
These cleaners are a cost-effective solution for mildly clogged converters. c. Improved performance: Regular use of a cleaner can help maintain your converter’s efficiency and prolong its lifespan.
Drawbacks:
Limited effectiveness:
Severely clogged or damaged converters may not benefit from a cleaner.
Temporary solution:
A cleaner may provide temporary relief but may not address the root cause of the clogging.
Step-by-Step Guide
- Purchase a high-quality catalytic converter cleaner from a reputable brand.
- Consult your vehicle’s owner manual to determine the fuel tank capacity.
- Fill your fuel tank with the appropriate amount of gasoline.
- Pour the recommended amount of cleaner into the fuel tank, following the manufacturer’s instructions.
- Drive your vehicle for at least 30 minutes to an hour at highway speeds, allowing the cleaner to circulate and break down the deposits in the converter.
- Refuel your vehicle and monitor its performance, noting any improvements.
Removing and Cleaning the Converter Manually
Tools and Materials Needed
- Safety goggles
- Mechanic gloves
- Jack and Jack stand
- Wrench set
- Oxygen sensor socket
- Wire brush
- High-pressure washer or garden hose
- Degreaser or cleaning solution
Step-by-Step Guide
- Park your vehicle on a flat surface, engage the parking brake, and disconnect the battery.
- Use a jack and jack stand to raise your vehicle and ensure its stability.
- Locate the catalytic converter and the oxygen sensors connected to it. Consult your owner’s manual if necessary.
- Using an oxygen sensor socket, carefully remove the oxygen sensors.
- Using a wrench, remove the bolts or clamps connecting the converter to the exhaust system.
- Carefully remove the catalytic converter from the vehicle.
- Use a wire brush to remove any loose debris from the outside of the converter.
- Spray a degreaser or cleaning solution into the converter and let it sit for the recommended time.
- Rinse the converter thoroughly with a high-pressure washer or garden hose to remove any remaining debris and cleaning solution.
- Allow the converter to dry completely before reinstalling it.
- Reinstall the catalytic converter and oxygen sensors, ensuring all connections are secure.
- Lower your vehicle, reconnect the battery, and start the engine to verify the repair.

2. Replacing the Oxygen Sensor
The function of the Oxygen Sensor
The oxygen sensor is a crucial component of your vehicle’s emission control system. It monitors the levels of oxygen in the exhaust gases, providing feedback to the engine control module (ECM) to optimize the air-fuel mixture for efficient combustion.
By maintaining an optimal air-fuel ratio, the oxygen sensor helps reduce harmful emissions and ensures the proper functioning of the catalytic converter.
Symptoms of a Faulty Oxygen Sensor
A malfunctioning oxygen sensor can negatively impact your vehicle’s performance and emission levels. Common symptoms of a faulty sensor include:
Check engine light:
A failing oxygen sensor may trigger the check engine light on your dashboard.
Poor fuel efficiency:
A malfunctioning sensor may cause the engine to run too rich or too lean, reducing fuel efficiency.
Rough idling:
A faulty oxygen sensor can lead to an imbalanced air-fuel mixture, causing the engine to idle roughly or stall.
Increased emissions:
A defective sensor can result in increased harmful emissions, potentially causing your vehicle to fail an emissions test.
Step-by-Step Guide to Replacing the Oxygen Sensor
Gather the necessary tools, including a wrench set, an oxygen sensor socket, safety goggles, and mechanic gloves.
Park your vehicle on a flat surface, engage the parking brake, and disconnect the battery.
Use a jack and jack stand to lift your vehicle and ensure its stability.
Locate the oxygen sensor connected to the catalytic converter. Consult your owner’s manual if necessary.
Disconnect the wiring harness from the oxygen sensor.
Using an oxygen sensor socket, carefully remove the old oxygen sensor from the exhaust system.
Compare the new oxygen sensor with the old one to ensure they are identical.
Apply anti-seize compound to the threads of the new sensor, taking care not to touch the sensor tip.
Install the new oxygen sensor, tightening it securely with the oxygen sensor socket.
Reconnect the wiring harness to the new sensor.
Lower your vehicle, reconnect the battery, and start the engine to verify the repair.
Clear any stored diagnostic trouble codes, if necessary, and monitor your vehicle’s performance.
Cost-saving Tips for Purchasing a Replacement Sensor
Shop around:
Compare prices from different auto parts stores and online retailers to find the best deal.
Look for sales and discounts:
Take advantage of sales, coupons, or promotions to save on your purchase.
Consider aftermarket sensors:
Aftermarket oxygen sensors can be more affordable than OEM sensors while still providing reliable performance. However, ensure you choose a reputable brand to avoid compromising quality.
Seek professional advice:
If you’re unsure about which oxygen sensor is right for your vehicle, consult a mechanic or a knowledgeable friend to avoid purchasing the wrong part.
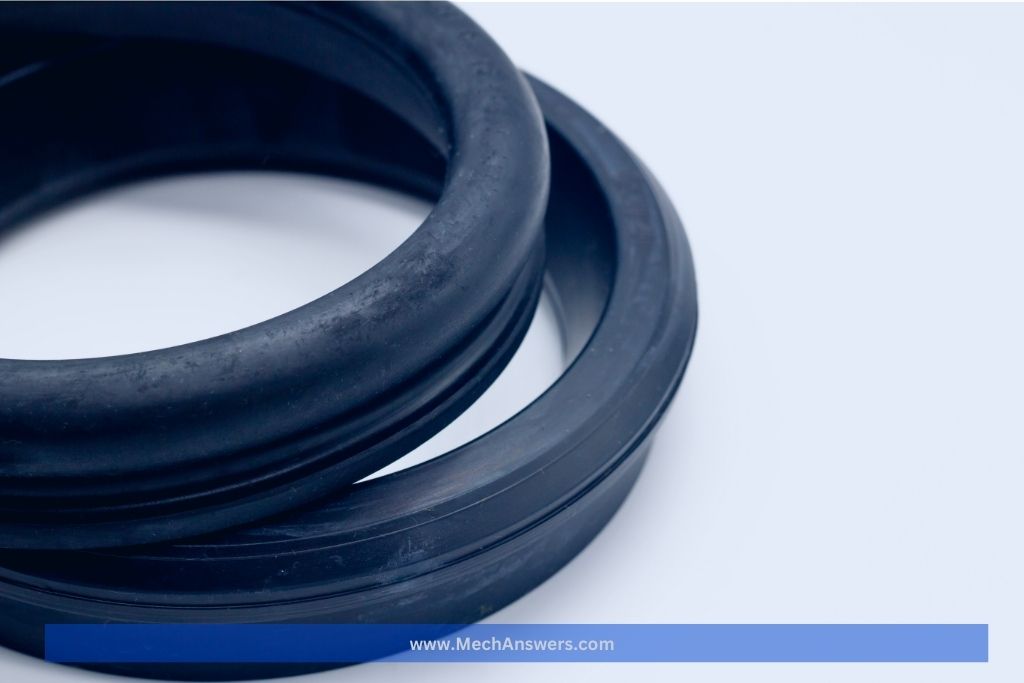
3. Inspecting and replacing exhaust gaskets
Importance of exhaust gaskets
Exhaust gaskets play a crucial role in maintaining the integrity of your vehicle’s exhaust system.
They create a tight seal between exhaust components, preventing exhaust gases from leaking out and ensuring that they pass through the catalytic converter for proper treatment.
A properly functioning exhaust gasket is essential for optimal engine performance, reduced emissions, and maintaining the efficiency of the catalytic converter.
Identifying leaking gaskets
Leaking exhaust gaskets can compromise the performance of your catalytic converter and lead to increased emissions. Common signs of leaking gaskets include:
Unusual noises:
A leaking gasket may cause a hissing, ticking, or puffing noise as exhaust gases escape through the compromised seal.
Reduced engine performance:
Leaking exhaust gases can lead to a loss of engine power and poor fuel efficiency.
The smell of exhaust fumes:
A noticeable smell of exhaust fumes inside or around the vehicle may indicate a leaking gasket.
Visual inspection:
Inspect the exhaust system for any signs of black soot or carbon buildup around gasket connections, which can indicate a leak.
A step-by-step guide to replacing exhaust gaskets
Gather the necessary tools, including a wrench set, socket set, safety goggles, and mechanic gloves.
Park your vehicle on a flat surface, engage the parking brake, and disconnect the battery.
Use a jack and jack stand to lift your vehicle and ensure its stability.
Locate the leaking exhaust gasket by following the exhaust system from the engine to the tailpipe. Consult your owner’s manual if necessary.
Using a wrench or socket set, remove the bolts or nuts securing the exhaust components connected by the leaking gasket.
Carefully separate the exhaust components and remove the old gasket.
Clean the mating surfaces of the exhaust components, removing any debris or remnants of the old gasket.
Install the new exhaust gasket, ensuring proper alignment with the exhaust components.
Reconnect the exhaust components, tightening the bolts or nuts securely to create a tight seal.
Lower your vehicle, reconnect the battery, and start the engine to verify the repair.
Cost-saving tips for purchasing replacement gaskets
Compare prices:
Check various auto parts stores and online retailers to find the best deal on replacement gaskets.
Take advantage of sales and discounts:
Look for sales, coupons, or promotions to save on your purchase.
Consider aftermarket gaskets:
Aftermarket exhaust gaskets can be more affordable than OEM gaskets while still providing reliable performance. However, choose a reputable brand to avoid compromising quality.
Buy a gasket kit:
If you need to replace multiple gaskets, consider purchasing a complete gasket kit, which can be more cost-effective than buying individual gaskets.
4. Repairing damaged heat shields
Purpose of Heat Shields
Heat shields are essential components of your vehicle’s exhaust system.
They serve to protect surrounding components, including the catalytic converter, from the extreme heat generated by the exhaust system.
By preventing excessive heat from reaching these components, heat shields help maintain their efficiency and longevity, reducing the risk of heat-related damage.
Symptoms of Damaged Heat Shields
Damaged or loose heat shields can compromise the effectiveness of your vehicle’s exhaust system and catalytic converter. Common symptoms of damaged heat shields include:
Rattling noise:
A loose or damaged heat shield may produce a rattling noise, particularly during acceleration or when driving over bumps.
Overheating:
Damaged heat shields can cause excessive heat to reach surrounding components, potentially leading to overheating issues.
Visual inspection:
Inspect the heat shields for any signs of damage, such as corrosion, cracks, or loose mounting hardware.
A step-by-step guide to repairing heat shields
Gather the necessary tools, including a wrench set, socket set, pliers, safety goggles, and mechanic gloves.
Park your vehicle on a flat surface, engage the parking brake, and disconnect the battery.
Use a jack and jack stand to lift your vehicle and ensure its stability.
Locate the damaged heat shield by following the exhaust system from the engine to the tailpipe. Consult your owner’s manual if necessary.
Assess the damage and determine whether the heat shield can be repaired or needs to be replaced.
If the heat shield is loose or has damaged mounting hardware, tighten or replace the hardware as needed.
For minor cracks or damage, use heat-resistant metal tape or a high-temperature epoxy to repair the affected area.
If the heat shield is severely damaged or corroded, it may be necessary to replace it entirely. Remove the damaged heat shield by loosening the mounting hardware and installing a new one in its place.
Lower your vehicle, reconnect the battery, and start the engine to verify the repair.
Cost-saving tips for purchasing replacement heat shields
Compare prices:
Check various auto parts stores and online retailers to find the best deal on replacement heat shields.
Take advantage of sales and discounts:
Look for sales, coupons, or promotions to save on your purchase.
Consider aftermarket heat shields:
Aftermarket heat shields can be more affordable than OEM heat shields while still providing reliable performance. However, choose a reputable brand to avoid compromising quality.
DIY repair:
If the damage to the heat shield is minor, consider repairing it yourself using heat-resistant metal tape or high-temperature epoxy to save on replacement costs.
5. Adjusting the Air-Fuel Mixture
Role of the air-fuel mixture in catalytic converter function
The air-fuel mixture plays a crucial role in the efficient operation of your vehicle’s engine and the proper functioning of the catalytic converter.
An optimal air-fuel ratio ensures complete combustion of the fuel, reducing harmful emissions and improving engine performance. The catalytic converter relies on this precise balance to effectively convert toxic exhaust gases into less harmful substances.
An improper air-fuel mixture can lead to increased emissions, reduced fuel efficiency, and potential damage to the catalytic converter.
Identifying an improper air-fuel mixture
An improper air-fuel mixture can cause various issues with your vehicle’s performance and emissions. Common signs of an improper mixture include:
Check engine light:
A malfunctioning air-fuel mixture may trigger the check engine light on your dashboard.
Poor fuel efficiency:
An imbalanced mixture can reduce your vehicle’s fuel efficiency.
Rough idling or stalling:
An improper air-fuel mixture can cause the engine to idle roughly or stall.
Increased emissions:
A faulty air-fuel mixture may result in increased harmful emissions.
Adjusting the air-fuel mixture
Tools and Materials Needed
- OBD-II scanner
- Screwdriver or wrench set (depending on your vehicle’s configuration)
- Owner’s manual or repair manual for your specific vehicle
Step-by-Step Guide
Park your vehicle on a flat surface, engage the parking brake, and turn off the engine.
Consult your owner’s manual or repair manual to determine the location of the air-fuel mixture adjustment screw or component.
Connect an OBD-II scanner to your vehicle’s diagnostic port and read any stored trouble codes related to the air-fuel mixture.
Use the scanner to monitor the air-fuel ratio, oxygen sensor readings, and short-term fuel trim values.
Based on the diagnostic information, adjust the air-fuel mixture screw or component according to your vehicle’s specifications. This may involve turning the screw or adjusting an electronic component to achieve the desired mixture.
Monitor the scanner’s readings as you make adjustments to ensure that you achieve an optimal air-fuel ratio.
After making the necessary adjustments, clear any stored trouble codes and disconnect the OBD-II scanner.
Start the engine and allow it to warm up to operating temperature. Observe the engine’s performance, paying attention to any improvements in idling, fuel efficiency, or emissions.
If further adjustments are necessary, repeat the process until the desired air-fuel mixture is achieved.
Note: Modern vehicles with electronic fuel injection systems may require a professional mechanic to adjust the air-fuel mixture, as adjustments may involve reprogramming the engine control module (ECM) or updating the vehicle’s software.
6. Fixing Exhaust Leaks
Impact of exhaust leaks on catalytic converter performance
Exhaust leaks can have a detrimental effect on your vehicle’s catalytic converter performance.
Leaks can cause exhaust gases to escape before they reach the converter, reducing its efficiency in treating harmful emissions. Additionally, exhaust leaks can affect the oxygen sensor readings, leading to an imbalanced air-fuel mixture that can further harm the catalytic converter.
Fixing exhaust leaks is essential for maintaining optimal catalytic converter function and reducing emissions.
Identifying exhaust leaks
Common signs of exhaust leaks include:
Hissing or tapping noises:
Exhaust leaks can produce a hissing or tapping noise as exhaust gases escape through the compromised area.
Reduced engine performance:
Leaking exhaust gases can lead to a loss of engine power and poor fuel efficiency.
The smell of exhaust fumes:
A noticeable smell of exhaust fumes inside or around the vehicle may indicate an exhaust leak.
Visual inspection:
Inspect the exhaust system for any signs of rust, cracks, or holes, which can indicate a leak.
Repairing exhaust leaks
Tools and Materials Needed
- Wrench set
- Socket set
- Safety goggles
- Mechanic gloves
- Exhaust repair kit or materials (e.g., exhaust putty, pipe repair tape, or high-temperature epoxy)
Step-by-Step Guide
Park your vehicle on a flat surface, engage the parking brake, and turn off the engine.
Use a jack and jack stand to lift your vehicle and ensure its stability.
Locate the exhaust leak by following the exhaust system from the engine to the tailpipe. Consult your owner’s manual if necessary.
Assess the damage and determine whether the leak can be repaired or if the affected component needs to be replaced.
If the leak can be repaired, follow the instructions provided with the exhaust repair kit or materials. This may involve applying exhaust putty, wrapping pipe repair tape, or using high-temperature epoxy to seal the leak.
Allow the repair material to cure as directed by the manufacturer’s instructions. Lower your vehicle, start the engine, and observe the repaired area to ensure the leak has been sealed.
Cost-saving tips for purchasing repair materials
Compare prices:
Check various auto parts stores and online retailers to find the best deal on exhaust repair materials.
Take advantage of sales and discounts:
Look for sales, coupons, or promotions to save on your purchase.
Consider DIY repair:
If the exhaust leak is minor and accessible, consider repairing it yourself using exhaust repair materials to save on labor costs.
7. Reflashing the Engine Control Module (ECM)
The function of the ECM in Relation to the Catalytic Converter
The engine control module (ECM) is a crucial component of your vehicle, responsible for managing various aspects of the engine and its performance.
In relation to the catalytic converter, the ECM monitors and adjusts the air-fuel mixture, ignition timing, and emissions control systems to ensure optimal performance and reduced emissions.
A well-functioning ECM helps maintain the efficiency of the catalytic converter and prevents premature failure.
Symptoms of a Faulty ECM
A faulty ECM can cause a range of issues affecting your vehicle’s performance and emissions, including:
Check engine light:
A malfunctioning ECM may trigger the check engine light on your dashboard.
Poor engine performance:
A faulty ECM can result in reduced engine power, poor fuel efficiency, and rough idling.
Emission problems:
A malfunctioning ECM may cause excessive emissions due to an imbalanced air-fuel mixture or incorrect ignition timing.
Difficulty starting:
A failing ECM can cause issues with the ignition system, making it difficult to start the vehicle.
Reflashing the ECM
Tools and Materials Needed
- OBD-II scanner with reflash capability or specialized ECM reflash tool
- Laptop or computer (if required by the reflash tool)
- Internet access to download the latest ECM firmware or software updates
Step-by-Step Guide
Park your vehicle on a flat surface, engage the parking brake, and turn off the engine.
Locate your vehicle’s diagnostic port, typically found under the dashboard on the driver’s side.
Connect the OBD-II scanner with reflash capability or the specialized ECM reflash tool to the diagnostic port.
Follow the instructions provided by the reflash tool or software to access the ECM and download the current firmware or software version.
Visit the vehicle manufacturer’s website or a reputable source to download the latest firmware or software updates for your specific vehicle model.
Load the new firmware or software update onto the reflash tool or software, following the instructions provided.
Use the reflash tool or software to install the new firmware or software update onto your vehicle’s ECM.
Disconnect the reflash tool or OBD-II scanner and start the engine to verify that the update was successful and that any related issues have been resolved.
Cost-saving Tips for Reflashing the ECM
DIY reflash:
If you have the necessary skills and equipment, reflashing the ECM yourself can save on labor costs associated with professional reflashing services.
Borrow or rent a reflash tool:
Instead of purchasing an expensive reflash tool or OBD-II scanner, consider borrowing one from a friend or renting one from an auto parts store.
Research online resources:
Many online forums and resources are available to help guide you through the reflashing process, potentially reducing the need for professional assistance.
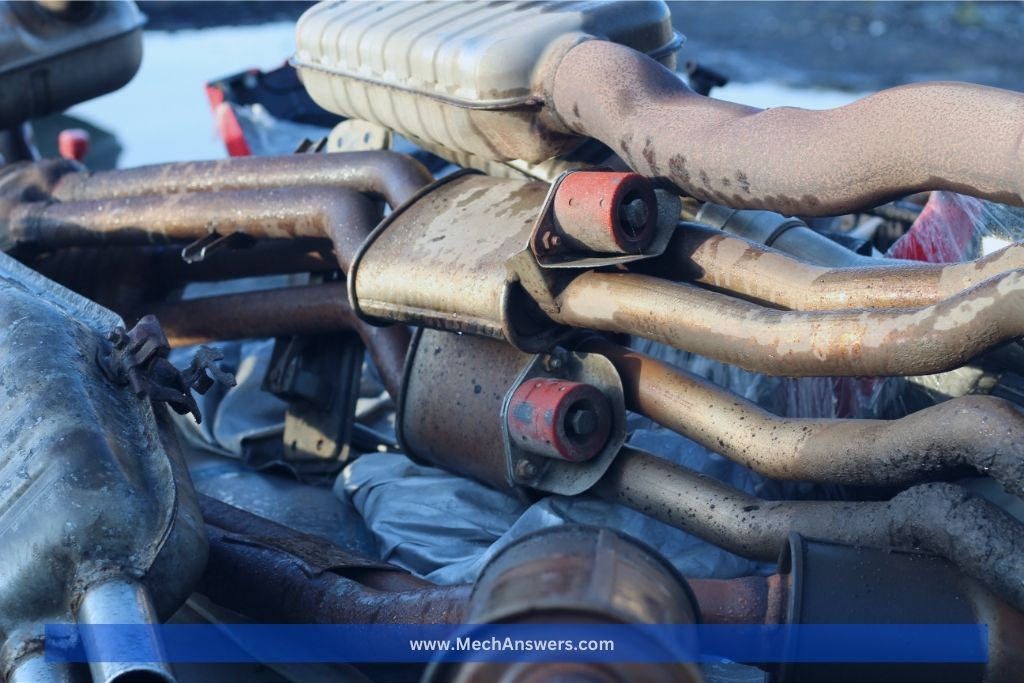
8. Utilizing aftermarket catalytic converters
Comparison of OEM and aftermarket catalytic converters
Original equipment manufacturer (OEM) catalytic converters are designed specifically for your vehicle by the manufacturer, ensuring optimal fit, performance, and compatibility.
Aftermarket catalytic converters, on the other hand, are produced by third-party companies and may be designed to fit multiple vehicle makes and models.
While aftermarket converters can be a more affordable option, their quality and performance can vary significantly.
Benefits and drawbacks of using aftermarket converters
Benefits:
Cost savings:
Aftermarket catalytic converters are typically less expensive than OEM converters, making them an attractive option for budget-conscious vehicle owners.
Availability:
Aftermarket converters are widely available from various auto parts retailers and online sources.
Variety:
With a wide range of manufacturers and designs, aftermarket converters provide more options for vehicle owners.
Drawbacks:
Quality and performance:
The quality and performance of aftermarket converters can vary greatly, and some may not provide the same level of emissions reduction as OEM converters.
Fit and compatibility:
Aftermarket converters may not fit as seamlessly as OEM converters, potentially requiring additional modifications or adjustments during installation.
Warranty:
Some aftermarket converters may not be covered by the vehicle’s warranty, and their use could potentially void existing warranties.
A step-by-step guide to installing an aftermarket converter
Park your vehicle on a flat surface, engage the parking brake, and turn off the engine.
Use a jack and jack stand to lift your vehicle and ensure its stability.
Locate the existing catalytic converter in your vehicle’s exhaust system and disconnect any necessary components (e.g., oxygen sensors, and heat shields).
Use a wrench or socket set to remove the bolts or fasteners securing the old converter.
Carefully remove the old catalytic converter from the exhaust system.
Install the new aftermarket converter, ensuring proper alignment and fit with the exhaust system.
Reattach any components that were disconnected during the removal process (e.g., oxygen sensors, heat shields).
Secure the new converter with the appropriate bolts or fasteners, tightening them to the manufacturer’s specified torque settings.
Lower your vehicle, start the engine, and observe the exhaust system for any leaks or performance issues.
Cost-saving tips for purchasing aftermarket converters
Research and compare:
Before purchasing an aftermarket converter, research various brands and models to find one with a reputation for quality and performance.
Online shopping:
Check online retailers for the best deals on aftermarket catalytic converters, as they may offer lower prices than brick-and-mortar stores.
Look for sales and discounts:
Take advantage of sales, promotions, or coupons to save on your purchase of an aftermarket converter.
Consult online forums and reviews:
Online forums and customer reviews can provide valuable insights into the performance and reliability of specific aftermarket converter brands and models, helping you make an informed decision.
Related Articles:
Read more >> 12 Hacks How To Fix Catalytic Converter Without Replacing!
Read more >> Can A Catalytic Converter Go Bad From Sitting? (Read This!)
Read more >> What Is The Easiest Way To Clean A Catalytic Converter?
Read more >> How To Fix A Loud Exhaust Noise From The Front Of The Car?
Conclusion
Fixing a catalytic converter doesn’t have to break the bank. There are several cost-effective ways to repair or replace a faulty converter without spending a lot of money.
From checking for warranties and recalls to using aftermarket parts and DIY repairs, there are many options available to car owners on a budget.
By following the tips outlined in this article and being proactive in maintenance, car owners can ensure that their catalytic converter remains in good working order without draining their wallets.
Remember to always prioritize safety and consult with a professional if you are unsure about any repair or replacement procedures. With these affordable solutions, there’s no need to let catalytic converter issues keep you off the road.
Reference Source:
https://carbrain.com/blog/catalytic-converter-replacement-cost