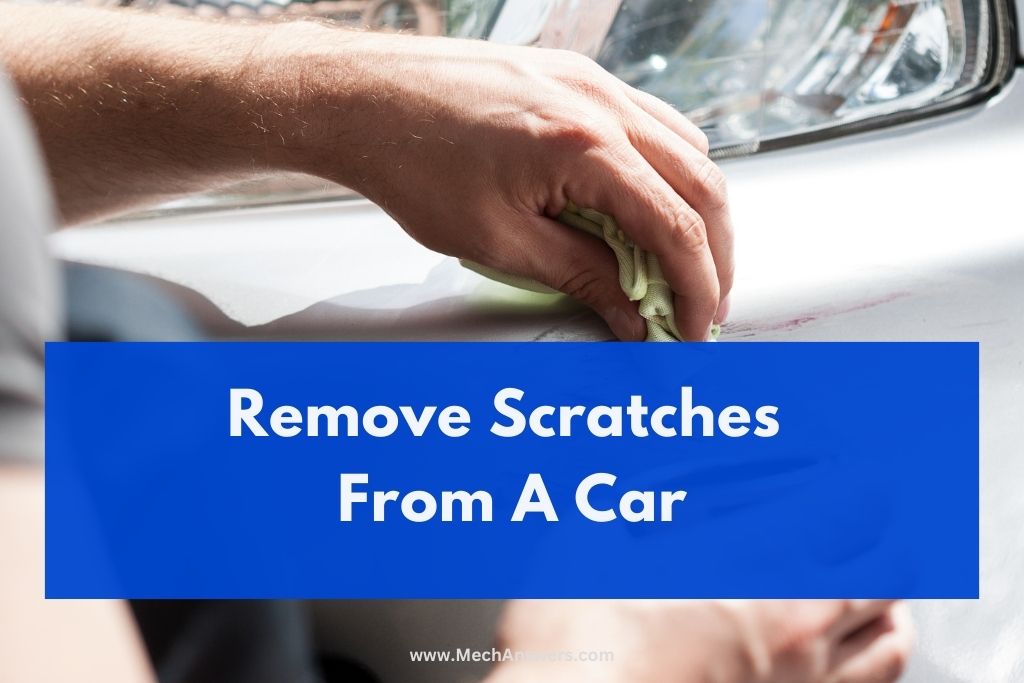
Ever found yourself tirelessly searching online for ways to “Remove Scratches From Car”? Haven’t you? Well, search no more. Cars are susceptible to scratches, and finding the right method to remove them can be a daunting task.
So, how to remove scratches from a car? In this detailed guide, we delve into a variety of methods to tackle car scratches, ranging from simple home remedies like toothpaste and baking soda to professional-grade products and services. You’ll learn how to assess the severity of the scratch, choose the right solution, and apply it effectively to restore your car’s flawless finish.
Whether it’s a superficial mark or a deeper gouge, we provide clear, step-by-step instructions to ensure you can handle it with ease and precision.
Table of Contents
Main Types of Car Scratches
Understanding the main types of car scratches is crucial for effective removal and restoration of your vehicle’s appearance. This guide will delve into clear coat scratches, base coat scratches, and primer coat scratches, providing insights into how each type affects different layers of car paint.
Overview:
- Essential Takeaway: A brief summary highlighting the importance of understanding car scratches and their impact on different paint layers.
- Clear Coat Scratches:
- Overview of what clear coat scratches are and how to fix them.
- Base Coat Scratches:
- Explanation of base coat scratches and methods for repair.
- Primer Coat Scratches:
- Discussion on primer coat scratches and why professional repair is often necessary.
- Explanation of How Different Scratches Affect Various Layers of Car Paint:
- Insight into how different types of scratches impact the car’s paint layers and overall appearance.
Clear Coat Scratches
Clear coat scratches are the most common and least severe type of car scratches. They occur on the outermost layer of the car’s paint, which is designed to protect the underlying layers and provide a glossy finish. Clear coat scratches are usually caused by abrasive cleaning, minor accidents, or environmental factors.
These scratches can often be fixed at home with the right products and techniques. The process involves cleaning the affected area, applying a scratch remover or polishing compound, and buffing the surface until the scratch is no longer visible.
It is essential to follow the product instructions carefully and use the appropriate tools to avoid causing further damage.
- Key Point: Clear coat scratches are superficial and can typically be repaired at home with the correct products and techniques.
Base Coat Scratches
Base coat scratches are more severe than clear coat scratches and require more attention. They penetrate through the clear coat and reach the base coat, where the car’s color is located. These scratches are often caused by more significant impacts, such as key scratches or minor collisions.
Repairing base coat scratches may require touch-up paint to restore the car’s color and appearance. It is crucial to match the touch-up paint precisely to your car’s color, which can be found using the vehicle’s VIN number or by consulting the manufacturer.
After applying the touch-up paint, you will need to seal it with a clear coat to protect the repaired area and restore the glossy finish.
- Key Point: Base coat scratches are more severe and may require touch-up paint and a clear coat to repair.
Primer Coat Scratches
Primer coat scratches are the most severe type of car scratches and require professional attention. They penetrate through both the clear coat and base coat, reaching the primer layer, which is designed to protect the metal body of the car. Primer coat scratches are usually caused by significant impacts or accidents.
Repairing primer coat scratches is a complex process that involves sanding the affected area, applying a primer, color matching and applying touch-up paint, and finally sealing it with a clear coat.
Due to the complexity and the need for precision, it is highly recommended to seek professional help when dealing with primer coat scratches.
- Key Point: Primer coat scratches are the most severe and typically require professional repair to ensure a precise and lasting fix.
Explanation of How Different Scratches Affect Various Layers of Car Paint
Understanding how different types of scratches affect the various layers of car paint is crucial for effective repair. Clear coat scratches only affect the outer layer, while base coat scratches reach the color layer, and primer coat scratches extend to the protective layer above the metal body.
Each layer of car paint has a specific function, and damage to these layers can impact the car’s appearance, protection, and overall value. Addressing scratches promptly and appropriately ensures that your vehicle maintains its aesthetic appeal and remains protected from environmental factors.
- Key Point: Addressing scratches based on their severity and affected paint layers is crucial for maintaining your car’s appearance and protection.
Types of Car Scratches and Recommended Repair Methods
| Type of Scratch | Description | Recommended DIY Method | Recommended Professional Method |
|---|---|---|---|
| Clear Coat Scratch | Shallow scratch that only affects the outermost layer of paint | Scratch removal cream or polish | Machine polish or professional buffing |
| Base Coat Scratch | A deeper scratch that reaches the car’s color layer | Touch-up paint and clear coat application | Professional paint correction |
| Primer Scratch | A scratch that has reached the primer layer | Sanding, applying primer, touch-up paint, and clear coat | Professional repainting of the affected area |
| Deep Scratch (reaching the metal) | A severe scratch that has penetrated through all layers of paint and reached the metal | Not recommended for DIY due to risk of rust and need for extensive repair | Professional repainting and possible rust treatment |
How to Identify Car Scratches
Properly identifying the type of car scratch you are dealing with is the first crucial step toward effective repair. This guide will provide you with the knowledge and tools needed to assess and categorize car scratches, ensuring you choose the most appropriate repair method.
Overview:
- Essential Takeaway: A concise summary highlighting the importance of accurately identifying car scratches.
- Understanding the Different Types of Scratches: Explanation of the various types of car scratches based on their depth and affected paint layer.
- Tools and Techniques for Scratch Assessment: Discussion on the necessary tools and techniques to properly assess the type of scratch on your car.
- Step-by-Step Guide to Identifying Car Scratches: A systematic guide to help you accurately identify the scratches on your vehicle.
- Conclusion and Next Steps: Final thoughts on the importance of scratch identification and guidance on the next steps to take for repair.
Understanding the Different Types of Scratches
Car scratches can be categorized based on their depth and the layer of paint they affect. Clear coat scratches are superficial, affecting only the outermost layer, while base coat scratches are deeper, reaching the car’s color layer. Primer coat scratches are the most severe, extending to the protective layer above the metal.
It’s crucial to differentiate between these types of scratches as they directly influence the repair method you will need to employ. Misidentifying a scratch could lead to ineffective repair attempts and potentially cause further damage to your vehicle.
- Key Point: Accurately identifying the type of scratch on your car is essential for choosing the correct repair method and preventing further damage.
Tools and Techniques for Scratch Assessment
To accurately assess the type of scratch on your car, you will need a few tools and to follow specific techniques. A good quality flashlight or direct sunlight can help illuminate the scratch, making it easier to see the depth and extent of the damage.
Running your fingernail across the scratch can also provide insight into its severity. If your nail catches, the scratch is likely deep, and if it glides smoothly, the scratch is probably superficial. However, this method should be used with caution to avoid causing additional damage.
- Key Point: Using the right tools and techniques is crucial for accurately assessing the type of scratch on your car.
Step-by-Step Guide to Identifying Car Scratches
Identifying car scratches requires a systematic approach. Start by cleaning the area around the scratch thoroughly to remove any dirt or debris that could interfere with your assessment.
Step 1: Examine the Scratch Closely
Take a close look at the scratch, paying attention to its length, width, and depth. Use a flashlight or direct sunlight to highlight the scratch and make it more visible.
Step 2: Feel the Scratch
Gently run your fingernail across the scratch. If your nail catches, the scratch is likely deep, while a smooth feel indicates a superficial scratch.
Step 3: Assess the Color of the Scratch
Look at the color of the scratch. If it’s the same color as your car’s paint, the scratch has likely only affected the clear coat. If it’s darker or shows a different color, the scratch may have reached the base or primer coat.
- Key Point: Following a systematic approach and paying attention to the scratch’s visibility, feel, and color is crucial for accurate identification.
Conclusion and Next Steps
Once you have identified the type of scratch on your car, you can proceed to choose the most appropriate repair method. Understanding the depth and severity of the scratch ensures that you employ the right techniques and products, ultimately leading to a successful repair.
- Key Point: Properly identifying car scratches is the foundation for effective repair, ensuring your vehicle’s appearance is restored and its value maintained.
DIY Car Scratch Repair
DIY car scratch repair is a feasible and economical option for addressing minor surface imperfections on your vehicle. With the right tools and materials, you can effectively remove scratches and restore your car’s appearance, all by yourself.
Overview
After the essential takeaway, we will delve into the following key areas:
- Tools and Materials Needed: A detailed list and explanation of all the necessary items for DIY scratch removal.
- Preparing the Area: Steps to properly clean and prepare the affected area before starting the repair process.
- Sanding the Scratch: Guidance on how to correctly sand the scratch to level the paint and prepare it for polishing.
- Polishing the Area: Instructions on how to polish the area to restore the shine to your car’s paint.
- Applying Touch-Up Paint (If Necessary): Steps to apply touch-up paint if the scratch has penetrated through the clear coat.
- Final Polishing and Waxing: How to give the area a final polish and wax to enhance the shine and protect the repaired area.
Tools and Materials Needed
To embark on DIY car scratch repair, you need to equip yourself with the right tools and materials. This includes various grits of sandpaper, polishing compound, microfiber cloths, and potentially touch-up paint and clear coat.
Sandpapers
You will need a range of sandpapers, starting from 2000-grit for initial sanding, up to 5000-grit for finishing. The finer grits are crucial for smoothing out the scratch and preparing the surface for polishing.
Polishing Compound
A quality polishing compound is necessary for buffing out the scratches and bringing back the shine to your car’s paint. Ensure the compound is suitable for your car’s paint type.
Microfiber Cloths
Microfiber cloths are required for applying the polishing compound and for buffing the surface. Make sure the clothes are clean and free from any debris to prevent further scratches.
Touch-Up Paint and Clear Coat (If Necessary)
If the scratch is deep enough to have penetrated the paint, you might need touch-up paint and a clear coat. Ensure the color matches your car’s original paint.
- Key Point: Equipping yourself with the right tools and materials is the first step to successful DIY car scratch repair.
Preparing the Area
Before you start the repair, it’s crucial to properly prepare the area around the scratch. Cleaning the area ensures that dirt and debris won’t interfere with the repair process.
Cleaning
Use a gentle automotive soap to clean the area, and make sure it’s completely dry before you proceed. Avoid leaving any residue on the surface.
Masking
Use automotive masking tape to protect the surrounding paint. This prevents accidental damage to the adjacent areas during the repair.
- Key Point: Proper preparation of the area is crucial for a successful DIY car scratch repair.
Sanding the Scratch
The next step is to sand the scratch to level the paint and prepare it for polishing. Using the 2000-grit sandpaper and water, gently sand the area, keeping it wet to prevent additional damage.
Assessing the Depth
Periodically check the depth of the scratch to ensure you don’t sand too much. The goal is to level the paint, not to remove it.
Progressing to Finer Grits
Once the scratch is leveled, move to finer grits of sandpaper to smooth the surface. Ensure the area is wet before moving to a finer grit.
- Key Point: Careful sanding and progression to finer grits are essential for a smooth finish.
Polishing the Area
After sanding, the next step is to polish the area to restore the shine to the paint. Apply a small amount of polishing compound to a clean microfiber cloth and gently buff the area.
Right Technique
Use a circular motion and moderate pressure to buff the area. Ensure you cover the entire sanded area for a uniform finish.
Checking Progress
Periodically check your progress to ensure the scratch is disappearing and the shine is being restored. If necessary, apply more polishing compound and continue buffing.
- Key Point: Employing the right technique and regularly checking your progress are crucial for achieving a flawless finish during the polishing stage.
Applying Touch-Up Paint (If Necessary)
If the scratch has penetrated through the clear coat and into the paint, you will need to apply touch-up paint. Ensure the paint matches your car’s original color and apply it carefully to the scratch.
Drying Time
Allow ample time for the touch-up paint to dry completely, following the manufacturer’s instructions. Patience is key during this stage.
Applying Clear Coat (If Necessary)
Once the touch-up paint is dry, apply a clear coat to protect the paint and restore the glossy finish. Ensure the clear coat is applied evenly and allowed to dry completely.
- Key Point: Careful application of touch-up paint and clear coat, followed by sufficient drying time, are crucial for a successful repair.
Final Polishing and Waxing
After the repair is complete, give the area a final polish to ensure a seamless finish. Apply car wax to protect the paint and enhance the shine.
Inspecting the Final Results
Closely inspect the area to ensure the scratch is no longer visible and the finish is smooth and glossy. If necessary, repeat the polishing and waxing until you achieve the desired results.
- Key Point: Final polishing and waxing not only enhance the shine but also protect the repaired area, ensuring long-lasting results.
Step-by-Step Guide to Remove Car Scratches
Removing car scratches, whether minor or deep, is crucial for maintaining your vehicle’s aesthetic appeal and resale value. This guide provides a comprehensive step-by-step approach to help you effectively remove different types of car scratches, ensuring your vehicle looks as good as new.
Overview:
- Assessing the Scratch: Determining the depth and severity of the scratch to choose the appropriate repair method.
- Gathering Materials: Compiling all necessary tools and materials required for the scratch removal process.
- Cleaning the Area: Ensuring the affected area is free from dirt and debris to prevent further damage during the repair.
- Repairing Clear Coat Scratches: Step-by-step instructions for addressing scratches that haven’t penetrated beyond the clear coat.
- Repairing Base Coat or Primer Scratches: Detailed guidance for fixing deeper scratches that have reached the base coat or primer.
- Final Touches: Applying the finishing touches with polish and wax to protect the repair and enhance the car’s shine.
Assessing the Scratch
The first step in removing car scratches is to properly assess the scratch to determine its depth and severity. Understanding the type of scratch on your car is crucial for choosing the right repair method.
Clear Coat Scratches
If the scratch is only on the surface and hasn’t penetrated beyond the clear coat, it’s considered a clear coat scratch. These are usually easier to fix and require less aggressive repair methods.
Base Coat or Primer Scratches
If the scratch has reached the base coat or primer, it’s a deeper scratch that may require more extensive repair methods. In some cases, touch-up paint may be needed.
- Key Point: Properly assessing the scratch is the first step to ensuring a successful repair.
Gathering Materials
Once you have assessed the scratch, gather all the necessary materials for the repair. Having the right tools and materials on hand is crucial for a smooth repair process.
For Clear Coat Scratches
You will need a high-quality scratch remover, a microfiber cloth, and possibly a polishing compound. Ensure the scratch remover is suitable for your car’s finish.
For Base Coat or Primer Scratches
In addition to the materials needed for clear coat scratches, you may also need touch-up paint and a clear coat. Make sure the touch-up paint matches your car’s color exactly.
- Key Point: Gathering the right materials is crucial for effectively repairing car scratches.
Cleaning the Area
Before you start the repair, it’s important to thoroughly clean the area around the scratch. Any dirt or debris left on the surface can cause further damage during the repair process.
Use a Gentle Cleaner
Use a gentle automotive soap and water to clean the area, ensuring all dirt and debris are removed. Dry the area completely before proceeding to the next step.
- Key Point: A clean work area is essential for preventing further damage and ensuring a successful repair.
Repairing Clear Coat Scratches
If the scratch is a clear coat scratch, the repair process is relatively straightforward. You can use a high-quality scratch remover and a microfiber cloth to buff out the scratch.
Apply the Scratch Remover
Apply a small amount of scratch remover to the microfiber cloth and gently buff the area in a circular motion. Apply moderate pressure and work in small sections until the scratch is no longer visible.
Polish the Area
After the scratch is removed, use a polishing compound to restore shine to the area. Ensure the area is completely buffed and the shine is restored before moving on.
- Key Point: Clear coat scratches can be effectively repaired with a scratch remover and some elbow grease.
Repairing Base Coat or Primer Scratches
If the scratch has penetrated the base coat or primer, the repair process is more involved. You may need to use touch-up paint and a clear coat to fully repair the scratch.
Apply Touch-Up Paint
If the scratch has reached the base coat, apply a small amount of touch-up paint to the scratch. Ensure the paint is exactly matched to your car’s color and allow it to dry completely.
Apply Clear Coat
Once the touch-up paint is dry, apply a clear coat to protect the paint and restore the glossy finish. Ensure the clear coat is applied evenly and allowed to dry completely.
- Key Point: Base coat or primer scratches require touch-up paint and a clear coat for complete repair.
Final Touches
After the scratch is repaired, it’s important to give the area a final polish and wax to protect the repair and enhance the shine. This ensures your car looks as good as new and protects the repair from future damage.
Polish and Wax
Use a high-quality car polish and wax to give the area a final shine and protect the paint. Ensure the area is completely polished and waxed for the best results.
- Key Point: Final polishing and waxing protect the repair and enhance your car’s shine, ensuring long-lasting results.
Scratch Removal Products and Tools
| Product/Tool | Purpose | Cost Range | DIY or Professional | Effectiveness |
|---|---|---|---|---|
| Scratch removal cream | To minimize or remove minor scratches | $10 – $30 | DIY | Moderate |
| Touch-up pen | To cover up small, deep scratches | $10 – $20 | DIY | Low to Moderate |
| Sandpaper | To level the paint around deep scratches | $5 – $20 | DIY/Professional | High (when used correctly) |
| Microfiber cloths | For applying products and buffing the surface | $5 – $20 | DIY/Professional | High |
| Machine polisher | To buff out scratches and restore shine | $50 – $300 | Professional | High |
Best Methods to Succeed in Car Scratch Removal
Addressing car scratches promptly and effectively is paramount in preserving your vehicle’s aesthetic appeal and maintaining its value. This guide unfolds a variety of methods, both DIY and professional, to help you successfully eliminate different types of car scratches, ensuring your vehicle regains its pristine condition.
Overview:
In this comprehensive guide, we will explore a range of topics, each tailored to guide you through the process of car scratch removal:
- Understanding Your Car’s Scratch Situation: A thorough examination to assess the extent of the damage and determine the appropriate course of action.
- DIY Scratch Removal Possibilities: Exploring the potential of fixing car scratches by yourself, including the pros and cons.
- Toothpaste Magic: A Surprising Scratch Fix: A step-by-step guide on how to utilize toothpaste as an unconventional yet effective scratch remover.
- Mastering the Art of Scratch Removers: Detailed instructions on how to properly apply scratch removers for optimal results.
- Navigating Through Deeper Scratches: A comprehensive guide on repairing more severe scratches that have penetrated beyond the surface.
- Exploring Various Scratch Removal Methods: An extensive list and explanation of different methods available for car scratch removal, helping you choose the best option for your situation.
With these topics in hand, let’s dive into each section, ensuring you have all the necessary knowledge and skills to bring back the shine and perfection to your vehicle.
Understanding Your Car’s Scratch Situation
Identifying the type and severity of the scratch on your vehicle is the first crucial step in the car scratch removal process. This involves closely examining the affected area to understand how deep the scratch is and which layer of the car’s paintwork has been damaged.
Visual Inspection
Start by cleaning the area around the scratch and conducting a visual inspection. Look for signs that indicate whether the scratch is just on the surface or if it has penetrated the deeper layers of the paint.
The Fingernail Test
Perform the fingernail test by gently running your fingernail across the scratch. If your nail doesn’t catch, it’s likely a clear coat scratch, but if it does, the scratch may be deeper.
- Key Point: Accurately assessing the scratch is vital for choosing the right repair method and ensuring a successful outcome.
DIY Scratch Removal Possibilities
Removing car scratches by yourself can be a cost-effective solution, but it’s important to know when DIY methods are appropriate. Not all scratches can be fixed at home, and some may require professional attention.
Surface Scratches
For minor surface scratches, DIY methods can be quite effective. Products like scratch removal creams can be applied to buff out the scratch.
Deeper Scratches
However, for deeper scratches that have penetrated beyond the clear coat, DIY methods may not suffice. In such cases, professional repair services or touch-up paint may be necessary.
- Key Point: While DIY methods can be effective for minor scratches, deeper scratches may require professional attention.
Toothpaste Magic: A Surprising Scratch Fix
Toothpaste, particularly whitening toothpaste with baking soda, can be used as a makeshift scratch remover for minor surface scratches. This method is cost-effective and easy to try at home.
Application Process
Apply a small amount of toothpaste to a microfiber cloth and rub it into the scratch in a circular motion. After a few minutes of rubbing, wipe away the excess toothpaste and check if the scratch has improved.
Limitations
While this method can work for very light scratches, it’s not a solution for deeper or more severe scratches. It’s important to have realistic expectations when using toothpaste for scratch removal.
- Key Point: Toothpaste can be a quick and cost-effective fix for very light scratches, but it has its limitations.
Mastering the Art of Scratch Removers
Scratch removers are specially formulated products designed to minimize or eliminate car scratches. Using them correctly is key to achieving the best results.
Choosing the Right Product
Select a high-quality scratch remover that is suitable for your car’s finish. Ensure the product is compatible with your vehicle to prevent any potential damage.
Proper Application
Apply the scratch remover to a clean, microfiber cloth and rub it into the scratch using a circular motion. Follow the product’s instructions carefully and take your time to achieve the best results.
- Key Point: Using the right scratch remover and applying it correctly can significantly improve the appearance of car scratches.
Navigating Through Deeper Scratches
Deeper scratches that have penetrated beyond the clear coat require a more comprehensive repair approach. This may involve using touch-up paint and a clear coat to fully restore the affected area.
Assessing the Damage
Determine how deep the scratch is and whether it has reached the base coat or primer. This will dictate the type of repair method needed.
Professional Repair
For deep scratches, it may be best to seek professional repair services. Professionals have the tools and expertise to repair deeper scratches and ensure a seamless finish.
- Key Point: Deeper scratches may require professional repair or the use of touch-up paint and a clear coat for complete restoration.
Exploring Various Scratch Removal Methods
There are various methods available for car scratch removal, each with its own set of pros and cons. Choosing the right method depends on the type and severity of the scratch.
DIY Methods
DIY methods, such as using toothpaste or a scratch removal product, are cost-effective and can be done at home. These are best suited for minor surface scratches.
Professional Services
For deeper scratches or if you’re unsure about the DIY approach, professional services offer expertise and high-quality results. This option ensures the scratch is repaired correctly, but it comes at a higher cost.
- Key Point: Understanding the different scratch removal methods available helps you choose the best option for your situation, ensuring a successful outcome.
Pros, Cons, Effectiveness, and Time Required for Scratch Removal Methods
| Method | Pros | Cons | Effectiveness Rating | Time Required | Type of Scratch |
|---|---|---|---|---|---|
| DIY Methods | |||||
| Toothpaste, Baking Soda | Cost-effective, quick fix for very minor scratches | Not effective for deeper scratches, potential for incorrect use | Low | Less than 1 hour | Clear Coat Scratch |
| Scratch Removal Cream | Affordable, easy to use | May not work on deeper scratches | Medium | 1-2 hours | Clear Coat Scratch |
| Touch-up Pen | Convenient, affordable | Limited effectiveness, requires precision | Low to Medium | 2-4 hours | Base Coat Scratch |
| Professional Methods | |||||
| Paint Correction | High effectiveness, professional finish | Can fix deep scratches, restore original look | High | Several hours to a day | All Types |
| Touch-up Paint | Professional finish, long-lasting | Expensive, requires professional skills | High | Several hours to a day | Base Coat Scratch, Primer Scratch |
| Alternative Methods | |||||
| Car Wraps, Paint Protection Film | Provides a protective layer, and can enhance the car’s appearance | Expensive, not a direct method for scratch removal | N/A | Varies | Preventative Measure |
| Sanding and Repainting | Can fix deep scratches, restores original look | Expensive, time-consuming, requires professional skills | High (when done professionally) | Several hours to days | Primer Scratch, Deep Scratch |
DIY Car Scratch Repair Cost
DIY car scratch repair can be a cost-effective solution for minor damages, potentially saving you hundreds of dollars compared to professional services. However, it’s crucial to understand the potential costs and required materials to ensure a successful repair.
Overview:
In this article, we will cover:
- The different types of car scratches and the materials needed for DIY repair.
- A detailed cost breakdown of DIY scratch removal.
- A comparison between DIY repair costs and professional repair services.
- Tips on how to decide whether to go for DIY repair or seek professional help.
Types of Scratches and Materials Needed
Different types of car scratches require specific materials and tools for repair. Clear coat scratches, the most superficial type, can often be fixed with a scratch removal cream and a microfiber cloth. For base coat scratches, you might need a touch-up paint pen in addition to the scratch remover.
Deeper scratches that reach the primer or metal layer will require more extensive materials, including sandpaper, primer, and possibly color-matched paint.
- Key Point: Understanding the type of scratch on your car is crucial for determining the materials needed for repair, which directly influences the overall cost.
Cost Breakdown for DIY Scratch Removal
The cost of DIY car scratch repair can vary widely depending on the severity of the scratch and the materials required. For minor clear coat scratches, a high-quality scratch removal cream might cost between $10 to $30.
If touch-up paint or additional materials are needed, the cost could increase to $50 or even $100 for deeper scratches. However, these costs are significantly lower than what you might pay for professional repair services.
- Key Point: DIY scratch repair is a cost-effective option for minor damages, with potential savings of hundreds of dollars compared to professional services.
Comparison with Professional Repair Costs
Professional car scratch repair services offer expertise and high-quality results, but they come at a premium. A professional paint correction service can cost anywhere from $150 to $300 for minor scratches, and upwards of $500 for deeper damages.
While these services provide a guarantee of quality and longevity, the cost difference compared to DIY methods is substantial.
- Key Point: While professional repair services offer unmatched quality, DIY car scratch repair presents a significantly more affordable option for minor to moderate damages.
Making an Informed Decision
Balancing cost and quality is key when deciding between DIY and professional car scratch repair. For minor scratches, a DIY approach can provide satisfactory results without breaking the bank. However, for more severe damages or if you’re unsure about the repair process, seeking professional help might be the safer choice.
- Key Point: Consider the severity of the scratch, your budget, and your comfort with DIY repairs when choosing between DIY and professional scratch removal.
Pros and Cons of DIY Scratch Removal
DIY scratch removal can be a cost-effective and satisfying solution, but it requires time, patience, and the right tools. On the other hand, while professional services offer convenience and expertise, they come at a higher cost.
Overview:
In this article, we will delve into:
- The advantages of DIY scratch removal.
- The disadvantages and potential risks of DIY methods.
- A comparison between DIY and professional scratch removal.
- Tips on how to decide which option is best for you.
Advantages of DIY Scratch Removal
Opting for DIY scratch removal offers a sense of accomplishment and can save you money. With the right tools and materials, minor scratches can be effectively removed at a fraction of the cost of professional services.
Additionally, DIY methods provide the convenience of fixing the issue on your own time, without the need to schedule an appointment or wait for the car to be serviced.
- Key Point: DIY scratch removal is a cost-effective solution that provides a sense of accomplishment and convenience.
Disadvantages and Potential Risks of DIY Methods
While DIY scratch removal has its perks, it also comes with potential risks and disadvantages. Without the proper knowledge and tools, there’s a risk of causing further damage to the car’s paintwork.
Additionally, DIY methods may not provide the same level of finish and longevity as professional services, potentially affecting the car’s resale value.
- Key Point: DIY scratch removal carries potential risks and may not offer the same level of quality as professional services.
Comparison Between DIY and Professional Scratch Removal
Understanding the differences between DIY and professional scratch removal is crucial for making an informed decision. Professional services offer expertise, high-quality materials, and a guarantee of workmanship. However, these services come at a higher cost and may require you to be without your car for a period of time.
- Key Point: Weighing the pros and cons of DIY and professional scratch removal will help you choose the option that best suits your needs and budget.
Deciding Which Option is Best for You
Your decision between DIY and professional scratch removal should be based on the severity of the scratch, your budget, and your level of confidence in performing the repair.
For minor scratches, a DIY approach may be sufficient. However, for deeper or more extensive damage, seeking professional help is advisable to ensure the best results.
- Key Point: Consider the severity of the scratch, your budget, and your DIY skills when deciding between DIY and professional scratch removal.
Comparison of DIY and Professional Scratch Removal
| Criteria | DIY Scratch Removal | Professional Scratch Removal |
|---|---|---|
| Cost | Low | High |
| Time Required | Varies, usually quicker | Longer, depending on the severity and booking availability |
| Skill Level Needed | Low to moderate | High, professional skills required |
| Effectiveness | Good for minor scratches | Excellent for all types of scratches |
| Risk of Further Damage | Higher, especially if not done carefully | Low, as professionals have the right tools and expertise |
Best Car Scratch Removers
The best car scratch removers effectively eliminate scratches, restoring the vehicle’s aesthetic appeal. They are easy to use, affordable, and provide long-lasting results.
Overview:
In this article, we will delve into:
- Reviews of top car scratch removers.
- Factors to consider when choosing a car scratch remover.
- How to use car scratch removers for optimal results.
Introduction to Car Scratch Removers
Car scratch removers are specially formulated products designed to minimize or eliminate scratches on your vehicle’s paintwork. They work by smoothing out the surface, filling in the scratches, and providing a protective layer to prevent further damage.
These products come in various forms, including creams, pastes, and kits, catering to different types of scratches and user preferences.
Review of Product 1: ScratchOut Pro
Features and Benefits
ScratchOut Pro is renowned for its advanced formula that effectively tackles a wide range of scratches, from minor surface marks to deeper imperfections. It comes with a user-friendly applicator and detailed instructions, ensuring a hassle-free application process. The product not only removes scratches but also restores the shine and luster of the car’s paintwork.
Performance and Effectiveness
Users have reported significant improvements in the appearance of scratches after using ScratchOut Pro, noting its quick action and long-lasting results. The product has garnered praise for its ability to bring back the car’s original shine, making it a favorite among car enthusiasts and professionals alike.
Price and Value for Money
Priced at around $20 for a 250ml bottle, ScratchOut Pro offers excellent value for money. Its efficiency in removing scratches and restoring the car’s appearance makes it a cost-effective solution compared to professional repair services.
- Key Point: ScratchOut Pro stands out for its advanced formula, ease of use, and ability to restore the car’s original shine, offering great value for money.
Review of Product 2: ShineArmor Revitalizer
Features and Benefits
ShineArmor Revitalizer is a versatile car scratch remover that doubles as a paint restorer and protective coating. Its all-in-one formula saves time and effort, making it a convenient choice for car owners. The product is safe for all paint colors and types, ensuring wide applicability.
Performance and Effectiveness
Customers have praised ShineArmor Revitalizer for its quick action in removing light to moderate scratches and its ability to leave a protective layer that prevents future damage. The product has proven to be effective in enhancing the car’s overall appearance, adding a glossy finish to the paintwork.
Price and Value for Money
With a price tag of around $25 for a 500ml bottle, ShineArmor Revitalizer offers good value, especially considering its multifunctional capabilities. Its long-lasting formula ensures that a little goes a long way, making it a cost-effective option for regular use.
- Key Point: ShineArmor Revitalizer is praised for its multifunctional capabilities, effectiveness in scratch removal, and additional protective benefits, providing good value for money.
Review of Product 3: NanoMagic Cloth
Features and Benefits
NanoMagic Cloth is a revolutionary product that utilizes nanotechnology to remove scratches and stains from your car’s surface. Its easy-to-use, cloth-based application makes it a convenient option for quick touch-ups and on-the-go repairs. The product is suitable for all car colors and types, ensuring versatility.
Performance and Effectiveness
Users have reported impressive results with NanoMagic Cloth, especially for light scratches and surface imperfections. The product’s nanotechnology formula ensures a deep clean and scratch removal, leaving a smooth and shiny finish.
Price and Value for Money
Priced at around $15 for a pack of three clothes, NanoMagic Cloth offers an affordable and practical solution for car scratch removal. Its reusable nature and long-lasting formula provide excellent value for money, making it a popular choice among car owners.
- Key Point: NanoMagic Cloth stands out for its innovative use of nanotechnology, ease of use, and affordability, offering a practical solution for car scratch removal.
Factors to Consider When Choosing a Car Scratch Remover
When selecting a car scratch remover, consider the depth and severity of the scratches, the product’s formula, ease of use, and value for money. Opt for products with positive customer reviews and proven effectiveness to ensure satisfactory results.
Conclusion and Recommendations
In conclusion, the market offers a variety of car scratch removers to suit different needs and preferences. ScratchOut Pro, ShineArmor Revitalizer, and NanoMagic Cloth are among the top products, each with unique features and benefits. We recommend assessing your specific needs and conducting thorough research to find the best product for your vehicle.
- Key Point: Choosing the right car scratch remover depends on the severity of the scratches, the product’s features, and your personal preferences, with ScratchOut Pro, ShineArmor Revitalizer, and NanoMagic Cloth being top recommendations.
Car Scratch Repair Kits
Car scratch repair kits are comprehensive solutions designed to tackle various types of scratches, providing all necessary tools and materials in one package. These kits offer a convenient and cost-effective alternative to professional repair services, ensuring that even beginners can achieve excellent results.
Overview:
- Introduction to Car Scratch Repair Kits
- Components of a Typical Car Scratch Repair Kit
- Step-by-Step Guide on How to Use a Car Scratch Repair Kit
- Top Recommended Car Scratch Repair Kits
- Tips and Tricks for Successful Scratch Removal
- Maintenance After Scratch Repair
- Conclusion
Introduction to Car Scratch Repair Kits
Car scratch repair kits are curated collections of tools and materials specifically designed to address car scratches. They provide a DIY solution that is both accessible and efficient, catering to a variety of scratch types and vehicle colors.
These kits typically include abrasives, polishes, and applicators, ensuring that users have everything they need to tackle scratches head-on.
Components of a Typical Car Scratch Repair Kit
Abrasives and Polishes
Most kits will include a range of abrasives and polishes, each designed for different scratch depths. Abrasives help to level the scratched area, while polishes restore the shine and finish of the paintwork. It’s crucial to use these products in the correct order and quantity to achieve the best results.
Applicators and Cloths
Quality applicators and microfiber cloths are essential for applying and removing products without causing further damage. These tools ensure an even application and help to buff out the repaired area, blending it seamlessly with the surrounding paintwork.
Clear Coat Pens
Some kits also include clear coat pens, which provide a protective layer over the repaired area. These pens help to seal the repair, ensuring longevity and protection against the elements.
- Key Point: A typical car scratch repair kit includes abrasives, polishes, applicators, and sometimes clear coat pens, providing a comprehensive solution for scratch repair.
Step-by-Step Guide on How to Use a Car Scratch Repair Kit
Assessing the Scratch
Before starting the repair process, it’s crucial to assess the depth and severity of the scratch. This will determine which components of the kit you will need to use and guide you through the repair process.
Cleaning the Area
Thoroughly clean the area around the scratch, ensuring that all dirt and debris are removed. This prevents further damage during the repair process and ensures that the products can work effectively.
Applying the Abrasive
If the scratch is deep, start with the abrasive, applying it as directed and using the applicator to work it into the scratch. Be gentle and patient, as applying too much pressure can cause more damage.
Polishing the Area
Once the scratch is leveled, use the polish to restore the shine to the paintwork. Apply the polish in a circular motion, working it into the area until the scratch is no longer visible.
Applying the Clear Coat
If your kit includes a clear coat pen, apply it over the repaired area to provide a protective layer. This step is crucial for ensuring the longevity of the repair and protecting against future damage.
- Key Point: Using a car scratch repair kit involves assessing the scratch, cleaning the area, applying abrasives and polishes, and finishing with a clear coat for protection.
Top Recommended Car Scratch Repair Kits
Kit A: Comprehensive Solution
Kit A is known for its wide range of components, catering to all types of scratches. It includes multiple abrasives, polishes, and a clear coat pen, ensuring a complete repair solution.
Kit B: User-Friendly Option
Kit B stands out for its simplicity and ease of use, making it a great option for beginners. It includes straightforward instructions and essential components, ensuring a hassle-free repair process.
Kit C: Budget-Friendly Choice
Kit C offers a cost-effective solution without compromising on quality. It includes the basics for scratch repair, providing good results at an affordable price.
- Key Point: There are various car scratch repair kits available, ranging from comprehensive solutions to user-friendly and budget-friendly options.
Tips and Tricks for Successful Scratch Removal
Take Your Time
Patience is key when using a car scratch repair kit. Take your time to follow the instructions carefully and avoid rushing the process to ensure the best results.
Test Products First
Before applying any product to the scratched area, test it on a small, inconspicuous area of the car to ensure compatibility. This prevents potential damage and ensures that the products are suitable for your vehicle’s paintwork.
Follow the Instructions
Each kit comes with its own set of instructions. Follow these closely to ensure that you are using the products correctly and in the right order.
- Key Point: For successful scratch removal, take your time, test products first, and follow the instructions provided with your car scratch repair kit.
Maintenance After Scratch Repair
After repairing a scratch, it’s important to maintain the area to prevent future damage. Regularly clean and wax your car to protect the paintwork and keep it looking its best.
FAQ
How Can I Remove Scratches from My Car at Home?
Removing scratches from your car at home requires identifying the depth of the scratch and choosing the appropriate method. For minor surface scratches, a scratch removal product or a homemade solution like toothpaste can be effective. Ensure the area is clean before starting, and follow the product instructions carefully.
Tools and Materials
You will need a microfiber cloth, a scratch removal product or toothpaste, and possibly some sandpaper for deeper scratches. Ensure you have all the necessary tools and materials before starting the process.
Step-by-Step Guide
Start by cleaning the area around the scratch. Apply the scratch remover or toothpaste to the microfiber cloth and rub it into the scratch in a circular motion. For deeper scratches, you may need to use sandpaper before applying the scratch remover, but be cautious and gentle to avoid causing further damage.
- Key Point: Removing scratches at home requires identifying the scratch depth, gathering the necessary tools and materials, and following a step-by-step process.
Can You Actually Remove Scratches from Car?
Yes, it is possible to remove scratches from a car, but the success of the removal depends on the depth of the scratch. Surface scratches can usually be removed with scratch removal products or DIY methods, while deeper scratches may require professional attention.
Limitations of DIY Methods
While DIY methods can be effective for minor scratches, they may not be suitable for deeper or more severe scratches. Understanding the limitations of DIY methods is crucial to avoid causing further damage to your car’s paintwork.
- Key Point: Scratches can be removed from a car, but the success depends on the scratch’s depth, and there are limitations to DIY methods.
What Is the Best Method for Removing Scratches from Car Paint?
The best method for removing scratches from car paint depends on the scratch’s depth and severity. For minor surface scratches, scratch removal products or DIY solutions like toothpaste can work well. For deeper scratches, a more comprehensive approach, including sanding and repainting, may be required.
Professional Services
For deeper scratches that have penetrated the paintwork, seeking professional help is often the best course of action. Professionals have the tools and expertise to repair the damage without causing further issues.
- Key Point: The best method for removing scratches from car paint depends on the scratch’s depth, with professional services being the best option for deeper scratches.
Will Toothpaste Remove Scratches from Car?
Toothpaste can be used to remove minor surface scratches from a car’s paintwork. The abrasive properties of toothpaste can help to level out the scratches and improve the appearance of the paintwork.
How to Use Toothpaste for Scratch Removal
Clean the area around the scratch and apply a small amount of toothpaste to a microfiber cloth. Rub the toothpaste into the scratch in a circular motion, applying gentle pressure. Wipe away any excess toothpaste and check the results, repeating the process if necessary.
- Key Point: Toothpaste can be used to remove minor surface scratches from a car, but it is important to use it carefully and follow the correct process.
Related Articles
Read more >> Types Of Car Scratches: 12 Main Types, Fixes & Costs
Read more >> How To Remove Deep Scratches From Car? (12 Ways To Remove)
Conclusion
In conclusion, addressing car scratches promptly and effectively is crucial to maintaining your vehicle’s aesthetic appeal and resale value. Whether you opt for DIY methods or professional services depends on the scratch’s severity and your comfort level with car maintenance.
This comprehensive guide has provided insights into various approaches, from using household items like toothpaste for minor scratches to seeking professional help for more severe damage.
By understanding the nature of the scratch and evaluating the available options, you can make an informed decision and restore your car’s pristine condition. Remember, patience and precision are key to successful car scratch repair.
Reference Source
www.reddit.com/r/cars/comments/pd219b/can_i_remove_these_scratches/