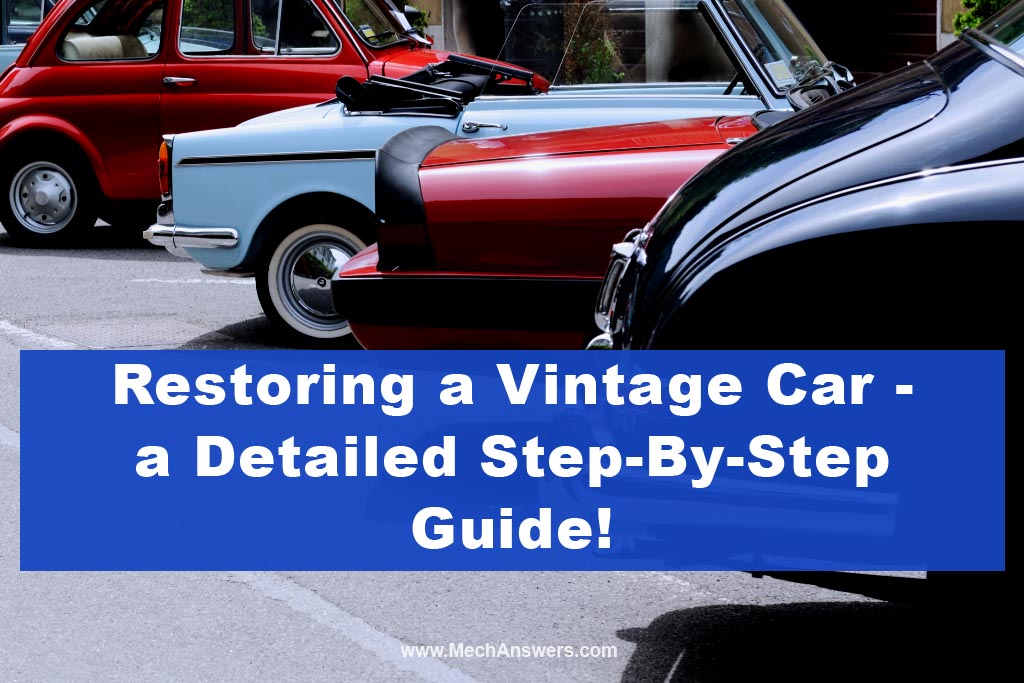
Welcome to “Restoring a Vintage Car – A Detailed Step-By-Step Guide,” your ultimate resource for bringing your beloved classic automobile back to life!
So, what does it take to restore a vintage car? It demands a blend of mechanical prowess, relentless dedication, a deep understanding of the vehicle’s history, and a passion for preserving its originality. The satisfaction derived from such a process is unparalleled, making the experience deeply rewarding and captivating.
We’ll cover essential topics such as preparing your workspace, finding parts and materials, and tackling every aspect of the restoration process, including the engine, transmission, suspension, steering, brakes, electrical system, and interior.
Table of Contents
What Makes a Car Vintage?
For this article, a vintage car is defined as an automobile that was manufactured at least 30 years ago and holds significant historical, cultural, or design value. Vintage cars are often characterized by their distinctive design elements, mechanical features, and the innovative engineering of their respective eras.
These automobiles are typically associated with a bygone time in automotive history, representing a period when craftsmanship and unique styling were at the forefront of car production.
A car is considered vintage if it meets the following criteria:
Age:
The car must be at least 30 years old, ensuring that it represents a specific era in automotive history.
Historical or cultural significance:
The car should have a notable background or be associated with a particular time, event, or achievement that adds to its allure and importance.
Design and engineering:
The car should showcase the distinctive design elements and mechanical features that were prevalent during its production period, setting it apart from modern automobiles.
Rarity:
While not a strict requirement, many vintage cars are considered valuable due to their limited production numbers or the scarcity of surviving examples, adding to their collectible appeal.
It’s important to note that the definition of a vintage car may vary depending on regional regulations, car clubs, or enthusiasts’ opinions. However, the criteria mentioned above serve as a general guideline for identifying a vintage car for this restoration guide.
Identifying Your Dream Vintage Car
Embarking on a vintage car restoration journey begins with identifying the classic automobile that sparks your passion and enthusiasm.
This process involves considering your personal preferences, understanding the significance of various makes and models, and researching the history and background of the car you desire. This section will guide you through these considerations to help you identify your dream vintage car.
Assessing Personal Preferences and Interests
Your personal preferences and interests play a significant role in choosing the right vintage car for your restoration project. Start by reflecting on the types of cars that have always captivated you. Consider factors such as design, performance, and rarity.
Additionally, think about the era that appeals to you the most. Are you drawn to the elegance of the 1920s, the sleek designs of the 1950s, or the muscle cars of the 1960s and 70s? By understanding your preferences, you will be better equipped to select a car that truly resonates with you and keeps you motivated throughout the restoration process.
Evaluating the Significance of Specific Makes and Models
Once you have a general idea of the type of vintage car you desire, delve deeper into the significance of specific makes and models. Some classic cars are known for their groundbreaking designs or engineering feats, while others have cultural or historical significance.
Research the unique characteristics, performance capabilities, and production numbers of various makes and models to further refine your choice.
This information will not only help you identify the perfect car but also provide you with valuable knowledge to share with fellow enthusiasts and potential buyers.
Researching the History and Background of Your Desired Car
With a particular make and model in mind, it’s essential to research the history and background of the car you wish to restore. This research includes understanding the model’s production history, learning about any notable ownership or racing achievements, and exploring the car’s place in automotive history.
Additionally, investigate the typical issues and challenges associated with your desired car, such as common rust areas or known mechanical problems.
This information will give you a better understanding of what to expect during the restoration process and help you make a more informed decision about whether this is the right car for your project.
Sourcing and Acquiring Your Vintage Car
Once you’ve identified your dream vintage car, the next step is to find and acquire the right vehicle for your restoration project. This process involves utilizing various resources, evaluating the car’s condition, and negotiating a fair price.
In this section, we’ll discuss each of these aspects in detail to help you source and acquire your vintage car with confidence.
Tips for Finding the Right Vehicle
Online and Print Resources:
Begin your search by exploring online classifieds, auction sites, and vintage car forums. Many websites cater specifically to classic car enthusiasts and can help you locate your desired vehicle.
Additionally, consider browsing print resources such as classic car magazines and local newspapers, as they may contain listings that haven’t made their way online.
Networking with Fellow Enthusiasts:
Connecting with other vintage car enthusiasts can be an invaluable resource during your search. Join local car clubs or online forums to discuss your desired vehicle and gather information on potential leads.
Fellow enthusiasts can provide insider knowledge on the availability of specific cars, suggest reputable sellers, and offer advice on what to look for when inspecting a vintage car.
Attending Car Shows and Auctions:
Car shows and auctions are excellent opportunities to find vintage cars for sale. These events often showcase a wide variety of classic vehicles and provide the chance to see your desired car in person before making a purchase.
Additionally, you can network with fellow enthusiasts, sellers, and experts who can offer valuable guidance and insights.
Evaluating the Condition of the Car
Before purchasing a vintage car, it’s essential to carefully evaluate its condition. Assess the vehicle’s structural integrity, looking for signs of rust, corrosion, or damage.
Examine the engine, transmission, suspension, and electrical systems to determine the extent of necessary repairs or replacements.
Inspect the interior for wear and tear, including upholstery, dashboard components, and headliner. If possible, enlist the help of an experienced vintage car mechanic to ensure a thorough assessment.
Determining a Fair Price and Negotiating the Purchase
Once you’ve found a vintage car that meets your criteria, the next step is to determine a fair price. Research the market value of similar vehicles in comparable conditions, taking into account factors such as rarity, provenance, and the extent of required restoration work.
With a price range in mind, approach the seller and negotiate the purchase, using your research and the car’s condition to support your offer.
Remember that while securing a good deal is important, being respectful and fair in your negotiations can lead to a smoother transaction and a positive experience for both parties.
Preparing for the Restoration Project
Once you have acquired your dream vintage car, it’s time to prepare for the restoration process. This stage involves setting up a proper workspace, creating a restoration plan, and sourcing parts and materials.
In this section, we’ll discuss each of these steps in detail to help you establish a solid foundation for a successful restoration project.
Securing a Proper Workspace
Size Requirements: The workspace for your restoration project should be spacious enough to accommodate the car, tools, equipment, and disassembled parts.
Ensure that there is ample room to move around and work comfortably in all areas of the vehicle. Ideally, your workspace should also have enough space for storage and organization.
Environmental Considerations:
A suitable workspace should be well-ventilated, temperature-controlled, and protected from the elements.
Good lighting is essential for precise work, so make sure your workspace has sufficient natural or artificial lighting. If possible, choose a space with a solid, level floor to facilitate jacking up the vehicle and working underneath it.
Tools and Equipment:
Before starting the restoration process, gather all necessary tools and equipment. This includes hand tools, power tools, safety gear, and specialized automotive tools such as engine hoists and bodywork equipment.
Investing in high-quality tools will pay off in the long run and make your restoration work more efficient and enjoyable.
Creating a Restoration Plan
Setting Goals and Milestones:
Develop a clear plan for your restoration project, outlining your goals and the desired outcome. Break down the process into manageable milestones, such as completing the bodywork, rebuilding the engine, or restoring the interior. This will help you stay organized and focused throughout the project.
Allocating Time and Resources:
Estimate the time and resources needed for each phase of the restoration, considering factors such as your skill level, the car’s condition, and the availability of parts and materials. Be realistic about your commitments and set a timeline that allows for unforeseen challenges and delays.
Documenting the Project:
Keep a detailed record of your restoration project, including photographs, notes, receipts, and any relevant information about parts and suppliers.
This documentation will serve as a valuable reference throughout the process and can also enhance the car’s provenance and value once the restoration is complete.
Sourcing Parts and Materials
Locating Original Parts:
Whenever possible, try to source original parts for your vintage car. These parts maintain the car’s authenticity and can contribute to its value. Search online, contact classic car clubs, or network with fellow enthusiasts to locate original parts.
Identifying Reputable Suppliers:
When sourcing parts and materials, it’s essential to deal with reputable suppliers who specialize in vintage car restoration. These suppliers often have extensive knowledge of specific makes and models and can provide guidance and support throughout the process.
Exploring Aftermarket Alternatives:
In some cases, original parts may be unavailable or prohibitively expensive. In these situations, consider using high-quality aftermarket parts or reproductions.
While these may not be identical to the original components, they can still provide an acceptable solution for your restoration project. Be sure to research and compare alternatives carefully to ensure the best possible fit and quality for your vintage car.
Disassembly and Inspection
The disassembly and inspection phase of your vintage car restoration project is crucial in identifying the extent of repairs and restoration work needed.
This stage involves organizing and cataloging parts, inspecting for damage and wear, assessing structural integrity, and identifying areas that require special attention. In this section, we’ll discuss each of these steps to ensure a thorough evaluation of your vintage car.
Organizing and Cataloging Parts
As you disassemble your vintage car, it’s essential to keep track of all parts and components to ensure a smooth reassembly process.
Create an organized system for cataloging and storing parts, such as labeling containers or using a spreadsheet to document part names, locations, and any notes or observations.
Taking photographs of parts and their original positions can also help you recall how they fit together when it’s time to reassemble the vehicle.
Inspecting for Damage and Wear
During disassembly, carefully inspect each part for signs of damage, wear, or corrosion. Pay close attention to areas that are prone to rust, such as the frame, body panels, and suspension components.
Examine mechanical and electrical components for wear and tear, and determine whether they can be repaired or need to be replaced.
This inspection process will help you create a comprehensive list of necessary repairs and replacements, allowing you to plan and budget accordingly.
Assessing Structural Integrity
One of the most critical aspects of your vintage car restoration project is ensuring the structural integrity of the vehicle. This includes evaluating the condition of the frame, chassis, and body panels. Check for signs of rust, damage, or previous repairs that may compromise the car’s strength and safety.
In some cases, you may need to consult with a professional to repair or replace structural components, such as welding in new frame sections or fabricating replacement body panels.
Identifying Areas That Require Special Attention
As you disassemble and inspect your vintage car, be on the lookout for areas that require special attention or expertise.
These may include complex mechanical systems, rare or hard-to-find parts, or areas with extensive damage that require professional restoration.
Identifying these areas early on will help you plan and allocate resources effectively, ensuring that your restoration project proceeds smoothly and efficiently.
Additionally, you may need to consult with experts or seek additional training to address these areas confidently and competently.
Body and Frame Restoration
Restoring the body and frame of your vintage car is a vital aspect of the restoration process, as it ensures the vehicle’s structural integrity and aesthetic appeal. This stage involves rust removal and prevention, repairing or replacing body panels, aligning and straightening the frame, and preparing the surface for paint. In this section, we’ll discuss each of these steps to help you achieve a high-quality body and frame restoration.
Rust Removal and Prevention
Chemical Methods:
Chemical rust removers are available in the form of liquids, gels, or sprays that can be applied to rusted areas. These products react with the rust, dissolving it and allowing for easy removal.
Once the rust is removed, it’s essential to treat the metal with a rust converter or rust inhibitor to prevent future rust formation.
Mechanical Methods:
Mechanical rust removal techniques involve physically removing rust from the metal using tools like wire brushes, sandpaper, or abrasive blasting.
This process can be time-consuming and labor-intensive, but it can be highly effective in removing rust and exposing clean, bare metal. After removing the rust, apply a rust converter or rust inhibitor to protect the metal from future rust formation.
Repairing or Replacing Body Panels
Depending on the extent of damage or rust, body panels may need to be repaired or replaced. Small dents and imperfections can often be fixed using body filler, while larger areas of damage or corrosion may require welding in new metal patches or replacing the entire panel.
When repairing or replacing body panels, it’s essential to ensure proper alignment and fitment to maintain the vehicle’s original appearance and structural integrity.
Aligning and Straightening the Frame
A straight and properly aligned frame is crucial for the vehicle’s performance, handling, and safety. Inspect the frame for signs of damage, warping, or misalignment, and enlist the help of a professional if necessary to straighten and align the frame.
This process may involve using specialized equipment like a frame straightening machine or hydraulic jacks to correct any deviations in the frame’s geometry.
Preparing the Surface for Paint
Sanding and Smoothing:
After completing all bodywork and rust repairs, prepare the surface for paint by sanding and smoothing the entire vehicle. This process involves removing any remaining paint, primer, or filler, and creating a smooth, even surface for the new paint to adhere to.
Use progressively finer grits of sandpaper to achieve the desired level of smoothness.
Priming:
Apply a high-quality primer to the entire surface of the vehicle, following the manufacturer’s instructions for application and drying times. The primer provides a consistent base for the paint to adhere to and helps to fill any minor imperfections in the surface.
Sealing:
Before applying the final paint, apply a sealer to the primed surface. The sealer acts as a barrier between the primer and paint, preventing any potential reactions between the two layers and ensuring a smooth, even finish.
Follow the manufacturer’s instructions for application and drying times, and ensure the surface is clean and dust-free before proceeding to the painting stage.
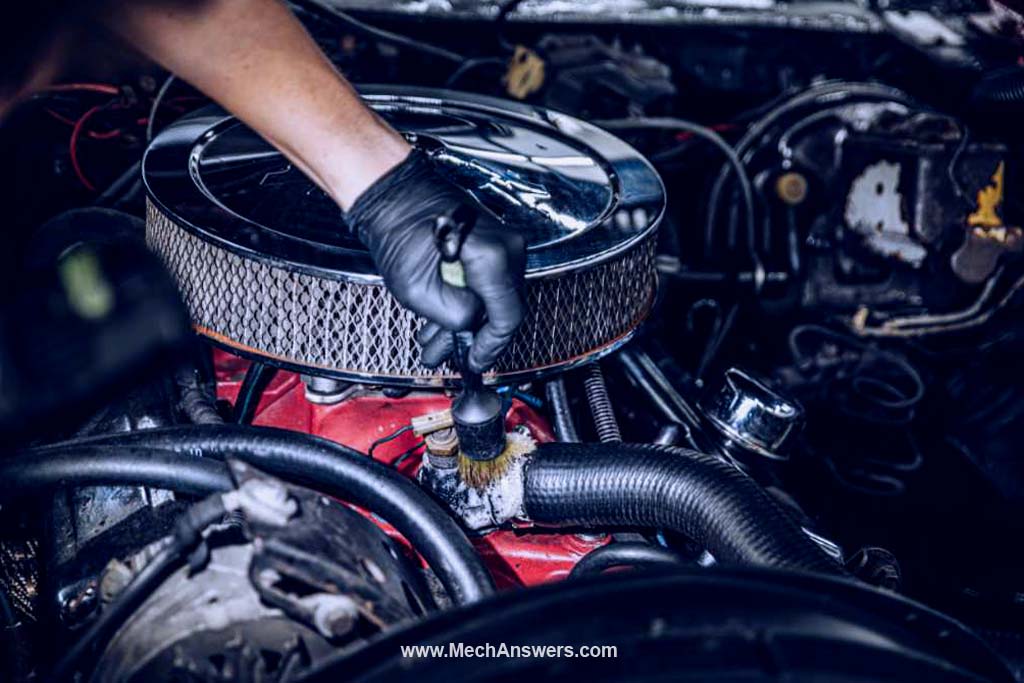
Engine and Transmission Restoration
Restoring the engine and transmission is crucial for the performance and reliability of your vintage car.
This process involves disassembly and inspection, rebuilding or replacing the engine and transmission, and ensuring that all components are in top working condition.
In this section, we’ll discuss each of these steps to help you achieve a successful engine and transmission restoration.
Engine Disassembly and Inspection
Cleaning Components:
As you disassemble the engine, thoroughly clean each component to remove dirt, grease, and grime. This process will allow you to inspect the parts more easily and identify any wear or damage that may require repair or replacement.
Checking for Wear and Damage:
Carefully inspect each engine component for signs of wear, damage, or corrosion. Pay particular attention to critical parts such as the pistons, cylinders, camshaft, and crankshaft. Any components that are worn or damaged beyond repair should be replaced with new or refurbished parts.
Rebuilding or Replacing the Engine
Machining Services:
If your engine requires significant repairs or modifications, consider enlisting the help of a professional machinist.
They can perform tasks such as resurfacing cylinder heads, boring and honing cylinders, and grinding crankshafts to ensure that all components are in optimal condition and within factory specifications.
Installing New Components:
Reassemble the engine using new or refurbished components as needed. This may include replacing worn bearings, seals, gaskets, and other parts to ensure optimal performance and reliability. Follow the manufacturer’s guidelines for proper assembly and torque specifications.
Transmission Disassembly and Inspection
Similar to the engine restoration process, begin by disassembling the transmission and cleaning each component.
Inspect all parts for signs of wear, damage, or corrosion, paying particular attention to gears, bearings, and seals. Any components that are worn or damaged beyond repair should be replaced with new or refurbished parts.
Rebuilding or Replacing the Transmission
After completing the inspection, decide whether to rebuild or replace the transmission based on the extent of wear and damage. If rebuilding, replace any worn or damaged components, such as bearings, seals, and synchronizers, to ensure optimal performance and reliability.
Reassemble the transmission following the manufacturer’s guidelines for proper assembly and torque specifications. If the transmission is beyond repair or rebuilding is not feasible, consider sourcing a refurbished or replacement unit that is compatible with your vintage car.
Suspension, Steering, and Brakes
Restoring the suspension, steering, and brakes of your vintage car is essential for its handling, safety, and overall performance.
This process involves inspecting and replacing suspension components, restoring steering mechanisms, and overhauling brake systems. In this section, we’ll discuss each of these steps to help you achieve a safe and functional vintage car.
Inspecting and Replacing Suspension Components
Begin by examining the suspension components, including springs, shock absorbers, bushings, and control arms, for signs of wear, damage, or corrosion.
Replace any worn or damaged parts with new or refurbished components, ensuring that they are compatible with your vehicle’s make and model.
When replacing suspension components, consider upgrading to modern parts that can provide improved handling and ride quality without compromising the car’s original appearance.
Restoring Steering Mechanisms
Inspect the steering system, including the steering box, linkage, and tie rods, for wear or damage. Replace any worn or damaged components with new or refurbished parts, and lubricate all moving parts to ensure smooth operation.
If your vintage car has a manual steering system, consider upgrading to a power steering system for improved steering response and ease of use.
Overhauling Brake Systems
Inspecting Brake Lines and Hoses:
Examine the brake lines and hoses for signs of wear, corrosion, or damage. Replace any damaged or worn lines and hoses with new components, ensuring they are compatible with your vehicle’s make and model. This will help prevent brake fluid leaks and maintain optimal braking performance.
Replacing or Refurbishing Brake Components:
Inspect the brake calipers, rotors, drums, and pads or shoes for signs of wear or damage. Replace or refurbish any worn or damaged components to ensure proper braking performance and safety.
When restoring the brake system, consider upgrading to modern brake components, such as disc brakes or performance brake pads, for improved stopping power and reliability. Be sure to follow the manufacturer’s guidelines for proper installation and adjustment of all brake components.
Electrical System Restoration
Restoring the electrical system of your vintage car is crucial for its proper functioning, safety, and overall performance.
This process involves assessing and repairing wiring harnesses, rebuilding or replacing electrical components, and, if desired, upgrading to modern electrical systems.
In this section, we’ll discuss each of these steps to help you achieve a reliable and functional electrical system in your vintage car.
Assessing and Repairing Wiring Harnesses
Begin by inspecting the wiring harnesses throughout the vehicle for signs of wear, damage, or corrosion. Repair any damaged wiring by soldering or using heat-shrink connectors, and replace any worn or corroded connectors.
If the wiring harness is beyond repair or in poor condition, consider replacing it with a new or refurbished unit that is compatible with your vehicle’s make and model.
Rebuilding or Replacing Electrical Components
Starter and Alternator:
Inspect the starter and alternator for signs of wear or damage. Rebuild or replace these components as needed, ensuring they are compatible with your vehicle’s make and model. A properly functioning starter and alternator are crucial for the efficient operation of your car’s electrical system.
Lighting:
Examine all exterior and interior lighting, including headlights, taillights, turn signals, and interior lights, for proper functioning and condition. Replace any damaged or non-functioning lights with new or refurbished components, ensuring they are compatible with your vehicle’s make and model.
Gauges and Switches:
Inspect all gauges, switches, and controls for proper functioning and condition. Repair or replace any non-functioning or damaged components with new or refurbished parts, ensuring they are compatible with your vehicle’s make and model. This will help maintain the accuracy and reliability of your car’s instrumentation.
Upgrading to Modern Electrical Systems (Optional)
While not necessary for all vintage car restorations, upgrading to modern electrical systems can provide improved reliability, safety, and convenience. Consider upgrading to a modern fuse box or circuit breaker system, which can offer enhanced protection for your vehicle’s electrical components.
Additionally, you may want to consider upgrading to modern lighting systems, such as LED or HID headlights, for improved visibility and efficiency. When making any upgrades, ensure they are compatible with your vehicle’s make and model and do not detract from its original appearance or authenticity.
Interior Restoration
The interior of your vintage car is an essential aspect of the restoration process, as it contributes to the overall aesthetics, comfort, and driving experience.
Restoring the interior involves reupholstering seats and panels, refurbishing or replacing dashboard components, restoring or replacing the headliner and carpet, and adding final detailing touches.
In this section, we’ll discuss each of these steps to help you achieve a comfortable and visually appealing interior for your vintage car.
Reupholstering Seats and Panels
Inspect the seats, door panels, and other upholstered components for signs of wear, damage, or fading. Reupholster these parts using materials that closely match the original fabric, leather, or vinyl, ensuring they are compatible with your vehicle’s make and model. When reupholstering, pay close attention to the stitching, patterns, and textures to maintain the car’s authentic appearance.
Refurbishing or Replacing Dashboard Components
Examine the dashboard components, including gauges, controls, and trim pieces, for signs of wear, damage, or fading.
Repair or replace any damaged or non-functioning components with new or refurbished parts, ensuring they are compatible with your vehicle’s make and model. This will help maintain the accuracy and reliability of your car’s instrumentation and controls.
Restoring or Replacing Headliner and Carpet
Inspect the headliner and carpet for signs of wear, damage, or fading. Repair or replace these components with materials that closely match the original color and texture, ensuring they are compatible with your vehicle’s make and model.
Properly fitting headliners and carpets not only improve the appearance of the interior but also provide insulation and noise reduction.
Detailing and Finishing Touches
After completing the restoration of the major interior components, focus on the smaller details and finishing touches. This may include cleaning and polishing trim pieces, installing new or refurbished door handles, and restoring or replacing any other interior components that show signs of wear or damage.
Additionally, consider applying a high-quality interior protectant to preserve the appearance and longevity of your restored interior.
Paying attention to these final details will help to create a comfortable and visually appealing interior that reflects the quality and craftsmanship of your vintage car restoration.
Final Assembly and Testing
The final stage of your vintage car restoration involves reassembling the vehicle, checking for proper fit and alignment, conducting road tests and troubleshooting, and making any necessary fine-tuning adjustments.
In this section, we’ll discuss each of these steps to help you achieve a fully functional and reliable vintage car that is ready for the road.
Reassembling the Vehicle
Begin the final assembly by carefully reinstalling all the restored components, including the engine, transmission, suspension, steering, and brakes, following the manufacturer’s guidelines for proper installation and torque specifications.
Reattach the body panels, ensuring proper fit and alignment. Install the electrical components, lighting, and interior components to complete the assembly process.
Checking for Proper Fit and Alignment
Once the vehicle is fully assembled, check for proper fit and alignment of all body panels, doors, and windows.
Adjust and realign any components as needed to ensure a smooth and uniform appearance. Additionally, check the alignment of the wheels and suspension components to ensure optimal handling and performance.
Road Testing and Troubleshooting
Before hitting the road, perform a thorough inspection of your vintage car to ensure that all systems are functioning correctly and safely. Start the engine and check for any leaks, unusual noises, or other issues that may require attention.
Conduct a road test to assess the car’s performance, handling, and braking, and identify any areas that may need fine-tuning or adjustments.
Fine-Tuning and Adjustments
After the road test, make any necessary fine-tuning adjustments to optimize your vintage car’s performance, handling, and reliability. This may involve adjusting the carburetor, ignition timing, suspension settings, or brake balance.
Perform a final inspection of the vehicle to ensure that all systems are functioning correctly and safely. With the fine-tuning complete, your vintage car is ready to be enjoyed on the open road, showcasing the hard work and dedication that went into its restoration.
Upgrading Safety Features
While vintage cars are admired for their style and charm, they often lack modern safety features that are standard in today’s vehicles. Upgrading the safety features of your vintage car can not only protect you and your passengers but also enhance its overall performance and reliability. In this section, we’ll discuss various ways to improve the safety of your restored vintage car.
A. Installing Seatbelts or Updating Existing Ones
Vintage cars may not have seatbelts or may be equipped with outdated or worn-out seatbelts. Installing new seatbelts or updating existing ones is a crucial safety upgrade that can help protect you and your passengers in case of an accident.
Choose seatbelts that are compatible with your vehicle’s make and model, and ensure they are properly installed and adjusted for maximum effectiveness.
Upgrading to Modern Braking Systems
Older braking systems, such as drum brakes, may not provide the stopping power and reliability of modern disc brakes. Upgrading your vintage car’s braking system can significantly improve its safety and performance.
Consider replacing drum brakes with disc brakes or upgrading to performance brake pads and rotors. When upgrading the braking system, ensure all components are compatible with your vehicle’s make and model and follow the manufacturer’s guidelines for proper installation and adjustment.
Improving Lighting for Better Visibility
Vintage car lighting systems are often less effective than modern lighting, which can compromise safety during nighttime driving. Upgrading your vehicle’s lighting can enhance visibility and safety.
Consider installing modern halogen, LED, or HID headlights, as well as upgrading taillights, turn signals, and other exterior lighting.
Ensure all lighting upgrades are compatible with your vehicle’s make and model, and properly wired and installed for maximum effectiveness.
Considering the Installation of a Fire Suppression System
While not a standard safety feature in most vintage cars, a fire suppression system can provide an extra layer of protection in the event of a fire.
These systems are designed to detect and extinguish fires quickly, minimizing damage to your vehicle and reducing the risk of injury.
Consider installing a fire suppression system, particularly if your vintage car has been extensively modified or has a high-performance engine. When choosing a fire suppression system, ensure it is suitable for automotive use and properly installed according to the manufacturer’s guidelines.
Paint and Exterior Finishing
A flawless paint job and well-executed exterior finishing can elevate the overall appearance of your restored vintage car.
This process involves choosing the right paint type and color, employing professional paint application techniques, adding decals or pinstriping if desired, and polishing and detailing for a perfect finish. In this section, we’ll discuss each of these steps to help you achieve a stunning exterior for your vintage car.
Choosing the Right Paint Type and Color
Selecting the right paint type and color is crucial for maintaining the authenticity and visual appeal of your vintage car. Research the original paint colors and finishes for your vehicle’s make and model, and consider whether you want to stay true to the original color or opt for a custom color.
When choosing a paint type, consider the durability and finish quality of modern automotive paints, such as urethane or acrylic enamel, which provide long-lasting protection and a high-quality finish.
Professional Paint Application Techniques
A high-quality paint job requires careful preparation and professional application techniques. Start by removing any rust, old paint, and imperfections from the body and applying a primer coat to ensure proper paint adhesion.
Once the primer has dried, apply multiple coats of paint, allowing each coat to dry thoroughly before applying the next one. Finish with a clear coat to protect the paint and add a glossy finish. Consider seeking the assistance of a professional automotive painter for the best results.
Adding Decals or Pinstriping (If Desired)
Decals and pinstriping can add a unique and personalized touch to your vintage car’s exterior. Research period-correct decals or pinstriping designs for your vehicle’s make and model, or create a custom design that reflects your style.
Ensure that decals and pinstriping are properly applied and sealed to prevent peeling or damage over time.
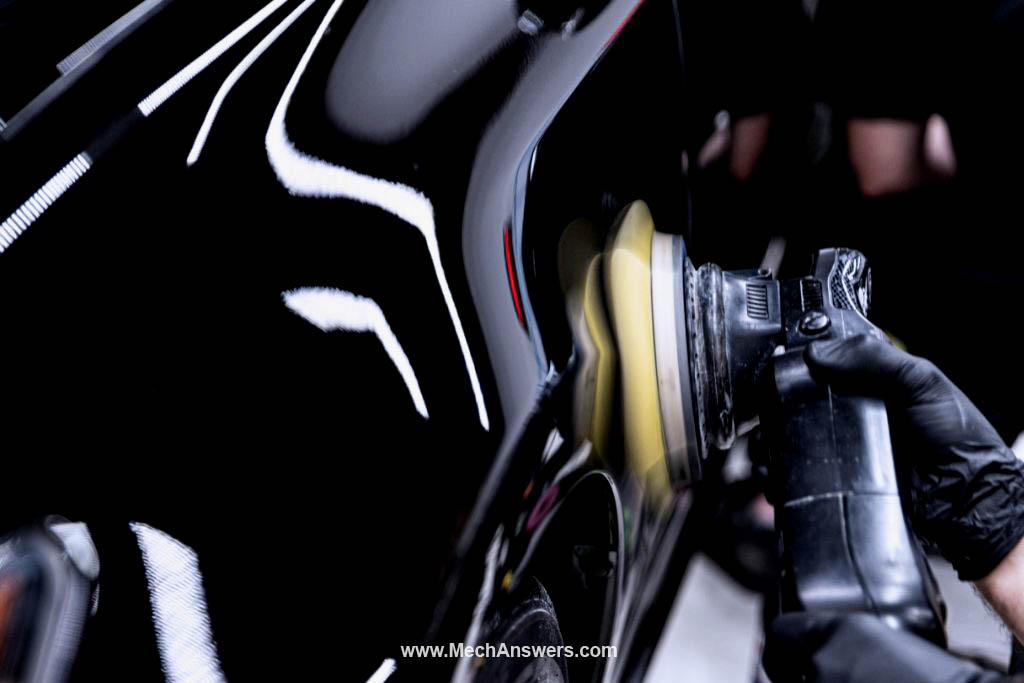
Polishing and Detailing for a Perfect Finish
Once the paint job is complete, polishing and detailing can provide a show-worthy finish for your vintage car. Use high-quality automotive polishing compounds and waxes to bring out the depth and shine of the paint.
Pay close attention to chrome and trim pieces, cleaning and polishing them to a mirror-like finish. Finish by applying a high-quality sealant to protect the paint and maintain its luster. With a meticulously polished and detailed exterior, your restored vintage car will truly stand out on the road and at car shows.
Maintaining Your Restored Vintage Car
After investing time, effort, and resources into restoring your vintage car, proper maintenance is essential to preserve its beauty, performance, and value.
In this section, we’ll discuss various aspects of maintaining your restored vintage car, including developing a regular maintenance schedule, proper storage, and protection, keeping the interior and exterior pristine, and joining a vintage car club or community for support and resources.
Developing a Regular Maintenance Schedule
Create a regular maintenance schedule to ensure the optimal performance and longevity of your vintage car. This includes routine tasks such as checking and changing fluids, inspecting and adjusting belts, replacing filters, and checking tire pressure.
Schedule more comprehensive services, such as tune-ups, brake inspections, and suspension checks, at recommended intervals based on your vehicle’s make and model. Regular maintenance not only keeps your vintage car running smoothly but also helps prevent potential issues from escalating into costly repairs.
Proper Storage and Protection from the Elements
Protecting your vintage car from the elements is crucial to preserving its appearance and condition. When not in use, store your car in a secure, climate-controlled garage or storage facility to shield it from harsh weather, temperature fluctuations, and potential damage.
Use a high-quality car cover for added protection against dust, moisture, and UV rays. Regularly inspect and maintain weatherstripping and seals to prevent water intrusion and rust formation.
Tips for Keeping the Interior and Exterior Looking Pristine
Maintain the interior and exterior of your vintage car by regularly cleaning and detailing it. For the exterior, use gentle, automotive-specific cleaning products to wash, polish, and wax the paint, chrome, and trim pieces.
For the interior, vacuum and clean upholstery, carpets, and surfaces with appropriate products to prevent damage to the materials. Treat leather and vinyl surfaces with conditioners to preserve their suppleness and appearance.
Joining a Vintage Car Club or Community for Support and Resources
Connecting with fellow vintage car enthusiasts through clubs or online communities can provide valuable support, resources, and camaraderie. These groups can offer expert advice, maintenance tips, and access to parts suppliers and specialized services.
Additionally, participating in car shows, events, and club gatherings can further enrich your vintage car ownership experience and provide opportunities to showcase your restored vehicle.
Registering and Insuring Your Vintage Car
After restoring your vintage car, it’s essential to properly register and insure it before taking it on the road.
In this section, we’ll discuss the steps involved in registering and insuring your vintage car, including understanding local regulations, obtaining a title and registration, choosing the right insurance coverage, and navigating specialty license plate options.
Understanding Local Regulations and Requirements
Regulations and requirements for vintage cars can vary depending on your location. Familiarize yourself with local laws governing the registration, inspection, and use of vintage cars.
Some jurisdictions may have specific regulations for emissions, safety equipment, or other modifications. Ensure that your restored vintage car complies with all applicable regulations to avoid fines or other penalties.
Obtaining a Title and Registration
To legally operate your vintage car on public roads, you’ll need to obtain a title and registration. If you don’t have the original title for the vehicle, contact your local Department of Motor Vehicles (DMV) or equivalent agency to determine the process for obtaining a new title.
Once you have a title, you can apply for registration. This typically involves presenting proof of ownership, completing the necessary paperwork, and paying registration fees.
In some cases, a safety inspection or emissions test may be required before registration is granted.
Choosing the Right Insurance Coverage for Your Restored Vehicle
Insuring your vintage car is essential to protect your investment and comply with local laws. Traditional auto insurance may not adequately cover the value of your restored vehicle, so consider specialized vintage or classic car insurance.
These policies typically offer agreed value coverage, which allows you and the insurer to agree on the vehicle’s value upfront, ensuring that you’ll be fully compensated in the event of a total loss.
Research different insurance providers and compare quotes, coverage options, and customer reviews to find the best policy for your needs.
Navigating Specialty License Plate Options
Many jurisdictions offer specialty license plates for vintage or classic cars, which can add a unique touch to your restored vehicle. These plates often feature distinct designs or markings that indicate the vehicle’s vintage status.
Contact your local DMV or equivalent agency to learn about the available options and eligibility requirements for obtaining a specialty license plate for your vintage car.
Keep in mind that some jurisdictions may have specific rules regarding the use of vintage plates, such as restrictions on daily driving or participation in car shows and events.
Showcasing Your Restored Vintage Car
After completing the restoration of your vintage car, it’s natural to want to share your hard work and passion with others.
Showcasing your restored vehicle can be a rewarding experience, allowing you to connect with fellow enthusiasts, share your restoration journey, and even inspire others to take on similar projects.
In this section, we’ll discuss various ways to showcase your restored vintage car, including participating in car shows and events, networking with other enthusiasts, sharing your story and experiences, and tips for photographing your vehicle.
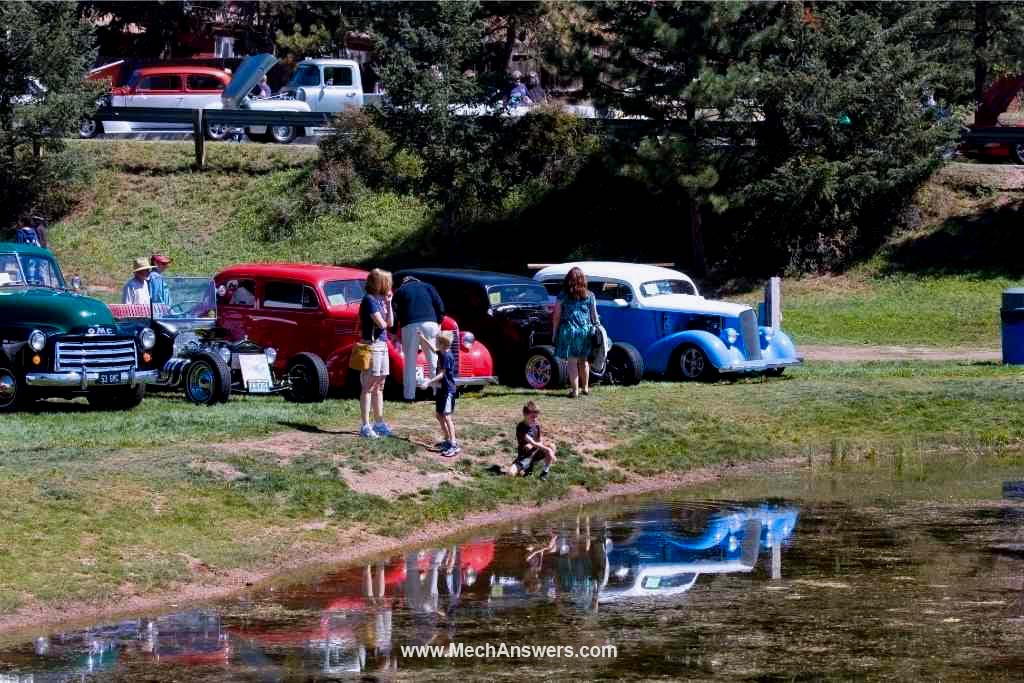
Participating in Local Car Shows and Events
Car shows and events provide an excellent opportunity to showcase your restored vintage car, allowing you to display your vehicle alongside other beautiful classic and custom cars.
Research local car shows, cruise-ins, and other automotive events in your area, and make plans to attend with your vintage car. Be prepared to discuss the details of your restoration project and answer questions from fellow enthusiasts and spectators.
Networking with Other Vintage Car Enthusiasts
Connecting with fellow vintage car enthusiasts can enrich your overall car ownership experience and provide valuable resources, support, and camaraderie.
Attend car club meetings, participate in online forums or social media groups, and engage with others who share your passion for vintage cars. Sharing your restored vehicle with like-minded individuals can lead to lasting friendships and valuable networking opportunities.
Sharing Your Restoration Story and Experiences
Your restoration journey is a unique and personal story that can inspire and educate others who are interested in vintage car restoration. Consider sharing your experiences through blog posts, social media updates, or even presentations at car club meetings or events.
Include details about the challenges you faced, the resources you found helpful, and the lessons you learned throughout the process. Your story can serve as a valuable resource for others and help foster a sense of community among vintage car enthusiasts.
Tips for Photographing Your Restored Vehicle
Capturing high-quality photographs of your restored vintage car is essential for showcasing your work, whether you’re sharing images online or entering your vehicle in a car show. Here are some tips for photographing your restored vehicle:
Choose a suitable location that complements your car’s style and highlights its features. Avoid cluttered or distracting backgrounds.
Use natural lighting to your advantage, aiming for early morning or late afternoon light, which provides a softer, more flattering illumination.
Experiment with different angles and perspectives to showcase your car’s unique design elements and details.
Pay attention to reflections on your car’s paint and glass surfaces, adjusting your position or using polarizing filters to minimize unwanted reflections.
Consider using a tripod to ensure sharp, stable images and enable longer exposure times for creative effects.
Edit your images using photo editing software to correct exposure, color balance, and other aspects of your photographs, ensuring that they accurately represent your restored vintage car.
Junkyard To On The Road In 25 Minutes – 1939 Ford Forgotten Hot Rod >> Check out the video below:
Read more >> Where to Start When Restoring a Car: A Guide for Beginners
Read more >> Car Restoration Checklist: A Detailed Step-by-Step Guide
Read more >> Is It Worth Restoring an Old Car? A Comprehensive Analysis
Read more >> Classic Car Restoration Checklist: Your Detailed Blueprint!
Read more >> Is Restoring Cars Profitable? How To Restore for Profit!
Conclusion
Restoring a vintage car can be a challenging but rewarding experience. By following a detailed step-by-step guide, you can bring an old car back to life and preserve a piece of automotive history.
From researching your classic car to disassembling it, restoring its body and interior, and finally giving it a new paint job, every step is crucial in the restoration process.
With the right tools, equipment, and professional help, you can bring your vintage car back to its former glory. Whether you are a seasoned car enthusiast or just starting, restoring a classic car can be a fulfilling and enjoyable experience that you’ll always treasure.
Reference Source:
classicsworld.co.uk/guides/12-best-beginners-tips-for-classic-car-restoration/