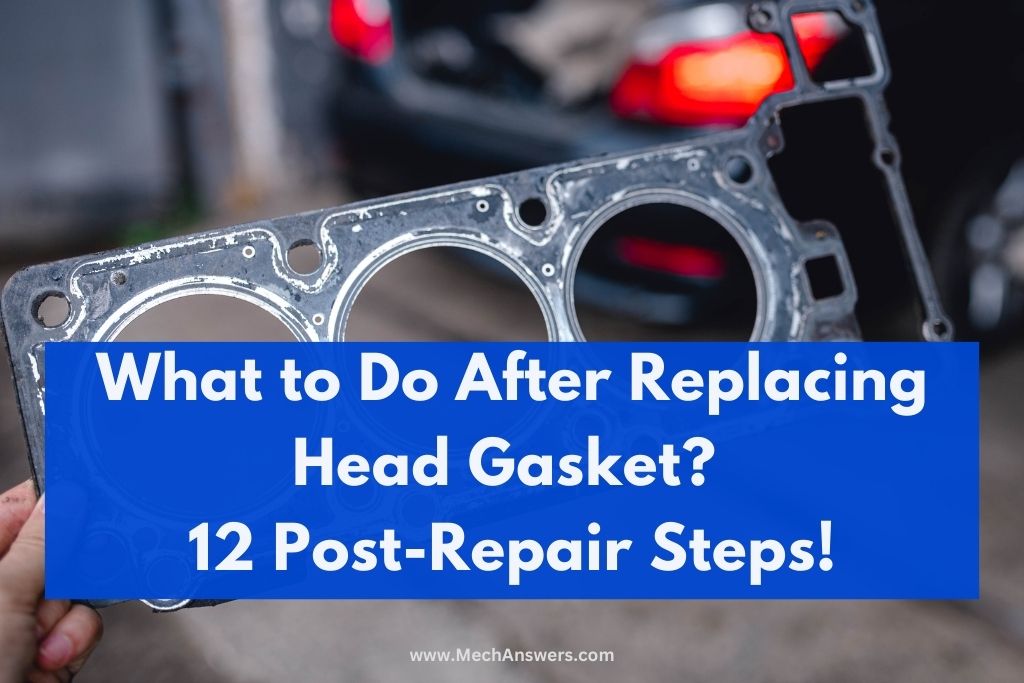
Ever found yourself pondering or even frantically googling “What To Do After Replacing Head Gasket?” If that sounds like you, then you’re in the right place. Head gasket replacement is a complex process, and it’s crucial to ensure you handle the post-repair steps correctly to prevent future issues.
So, what can you expect from “What To Do After Replacing Head Gasket?” We’ve put together a comprehensive guide that provides a step-by-step walk-through of the 12 critical post-repair actions you should take after replacing a head gasket. These actions range from reassembling the engine components to carefully observing the vehicle’s performance during the initial few drives.
In this article, you’ll find practical and insightful information that can save you from potential pitfalls and costly mistakes. This knowledge will help you safeguard your vehicle’s performance and longevity, making this a must-read for anyone who has recently replaced a head gasket.
Table of Contents
Step 1: Clean and Inspect
Cleaning the engine block and cylinder head surfaces
Before installing the new head gasket, it’s essential to clean the engine block and cylinder head surfaces thoroughly. These surfaces must be clean and free from any debris, oil, or coolant residue that may interfere with the gasket’s sealing properties.
Any contaminants left on these surfaces can cause the gasket to fail prematurely, leading to engine damage.
Inspecting the mating surfaces for damage or warping
To clean these surfaces, use a gasket scraper or a soft-bristled brush to remove any debris or residue. Be careful not to scratch or damage the surfaces as this may interfere with the gasket’s sealing properties.
Use a high-quality engine cleaner or degreaser to remove any oil or coolant residue. Follow the manufacturer’s instructions carefully when using these products.
Checking the head bolts/studs for stretching or damage
Inspecting the mating surfaces for damage or warping is also crucial. These surfaces should be flat and smooth without any signs of damage, warping, or pitting.
If any damage is found, the surfaces must be machined or resurfaced before installing the new head gasket. Failure to address these issues can cause the gasket to fail prematurely, leading to engine damage.
Checking the head bolts/studs for stretching or damage is also essential. The head bolts/studs play a crucial role in maintaining the head gasket’s sealing properties. If they’re stretched or damaged, they won’t provide the necessary clamping force, causing the gasket to fail prematurely.
Use a torque wrench to check the head bolts/studs for proper torque values. If any bolts/studs are stretched or damaged, they must be replaced.
Inspecting the valve train and timing components
Inspecting the valve train and timing components is another critical step. These components work together to ensure the engine runs smoothly and efficiently.
Any damage or wear on these components can cause poor engine performance, leading to engine damage. Inspect the valve train components for wear, damage, or proper seating.
Check the timing components for proper alignment, wear, or damage. If any issues are found, the components must be repaired or replaced before installing the new head gasket.
Step 2: Replace Components
Replacing any damaged or worn components such as the water pump, thermostat, and timing belt/chain is crucial during a head gasket repair.
The head gasket repair process provides a unique opportunity to inspect these components for damage or wear and replace them before they fail. This will prevent future engine damage and save you money in the long run.
Replacing Critical Components
The water pump is one of the most critical components to replace during a head gasket repair. It circulates coolant through the engine and keeps it from overheating.
If the water pump is damaged or worn, it can cause the engine to overheat, leading to severe engine damage. Therefore, it’s crucial to replace the water pump during a head gasket repair to avoid future engine damage.
Replacing the thermostat is another essential step. The thermostat regulates the engine’s temperature by opening and closing the coolant flow. If the thermostat fails to open or close, it can cause the engine to overheat or run too cold, leading to poor engine performance and damage.
Therefore, it’s important to replace the thermostat during a head gasket repair to prevent future engine damage.
Replacing the timing belt/chain is also crucial. The timing belt/chain ensures that the engine’s valves and pistons operate in sync. If the timing belt/chain fails, it can cause the valves and pistons to collide, leading to severe engine damage.
Therefore, it’s important to replace the timing belt/chain during a head gasket repair to prevent future engine damage.
Choosing Quality Replacement Parts
When choosing replacement parts, it’s essential to choose high-quality parts that meet or exceed the manufacturer’s specifications. These parts should be made from high-quality materials and tested for durability and performance. Using inferior parts can lead to premature failure and costly repairs down the road.
Step 3: Lubrication
Properly lubricating all components during reassembly is crucial to the success of a head gasket repair. Lubrication helps reduce friction between engine components, which can cause excessive wear and damage.
It also helps to prevent rust and corrosion on metal components. Therefore, it’s important to use the right lubricants and apply them correctly during reassembly.
Types of Lubricants
There are several types of lubricants to use during reassembly, including engine oil, assembly lube, and grease. Engine oil is used to lubricate the engine’s internal components, such as the crankshaft, camshaft, and lifters.
Assembly lube is used to lubricate the engine’s moving parts reassemblies, such as the piston rings and bearings. Grease is used to lubricate non-moving parts, such as bolts and threads.
Where to Apply Lubricants
When applying lubricants during reassembly, it’s important to follow the manufacturer’s specifications carefully. For example, when applying assembly lube, only apply a thin layer to the moving parts.
Applying too much lube can cause the engine to hydro-lock or prevent the engine from starting. Similarly, when applying engine oil, only apply the recommended amount and use the right viscosity for your engine.
It’s important to apply lubricants to all the engine components that require it, including the camshaft, lifters, bearings, and piston rings.
Applying lubricants to these components ensures that they function smoothly and efficiently, reducing the risk of excessive wear and damage. It’s also important to apply lubricants to bolts and threads to prevent rust and corrosion and ensure that they can be tightened correctly.
Step 4: Torqueing
Torquing the head bolts/studs to the manufacturer’s specifications is one of the most critical steps in a head gasket repair. The head bolts/studs play a crucial role in maintaining the head gasket’s sealing properties, and proper torquing ensures that they provide the necessary clamping force.
Failure to torque the head bolts/studs properly can cause the gasket to fail prematurely, leading to engine damage.
The Importance of Proper Torquing
Proper torquing ensures that the head bolts/studs are tightened to the manufacturer’s specifications, providing the necessary clamping force to maintain the gasket’s sealing properties.
Over-torquing or under-torquing can cause the head bolts/studs to stretch or fail, leading to gasket failure and engine damage. Therefore, it’s crucial to follow the manufacturer’s torque specifications carefully.
Torque Sequence and Pattern
It’s important to use the correct torque sequence and pattern when torquing the head bolts/studs. This ensures that the clamping force is distributed evenly across the gasket and prevents damage to the engine block and cylinder head.
The torque sequence and pattern may vary depending on the engine’s make and model, so it’s essential to consult the manufacturer’s specifications.
When torquing the head bolts/studs, it’s important to use a torque wrench and follow the manufacturer’s specifications carefully. Start by tightening the bolts/studs to the manufacturer’s recommended torque value in the correct sequence and pattern.
Then, repeat the torque sequence and pattern, increasing the torque value in increments until the final torque value is achieved.
Step 5: Surface Preparation
Preparing the new head gasket for installation is an essential step in a head gasket repair. The new head gasket must be installed correctly and fit properly to ensure the engine’s sealing properties.
Surface preparation ensures that the gasket is free from any debris, contaminants, or damage that may interfere with the sealing properties.
Checking for Proper Fit and Orientation
Before installing the new head gasket, it’s important to check for proper fit and orientation. The head gasket must fit the engine block and cylinder head surfaces properly, and the holes and openings must align with the engine components.
It’s also essential to ensure that the gasket is installed in the correct orientation to prevent future engine damage.
Applying Gasket Sealant as Needed
Applying gasket sealant is another essential step in surface preparation. Gasket sealant helps fill any imperfections or irregularities in the engine block and cylinder head surfaces, ensuring a proper seal between the gasket and the engine components.
It’s important to choose the right gasket sealant for your engine and follow the manufacturer’s instructions carefully.
When applying gasket sealant, apply a thin, even layer to the engine block and cylinder head surfaces. Be careful not to apply too much sealant, as this can interfere with the gasket’s sealing properties. Allow the sealant to dry for the recommended amount of time before installing the new head gasket.
Step 6: Installation
Properly installing the head gasket onto the engine block is critical to the success of a head gasket repair. The gasket must be installed correctly and aligned properly with the cylinder head to ensure a proper seal between the engine components. Failure to install the gasket correctly can cause it to fail prematurely, leading to engine damage.
Tips for Aligning the Gasket and Cylinder Head
When installing the head gasket, it’s important to align it correctly with the cylinder head. The gasket must fit the engine block and cylinder head surfaces properly, and the holes and openings must align with the engine components. Here are some tips for aligning the gasket and cylinder head:
Use a gasket alignment tool:
A gasket alignment tool helps ensure that the gasket is aligned correctly with the cylinder head. The tool fits into the bolt holes and aligns the gasket with the cylinder head surfaces.
Check the gasket for damage:
Before installing the gasket, check it for damage or defects. If the gasket is damaged or defective, it can cause premature failure and engine damage.
Use proper torquing techniques:
When installing the cylinder head bolts/studs, use the correct torque sequence and pattern to distribute the clamping force evenly across the gasket.
Ensure proper bolt length:
When installing the cylinder head bolts/studs, ensure that they are the correct length for your engine. Using the wrong length bolts/studs can cause the gasket to fail prematurely.
Check for leaks:
After installing the cylinder head, check for any leaks or signs of a failed gasket. If you notice any leaks or signs of a failed gasket, it’s important to address the issue immediately to prevent engine damage.
Step 7: Cylinder Head Installation
Installing the cylinder head onto the engine block is a critical step in a head gasket repair. The cylinder head must be installed correctly and aligned properly with the engine block to ensure a proper seal between the engine components.
Failure to install the cylinder head correctly can cause it to fail prematurely, leading to engine damage.
Proper Torquing Sequence and Pattern
When installing the cylinder head, it’s important to use the correct torque sequence and pattern to distribute the clamping force evenly across the gasket.
This ensures that the cylinder head is tightened to the manufacturer’s specifications and provides the necessary clamping force to maintain the gasket’s sealing properties.
The torque sequence and pattern may vary depending on the engine’s make and model, so it’s essential to consult the manufacturer’s specifications carefully.
Start by tightening the bolts/studs to the manufacturer’s recommended torque value in the correct sequence and pattern. Then, repeat the torque sequence and pattern, increasing the torque value in increments until the final torque value is achieved.
Tips for Ensuring Proper Alignment
When installing the cylinder head, it’s important to ensure proper alignment with the engine block. Improper alignment can cause the gasket to fail prematurely, leading to engine damage.
Here are some tips for ensuring proper alignment:
Use a cylinder head alignment tool:
A cylinder head alignment tool helps ensure that the cylinder head is aligned properly with the engine block. The tool fits into the bolt holes and aligns the cylinder head with the engine block surfaces.
Check for debris:
Before installing the cylinder head, check for any debris or contaminants that may interfere with the sealing properties. Clean the engine block and cylinder head surfaces thoroughly before installing the cylinder head.
Check for warping or damage:
Before installing the cylinder head, check for any warping or damage that may interfere with the sealing properties. If the cylinder head is warped or damaged, it may need to be resurfaced or replaced.
Use proper torquing techniques:
When torquing the cylinder head bolts/studs, use the correct sequence and pattern to distribute the clamping force evenly across the gasket.
Check for leaks:
After installing the cylinder head, check for any leaks or signs of a failed gasket. If you notice any leaks or signs of a failed gasket, it’s important to address the issue immediately to prevent engine damage.
Step 8: Coolant System
The coolant system plays a crucial role in maintaining the engine’s operating temperature and preventing overheating.
After a head gasket repair, it’s important to flush the coolant system, replace any damaged hoses, and fill the system with new coolant to ensure proper engine cooling and prevent future engine damage.
Flushing the Coolant System
Flushing the coolant system removes any debris, contaminants, or old coolant that may interfere with the system’s performance. To flush the coolant system, first, drain the old coolant from the system.
Then, flush the system with water, ensuring that all the old coolant and debris are removed from the system. Once the system is clean, replace the drain plug and move on to the next step.
Replacing Coolant Hoses as Needed
After a head gasket repair, it’s important to check the coolant hoses for damage or wear. If any hoses are damaged or worn, they should be replaced immediately to prevent leaks or ruptures. Coolant hoses are relatively inexpensive, and replacing them can save you from costly engine damage in the future.
Filling the System with New Coolant
After flushing the coolant system and replacing any damaged hoses, it’s time to fill the system with new coolant. It’s important to use the recommended coolant type and mixture for your engine, as using the wrong type of coolant can cause damage to the engine components.
Follow the manufacturer’s instructions carefully when filling the coolant system, ensuring that the system is filled to the correct level.
Once the coolant system is filled with new coolant, start the engine and let it run for a few minutes. This will allow the coolant to circulate through the system and ensure that there are no leaks or other issues. After the engine has run for a few minutes, check the coolant level and add more coolant as needed.
Step 9: Oil System
The oil system is essential in lubricating the engine components and preventing premature wear and damage.
After a head gasket repair, it’s important to change the oil and filter, inspect the oil pump, and check for blockages in the oil passages to ensure proper engine lubrication and prevent future engine damage.
Changing the Oil and Filter
Changing the oil and filter is a critical step in maintaining proper engine lubrication and preventing premature engine wear. After a head gasket repair, it’s recommended to change the oil and filter to remove any debris or contaminants that may have accumulated during the repair process.
Follow the manufacturer’s instructions carefully when changing the oil and filter, and use the recommended oil type and viscosity for your engine.
Inspecting the Oil Pump and Oil Passages for Blockage
The oil pump is responsible for circulating oil through the engine components, and any blockages in the oil passages can cause the engine to lose lubrication and suffer damage.
After a head gasket repair, it’s important to inspect the oil pump and oil passages for blockages or damage. If any blockages are found, they should be removed immediately to prevent future engine damage.
To inspect the oil pump and oil passages, remove the oil pump and inspect it for wear or damage. Check the oil passages for blockages, and use a wire brush or other tool to remove any debris or contaminants. Once the oil pump and passages are clean, reinstall the oil pump and move on to the next step.
Step 10: Start-up
Starting the engine for the first time after a head gasket repair can be nerve-wracking, but proper start-up procedures can prevent future engine damage and ensure a successful repair.
This step covers pre-startup checks, starting the engine and checking for leaks, and why it’s important to let the engine warm up before driving.
Pre-startup Checks
Before starting the engine, perform a few pre-startup checks to ensure that everything is in order. Check the oil level and coolant level, and ensure that all electrical connections are secure. Double-check that all components are installed correctly, and ensure that there are no leaks or other issues.
Starting the Engine and Checking for Leaks
Once the pre-startup checks are complete, it’s time to start the engine. Turn the key or push the start button and let the engine turn over for a few seconds. Once the engine starts, listen for any unusual noises or vibrations, and check for leaks or other issues.
If you notice any leaks or other issues, shut the engine off immediately and address the problem before continuing. If everything looks good, let the engine run for a few minutes and check for leaks again. This will allow the engine to reach operating temperature and ensure that everything is working correctly.
Why it’s Important to Let the Engine Warm Up Before Driving
After a head gasket repair, it’s essential to let the engine warm up before driving. The engine components need time to expand and reach operating temperature, and driving the vehicle before the engine has warmed up can cause premature wear and damage.
Let the engine idle for a few minutes before driving, and monitor the engine temperature gauge to ensure that the engine is not overheating. Once the engine has reached operating temperature, take the vehicle for a short test drive, and monitor the engine temperature, oil pressure, and other vital signs.
Step 11: Test Drive
Taking the vehicle for a test drive is the final step in a head gasket repair. A test drive allows you to check for proper engine performance, signs of overheating, and any other issues that may need to be addressed.
This step covers taking the vehicle for a test drive, checking for proper performance and signs of overheating, and monitoring coolant and oil levels.
Taking the Vehicle for a Test Drive
Before taking the vehicle for a test drive, ensure that all pre-drive checks are complete, and the engine is warm. Once the engine is warm, take the vehicle for a short test drive, and monitor the engine temperature, oil pressure, and other vital signs.
Pay attention to any unusual noises or vibrations and check for signs of overheating or other issues.
Checking for Proper Performance and Signs of Overheating
During the test drive, check for proper engine performance and signs of overheating. The engine should run smoothly and respond well to acceleration and deceleration.
Check the engine temperature gauge and oil pressure gauge regularly to ensure that the engine is not overheating or losing oil pressure. If you notice any issues, address them immediately to prevent future engine damage.
Monitoring Coolant and Oil Levels
After the test drive, check the coolant and oil levels to ensure that they are at the proper levels. Low coolant or oil levels can cause engine damage, so it’s essential to monitor them regularly. If you notice any significant changes in the coolant or oil levels, address the issue immediately to prevent future engine damage.
Step 12: Follow-up
After completing a head gasket repair, it’s important to follow up with regular engine inspections to ensure that the repair was successful and prevent future engine damage.
This step covers checking the engine for the first few hundred miles after the repair and scheduling a follow-up inspection with a mechanic.
Checking the Engine for the First Few Hundred Miles After the Repair
After completing a head gasket repair, it’s important to check the engine regularly for the first few hundred miles to ensure that the repair was successful.
Check the coolant and oil levels regularly and monitor the engine temperature, oil pressure, and other vital signs. If you notice any issues or changes in engine performance, address them immediately to prevent future engine damage.
Scheduling a Follow-up Inspection with a Mechanic
Even after completing the head gasket repair and checking the engine regularly, it’s essential to schedule a follow-up inspection with a mechanic.
A mechanic can perform a more thorough inspection of the engine and ensure that everything is in working order. They can also address any issues that may have been missed during the initial repair process.
Schedule a follow-up inspection with a mechanic within the first few months after the head gasket repair. During the inspection, the mechanic will check the engine for any signs of damage or wear and address any issues that may be present.
Startup After Head Gasket Replacement! >> Check out the video below:
Related Articles
Read more >> The True Cost of Head Gasket Repair: 15 Pros and Cons!
Read more >> 15 Symptoms Of A Blown Head Gasket: How To Diagnose Guide!
Read more >> 15 Causes Of A Blown Head Gasket: A Comprehensive Guide
Read more >> 12 Best Ways To Fix A Blown Head Gasket Without Replacing It
Read more >> After A Head Gasket Replacement Engine Life: 12 Pro Tips!
Read more >> Head Gasket Replacement: 15 Common Problems And Solves!
Conclusion
Replacing a head gasket is a significant engine repair that requires careful attention to detail and proper follow-up. By following the 12 post-repair steps outlined in this article, you can ensure a successful head gasket replacement and prevent future engine damage.
These steps include cleaning and inspecting, replacing components, lubrication, torquing, surface preparation, installation, cylinder head installation, coolant system, oil system, start-up, test drive, and follow-up.
It’s essential to have a qualified mechanic or technician perform the head gasket replacement and follow the manufacturer’s instructions carefully. By performing routine engine maintenance and monitoring engine performance regularly, you can prevent future engine damage and extend the life of your vehicle.