Ever found yourself deep in thought, considering, “Restoring a car with no experience?” It’s a daunting prospect that has likely driven you to scour the internet for answers. Well, search no more.
So, what is the answer to the question “Restoring a car with no experience?” The guide is designed to break down the process of car restoration into simple, manageable steps. It aims to help you understand where to start, what tools you’ll need, how to solve common issues, and give you confidence, even if you have no prior experience.
Reading this article will provide you with practical insights and a step-by-step guide that can help turn your dream of restoring a classic car into a reality. So buckle up and let’s get started on your restoration journey.
Table of Contents
Preparation and Planning
A. Choosing the Right Project Car
Budget Considerations:
When selecting the ideal project car, take into account your financial resources. Restoration can be costly, so it’s essential to choose a car that fits within your budget. Consider not only the initial purchase price but also the cost of replacement parts, tools, and professional services if needed.
Rarity and Availability of Parts:
The ease of finding replacement parts varies depending on the make and model of the car. Some vehicles have abundant aftermarket support, while others may require extensive searching for rare or hard-to-find parts. Consider this when choosing your project car, as it can affect both the restoration timeline and the overall cost.
Personal Preferences and Goals:
Choose a car that aligns with your personal preferences and restoration goals. Consider factors such as the car’s historical significance, design, and performance capabilities. Your passion for the project will keep you motivated throughout the restoration process.
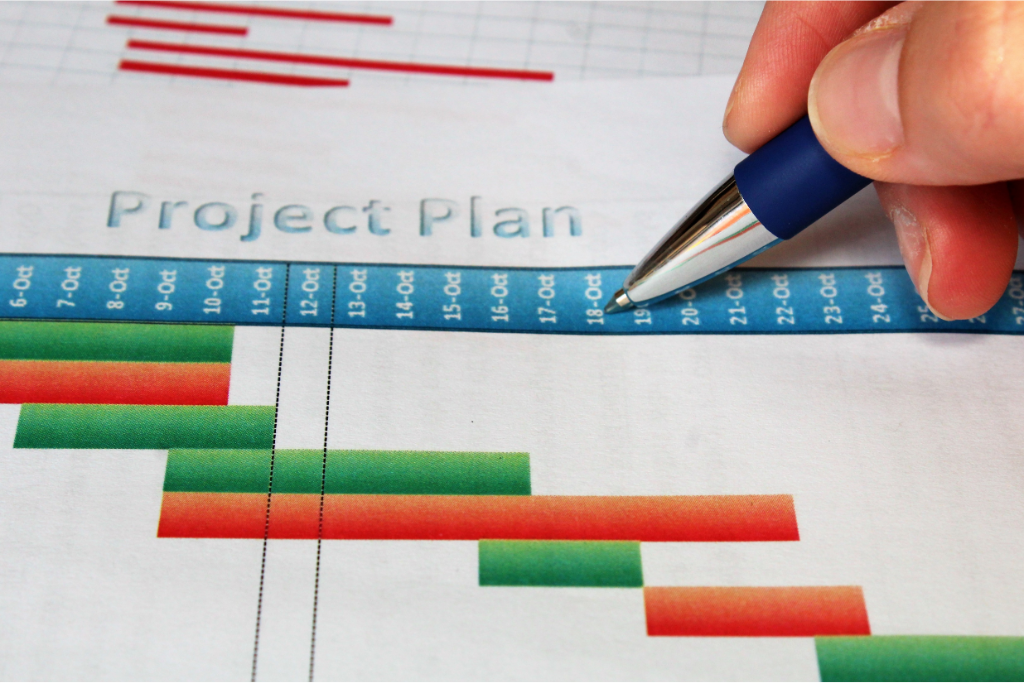
B. Creating a Project Timeline
Developing a realistic timeline is essential for managing your expectations and ensuring progress. Outline the primary phases of the restoration, such as disassembly, bodywork, engine rebuilding, and reassembly. Remember to allocate time for research, parts acquisition, and potential setbacks.
Break down the restoration process into distinct phases:
This will help you visualize the steps involved and allocate time for each task. Common phases include disassembly, bodywork, engine and drivetrain restoration, electrical system restoration, interior restoration, and final assembly.
Set milestones for each phase:
Define specific goals to be achieved within each phase, such as completing rust repair or reupholstering the seats. These milestones will help you measure progress and stay on track.
Estimate timeframes:
Research and consult with experienced restorers to determine realistic timeframes for each phase. Don’t forget to add buffer time for unexpected delays, such as waiting for parts to arrive or addressing unforeseen complications.
Prioritize tasks:
Identify which tasks should be completed first, based on factors like the availability of parts, the order of assembly, and the potential impact on other aspects of the restoration.
Regularly update your timeline:
As you work on your project, adjust your timeline to account for any changes in scope or unforeseen challenges.
C. Setting a Budget
Determine an overall budget for your restoration project, factoring in the cost of the car, replacement parts, tools, and potential professional services. Keep track of expenses throughout the restoration process to avoid overspending and to make informed decisions.
Initial purchase price:
Consider the cost of acquiring the car itself, which may vary based on the car’s rarity, condition, and desirability.
Parts and materials:
Research the cost of replacement parts, materials for bodywork and paint, and any upgrades you plan to make. Remember to factor in shipping and import fees for parts from overseas.
Tools and equipment:
Make a list of essential tools and any specialized equipment you’ll need for your restoration project. Compare the cost of purchasing versus renting larger or more expensive tools.
Professional services:
Some aspects of restoration, such as engine machining or paintwork, may require hiring professionals. Research and compare service providers to estimate the cost of these services.
Contingency fund:
Allocate a percentage of your budget (e.g., 10-15%) for unexpected expenses or setbacks that may arise during the restoration process.
D. Designating a Workspace
Select a workspace that provides ample room for disassembling and working on your car. Ensure the space is well-lit, properly ventilated, and has access to power outlets. A clean and organized workspace will contribute to a more efficient and enjoyable restoration process.
Size and layout:
Your workspace should be large enough to accommodate your car, tools, and equipment, with extra space for moving around and storing parts during disassembly. Plan the layout to maximize efficiency, with designated areas for different tasks, such as bodywork, engine work, and assembly.
Lighting:
Ensure adequate lighting by installing overhead fixtures and portable work lights. Good lighting will help you spot issues, work more accurately, and reduce eye strain.
Ventilation:
Proper ventilation is crucial for your safety, especially when working with chemicals, paint, and welding equipment. Install fans or exhaust systems to maintain good air quality.
Electrical and utility requirements:
Your workspace should have sufficient electrical outlets and capacity to handle the power requirements of your tools and equipment. Consider installing a compressed air system for pneumatic tools and airbrushing.
Storage and organization:
Plan storage solutions for your tools, parts, and materials. Use shelves, cabinets, pegboards, and toolboxes to keep everything organized and easily accessible.
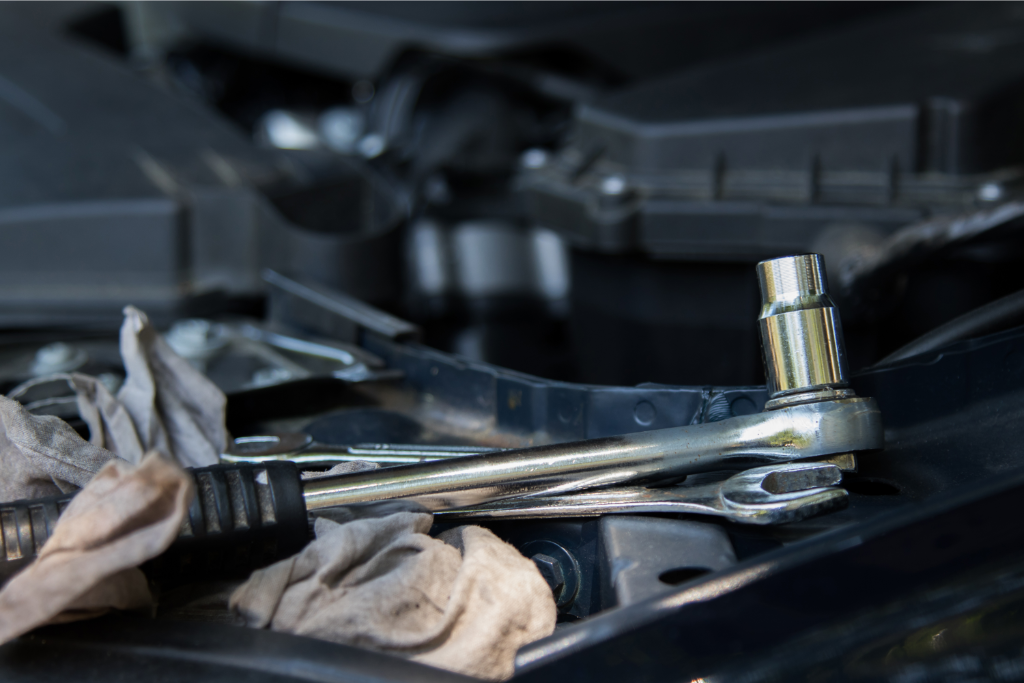
E. Gathering Essential Tools and Equipment
Invest in essential tools for car restoration, such as wrenches, sockets, pliers, screwdrivers, and a jack with stands. As you progress, you may need specialized tools like a torque wrench, engine hoist, and bodywork tools.
Purchasing or renting high-quality tools will make your restoration process more manageable and precise.
Hand tools:
Acquire basic hand tools such as wrenches, sockets, pliers, screwdrivers, hammers, and torque wrenches. These tools will be used throughout the restoration process.
Power tools:
Invest in power tools like drills, grinders, sanders, and air compressors. These tools will speed up tasks and improve the quality of your work.
Bodywork tools:
For bodywork, you’ll need equipment like body hammers, dollies, sanding blocks, and a variety of sandpaper grits. You may also need specialized tools for dent repair, such as a stud welder or slide hammer.
Engine and drivetrain tools:
Obtain tools specific to engine and drivetrain work, such as an engine hoist, engine stand, and transmission jack. You might also need special tools like a timing light, compression tester, and pullers for specific components.
Safety equipment:
Prioritize your safety by investing in protective gear like gloves, safety glasses, ear protection, and a respirator. Additionally, a fire extinguisher and first aid kit should be readily accessible in your workspace.
Painting equipment:
If you plan to paint the car yourself, you’ll need a spray gun, air compressor, paint booth, or a well-ventilated area, and proper protective gear like a respirator and coveralls.
Diagnostic tools:
Acquire diagnostic tools such as a multimeter, vacuum gauge, and OBD scanner (for modern cars) to test and troubleshoot electrical and mechanical systems.
Lifting and support equipment:
A hydraulic jack and sturdy jack stands are essential for lifting and supporting your car safely during various stages of the restoration process.
Organizational tools:
Use toolboxes, parts bins, and storage containers to keep your tools and disassembled parts organized. Consider labeling parts and keeping a detailed inventory to avoid confusion during reassembly.
F. Research and Education
Car-Specific Manuals:
Obtain a repair manual or factory service manual for your specific car. These manuals contain detailed information on the car’s components, specifications, and assembly procedures.
Online Forums and Communities:
Join online car restoration forums and communities where experienced restorers share their knowledge and experiences. These platforms provide a wealth of information and can help you troubleshoot issues during your restoration journey.
Books and Magazines:
Read automotive books and magazines to broaden your understanding of car restoration techniques, history, and trends. These resources often contain valuable tips and tricks from experienced professionals.
Online Courses and Videos:
Consider enrolling in online car restoration courses or watching instructional videos on platforms like YouTube. These resources can provide step-by-step guidance and demonstrate techniques that may be difficult to understand through text alone.
Disassembly and Inspection
A. Documenting the Disassembly Process
Take photographs:
Before starting the disassembly process, take detailed photos of your car from various angles, both exterior and interior. As you disassemble components, continue to take photos to create a visual record of their original positions and connections.
Record video:
If possible, use a video camera to record the disassembly process. This can provide additional context and help you recall the steps when it’s time to reassemble the car.
Create labeled diagrams:
Sketch or print out diagrams of major components and systems, then annotate them with labels, notes, and part numbers as you disassemble the car. These diagrams can serve as a reference during reassembly.
Maintain a journal:
Keep a written journal of the disassembly process, noting the order of removal, any difficulties encountered, and observations about the condition of parts.
B. Organizing and Labeling Parts
Use storage containers:
Invest in a variety of storage containers, such as clear plastic bins, parts trays, and zip-lock bags, to store disassembled parts. Choose containers of different sizes to accommodate various part sizes and shapes.
Label parts and fasteners:
As you remove parts, label them with their name, part number, and location on the car. This can be done using masking tape and a permanent marker or adhesive labels. Additionally, label fasteners (bolts, screws, etc.) and store them in zip-lock bags or small containers.
Group related parts together:
Organize parts by grouping them according to the system or assembly they belong to, such as the engine, transmission, or suspension.
Store parts in a logical order:
Arrange the parts in the order they were removed, making it easier to locate them during reassembly.
C. Inspecting Parts for Damage and Wear
Visual inspection:
Carefully examine each part for visible signs of damage, such as cracks, rust, or excessive wear. Pay special attention to critical components like the engine, transmission, and suspension.
Mechanical inspection:
For moving parts, check for smooth operation and proper alignment. This includes rotating parts like bearings, gears, and shafts, as well as sliding or hinged parts like linkages and pivots.
Electrical inspection:
Inspect electrical components, including wiring, connectors, switches, and relays, for signs of corrosion, damage, or wear. Use a multimeter to test for continuity and resistance where applicable.
Compare with specifications:
Consult your car’s service manual or repair guide to compare the condition of parts with the manufacturer’s specifications. This will help you determine if the parts are within acceptable tolerances or if they require replacement or repair.
D. Creating a List of Parts to Be Replaced or Restored
Replacement parts:
Based on your inspection, compile a list of parts that need to be replaced due to damage, wear, or inability to meet specifications. This list will help you plan your budget and parts acquisition strategy.
Restorable parts:
Identify parts that can be restored, such as those with minor damage or wear that can be repaired, cleaned, or reconditioned. This may include components like the carburetor, alternator, or upholstery.
Upgrades and modifications:
Consider any upgrades or modifications you plan to make to the car, such as installing a more modern engine or upgrading the suspension. Add these to your list, and research the parts and costs associated with these changes.
Organize and prioritize:
Organize your list by the order of importance or the order in which the parts will be needed during the restoration process. Prioritize acquiring parts that are essential for progress or those that have long lead times.
Bodywork and Paint
A. Rust Removal and Repair
Chemical rust removal:
Choose a rust remover:
Select a chemical rust remover, such as a phosphoric acid-based product or a rust converter, based on the severity of the rust and the part’s material.
Prepare the part:
Clean the part thoroughly, removing any dirt, grease, or loose rust flakes.
Apply rust remover:
Follow the manufacturer’s instructions for applying the rust remover to the affected areas, typically using a brush or spray.
Allow the rust remover to work:
Let the rust remover penetrate and react with the rust as specified by the product’s instructions.
Rinse and dry:
Thoroughly rinse the part with water, then dry it completely to prevent the formation of new rust.
Mechanical rust removal:
Choose a method:
Select a mechanical rust removal method, such as sanding, wire brushing, or abrasive blasting, depending on the extent of the rust and the part’s material.
Use appropriate tools:
Use the appropriate tool for the chosen method, such as sandpaper or a wire brush attachment for a drill or angle grinder.
Work gently:
Remove the rust carefully, avoiding excessive pressure that may cause damage to the underlying metal.
Clean the part:
Once the rust is removed, clean the part to remove any residual rust particles or debris.
B. Dent Repair
Assess the dent:
Examine the dent to determine its depth, size, and location. This will help you choose the best method for repairing it.
Choose a repair method:
Select a dent repair method, such as paintless dent repair (PDR), body filler application, or panel replacement, based on the dent’s characteristics.
Paintless dent repair:
For minor dents, use specialized PDR tools to gently push or pull the dent out from the backside of the panel, gradually restoring its original shape.
Body filler application:
For larger dents or those that cannot be accessed from the back, apply body filler to the dent, shaping and sanding it until the panel’s surface is smooth and even.
Panel replacement:
For extensive damage or when a repair is not feasible, replace the entire panel with a new or used one.
C. Prepping the Surface for Paint
Sanding:
Remove old paint:
Using a dual-action (DA) sander or sandpaper, remove the old paint from the body panels, exposing the bare metal.
Repair imperfections:
Address any remaining dents, scratches, or other imperfections by applying body filler and sanding it smooth.
Feather edge:
Sand the edges of repaired areas to create a smooth transition between the filler and the surrounding metal.
Progress through sandpaper grits:
Start with coarse-grit sandpaper (e.g., 80-grit) and progress to finer grits (e.g., 320-grit) to achieve a smooth, even surface.
Priming:
Clean the surface:
Wipe down the entire surface of the car with a wax and grease remover to ensure it is free of contaminants.
Mask off areas:
Mask off any areas that will not be painted, such as windows, trim, and chrome.
Apply primer:
Apply a high-build primer to the entire surface, following the manufacturer’s recommendations for mixing, application, and drying times.
Wet sand:
Wet sand the primer using progressively finer grits of sandpaper (e.g., 400- to 600-grit) to achieve a smooth, even surface ready for paint.
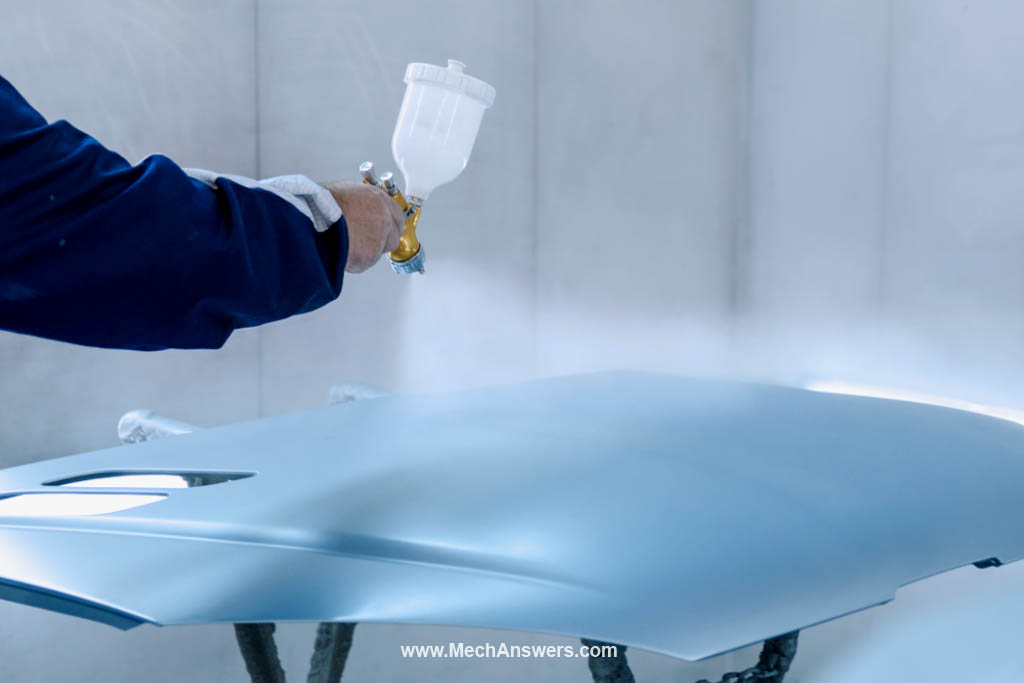
D. Painting
Selecting paint type:
Research paint options:
Research the various types of automotive paint available, such as acrylic enamel, urethane, or waterborne paints, and consider factors like durability, finish quality, and ease of application.
Match original color (optional):
If you want to match the original color of your car, find the factory paint code, usually located on a sticker or metal tag on the car’s body or in the owner’s manual.
Consult professionals:
Consult with experienced painters or your local paint supplier to determine the most appropriate paint type for your project.
Spraying techniques:
Practice:
Before painting your car, practice your spraying technique on scrap metal or a spare body panel to gain confidence and refine your skills.
Set up a paint booth:
Create a well-ventilated, dust-free environment for painting, either by setting up a paint booth or using a garage or workshop with proper ventilation and dust control measures.
Mix paint:
Follow the manufacturer’s instructions for mixing the paint, including the correct ratio of paint, reducer, and hardener (if required).
Apply paint:
Using a spray gun, apply the paint in even, overlapping passes, maintaining a consistent distance and speed. Apply multiple coats, allowing each coat to flash (partially dry) before applying the next.
Buffing and polishing:
Wet sand:
After the paint has fully cured, wet sand the surface with progressively finer grits of sandpaper (e.g., 1000- to 3000-grit) to remove any imperfections and achieve a smooth, even finish.
Compound:
Use a polishing compound and a dual-action (DA) polisher or rotary buffer to remove any remaining sanding marks and restore the paint’s gloss.
Polish:
Apply a fine polishing compound and use a DA polisher or rotary buffer to further refine the paint’s finish and achieve a high gloss.
Wax:
Finish the process by applying high-quality car wax to protect the paint and enhance its shine.
E. Re-chroming and Polishing Metal Components
Assess the condition:
Inspect chrome and metal parts for damage, corrosion, or wear to determine if they can be restored or need to be replaced.
Choose a re-chroming method:
For parts that can be restored, decide between DIY re-chroming kits or professional re-chroming services based on the complexity of the part and your skill level.
Prepare the parts:
If re-chroming yourself, clean the parts thoroughly, remove any rust, dirt, or old chrome, and sand them smooth.
Re-chrome the parts:
Follow the instructions provided with the DIY re-chroming kit, or send the parts to a professional re-chroming service to restore the chrome finish.
Polishing:
For non-chrome metal components, use metal polish and a polishing tool, such as a buffing wheel or polishing pad, to restore the shine and luster of the metal surfaces.
Reinstall:
Once the parts have been re-chromed or polished, reinstall them on the car, ensuring they are properly secured and aligned.
Engine and Drivetrain Restoration
A. Engine Disassembly and Inspection
Prepare the workspace:
Set up a clean, organized workspace with ample lighting and room to work on the engine.
Label and document:
As you disassemble the engine, label each part and take photos or videos to help with reassembly.
Drain fluids:
Before disassembling, drain all fluids, such as oil and coolant, from the engine.
Disassemble the engine:
Carefully remove the engine components in the correct order, following the manufacturer’s guidelines or a reputable repair manual.
Inspect components:
Thoroughly inspect each component for wear, damage, or fatigue, paying special attention to critical parts like pistons, rings, bearings, and the crankshaft.
B. Cleaning and Degreasing
Choose a cleaning method:
Select an appropriate cleaning method for the engine components, such as a parts washer, ultrasonic cleaner, or chemical degreaser.
Degrease the parts:
Thoroughly clean and degrease each component, removing dirt, grease, and grime.
Dry the parts:
After cleaning, dry the components thoroughly to prevent corrosion or contamination.
C. Rebuilding the Engine
Machining and parts replacement:
Machine shop services:
Consult a machine shop to perform any necessary machining services, such as resurfacing cylinder heads, honing cylinder walls, or grinding crankshafts.
Acquire replacement parts:
Purchase any necessary replacement parts, including bearings, gaskets, seals, pistons, and rings, based on your inspection findings.
Verify part compatibility:
Ensure that all replacement parts are compatible with your specific engine model and meet the manufacturer’s specifications.
Assembly and testing:
Assemble the engine:
Reassemble the engine in the correct order, following the manufacturer’s guidelines or a reputable repair manual. Ensure all components are properly torqued and aligned.
Lubricate moving parts:
Apply assembly lube to critical moving parts, such as camshafts, bearings, and lifters, to protect them during the initial start-up.
Test the engine:
Perform a series of tests, such as a compression test, leak-down test, and oil pressure test, to ensure the engine is operating correctly and within specifications.
D. Transmission and Differential Restoration
Disassemble and inspect:
Disassemble the transmission and differential, carefully inspecting each component for wear, damage, or fatigue.
Clean and degrease:
Thoroughly clean and degrease all components, removing dirt, grease, and contaminants.
Replace or repair parts:
Replace or repair any worn or damaged components, such as gears, bearings, seals, or synchronizers.
Reassemble and test:
Reassemble the transmission and differential, ensuring all components are properly torqued and aligned. Test for proper operation and address any issues.
E. Suspension, Brakes, and Steering System Restoration
Inspect components:
Inspect the suspension, brakes, and steering system components for wear, damage, or fatigue, paying special attention to critical parts like ball joints, bushings, brake pads, and calipers.
Replace or repair parts:
Replace or repair any worn or damaged components, such as shock absorbers, springs, brake lines, or tie rods.
Clean and lubricate:
Clean and lubricate all moving parts to ensure smooth operation and prevent corrosion.
Reassemble and test:
Reassemble the suspension, brakes, and steering system, ensuring all components are properly torqued and aligned. Test for proper operation and address any issues.
Electrical System Restoration
A. Inspecting and Testing Electrical Components
Perform a visual inspection:
Examine the wiring harness, connectors, fuses, switches, and other electrical components for damage, wear, or corrosion.
Test electrical components:
Use a multimeter to test components such as relays, switches, and sensors for proper function and continuity. Check for proper voltage and resistance where applicable.
Document issues:
Note any malfunctioning or damaged components that need to be repaired or replaced.
B. Rewiring the Car
Choose a wiring kit:
Select an appropriate wiring kit or harness for your specific make and model, ensuring it includes all necessary connectors, terminals, and wiring.
Remove old wiring:
Carefully remove the old wiring harness, taking note of how it was routed through the car and connected to various components.
Install the new wiring harness:
Route the new wiring harness through the car, following the original routing path and securing it with clips, ties, or other fasteners as needed.
Connect components:
Attach the new wiring harness to all relevant electrical components, ensuring secure and proper connections.
Test the system:
Once the rewiring is complete, test all electrical systems, such as lights, gauges, and accessories, to ensure they are functioning correctly.
C. Upgrading to Modern Electrical Systems (optional)
Assess your needs:
Determine which modern electrical upgrades you want to incorporate into your restoration, such as LED lighting, electronic ignition, or modern audio systems.
Research compatible upgrades:
Research available upgrades that are compatible with your specific make and model, ensuring they can be integrated without major modifications.
Acquire necessary components:
Purchase the desired upgrade components from reputable suppliers, ensuring they come with the necessary wiring, connectors, and instructions for installation.
Install upgrades:
Carefully install the modern electrical upgrades according to the manufacturer’s instructions, integrating them with the existing electrical system as required.
Test the upgrades:
Test the newly installed upgrades to ensure they are functioning correctly and do not interfere with the operation of other electrical systems.
Interior Restoration
A. Upholstery and Seat Restoration
Assess the condition:
Inspect the upholstery and seats for damage, wear, or fading to determine if they can be restored or need to be replaced.
Repair or replace upholstery:
Repair any minor damage, such as small tears or stains, or replace the upholstery with new material that matches the original design and color.
Rebuild or replace seat components:
Repair or replace any damaged seat components, such as seat frames, springs, or padding, ensuring proper fit and comfort.
B. Dashboard and Instrument Panel Restoration
Disassemble and inspect:
Remove the dashboard and instrument panel, and carefully inspect each component for damage or wear.
Repair or replace components:
Repair any damaged components, such as cracked or faded dashboard surfaces, or replace them with new or refurbished parts.
Restore or replace gauges:
Clean and restore gauges to their original appearance, or replace them with new or refurbished units that match the original design.
Reassemble and reinstall:
Reassemble the dashboard and instrument panel, ensuring all components are properly connected and securely fastened.
C. Carpet and Headliner Replacement
Remove old carpet and headliner:
Carefully remove the old carpet and headliner, taking note of how they were installed and secured.
Acquire replacement materials:
Purchase replacement carpet and headliner materials that match the original design and color.
Install new carpet:
Cut and fit the new carpet, ensuring proper coverage and alignment with the car’s interior. Secure the carpet using appropriate fasteners, adhesives, or clips.
Install new headliner:
Cut and fit the new headliner, ensuring it conforms to the car’s roof contours and is secured using appropriate fasteners or adhesive.
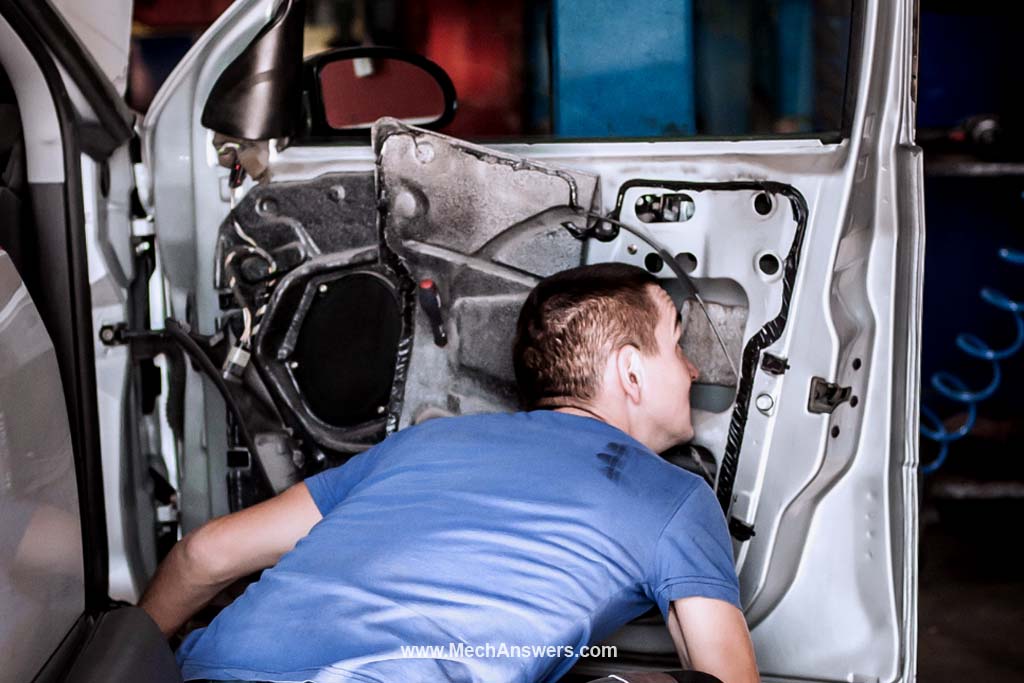
D. Door Panel and Trim Restoration
Remove and inspect:
Remove the door panels and interior trim pieces, and carefully inspect each component for damage or wear.
Repair or replace components:
Repair any damaged components, such as cracked or faded trim pieces, or replace them with new or refurbished parts.
Reinstall door panels and trim:
Reinstall the door panels and interior trim, ensuring all components are properly aligned and securely fastened.
Reassembly and Final Touches
A. Reinstalling the Drivetrain
Engine and transmission:
Carefully reinstall the restored engine and transmission into the car, ensuring they are properly aligned and securely fastened.
Exhaust and cooling systems:
Reinstall the exhaust and cooling systems, connecting all components and ensuring proper fit and function.
B. Reattaching the Body Panels
Align body panels:
Carefully reinstall the body panels, ensuring proper alignment and fit with adjacent panels and the car’s frame.
Secure panels:
Secure the body panels using appropriate fasteners, clips, or adhesive, ensuring they are tightly fastened and free of any gaps or misalignments.
C. Reinstalling the Interior Components
Install seats:
Reinstall the restored seats, ensuring they are securely fastened and properly aligned.
Reinstall dashboard and instrument panel:
Reinstall the restored dashboard and instrument panel, ensuring all components are properly connected and securely fastened.
Reinstall door panels and trim:
Reinstall the restored door panels and interior trim, ensuring all components are properly aligned and securely fastened.
D. Aligning and Adjusting Components for Proper Fit
Adjust body panels:
Fine-tune the alignment and fit of body panels, making any necessary adjustments to ensure even gaps and proper alignment.
Adjust doors, hood, and trunk:
Adjust the fit of doors, hood, and trunk, ensuring they open and close smoothly and have even gaps around their edges.
E. Testing Systems and Addressing Any Issues
Inspect fluid levels:
Check and fill all fluid levels, including engine oil, coolant, brake fluid, and power steering fluid, ensuring they are at the proper levels.
Test electrical systems:
Verify that all electrical systems, such as lights, gauges, and accessories, are functioning correctly and without any issues.
Test engine and drivetrain:
Start the engine and verify that it runs smoothly, without any unusual noises or vibrations. Test the transmission and drivetrain for proper operation, addressing any issues that arise.
Test suspension, brakes, and steering:
Inspect the suspension, brakes, and steering systems for proper operation, ensuring a smooth ride and responsive handling.
Road tests the car:
Perform a thorough road test to identify and address any remaining issues, ensuring the car operates as intended and is safe to drive.
Tips for Success
A. Seeking Help from Experienced Restorers
Reach out to local experts:
Connect with experienced restorers in your area who can provide valuable advice, assistance, or recommendations for your project.
Online forums and communities:
Participate in online forums and communities dedicated to car restoration, where you can ask questions, share experiences, and learn from others.
Hire professional help when needed:
If you encounter a particularly challenging aspect of the restoration, consider hiring a professional to help you overcome the obstacle and ensure a quality result.
B. Joining Car Clubs and Attending Car Shows
Find local car clubs:
Research and join local car clubs related to your specific make and model or classic cars, in general, to connect with other enthusiasts and learn from their experiences.
Attend car shows and events:
Visit car shows and events to meet fellow restorers, view restored cars, and gain inspiration for your project.
Network and build relationships:
Develop relationships with fellow enthusiasts, vendors, and professionals within the car restoration community to gain valuable connections and resources.
C. Staying Organized and Documenting Progress
Create a project log:
Maintain a detailed log of your restoration progress, including notes, photos, and any relevant documentation.
Organize and label parts:
Keep all removed parts organized and labeled to ensure easy reassembly and prevent confusion.
Track expenses and budget:
Monitor your spending and maintain a budget to ensure you stay on track financially throughout the restoration process.
D. Practicing Patience and Perseverance
Set realistic expectations:
Understand that car restoration is a time-consuming process, and be prepared for setbacks and challenges along the way.
Break the project into manageable tasks:
Divide the restoration process into smaller tasks that can be completed one at a time to help maintain motivation and a sense of progress.
Celebrate milestones:
Take time to celebrate major milestones in the restoration process, such as completing the bodywork or rebuilding the engine, to keep yourself motivated.
Stay committed:
Recognize that the process of restoring a classic car is a labor of love and requires dedication, patience, and perseverance to achieve a successful outcome.
CAN YOU RESTORE CLASSIC CARS WITH NO EXPERIENCE? >> Check out the video below:
Read more >> Restoring a Vintage Car – A Detailed Step-By-Step Guide
Read more >> Car Restoration Checklist: A Detailed Step-by-Step Guide
Read more >> Is It Worth Restoring an Old Car? A Comprehensive Analysis
Read more >> Classic Car Restoration Checklist: Your Detailed Blueprint!
Read more >> Is Restoring Cars Profitable? How To Restore for Profit!
Conclusion
Restoring a car with no experience may seem like an overwhelming task, but with the right guidance, it can be a rewarding experience.
With Beginner’s detailed guide, you now have a comprehensive resource to help you bring a vintage car back to life. Remember, the key to success is taking your time and following each step carefully.
Restoring a car requires patience, perseverance, and passion. However, the sense of accomplishment you’ll feel when you finally finish the project is worth all the effort.
We hope that this guide has inspired you to take on the challenge of restoring a car, and we wish you the best of luck on your journey. Happy restoring!